
When you’re assembling a home lab, there are a myriad of operating systems to choose from, ranging from Proxmox to Hyper-V. But if you’re fond of traversing through the expansive recesses of the Internet, you may come across some truly unique platforms. Harvester is one such operating system that's typically designed for home servers and large-scale operations rather than consumer-tier experimentation rigs.
So, I took it upon myself to try building a home lab centered around Harvester, and here’s a report of my observations and findings after tinkering with this hardcore server OS for a few days.
5 reasons why Proxmox is the be-all-and-end-all home lab OS
There's nothing quite like Proxmox for home server enthusiasts and DIY tinkerers
Harvester has higher minimum requirements than modern triple-A games
At least in the CPU, memory, network, and storage departments
Most home lab operating systems, be it the all-popular Proxmox, Xen-based XCP-ng, or the Unix-powered SmartOS, tend to consume fairly low resources. Heck, even the Hyper-V Server 2019 version of Microsoft’s hypervisor lists 4GB of memory as the minimum requirement. So, you can imagine my surprise when I saw that the platform considers an 8-core x86 CPU, 200GB storage, and 32GB memory as the bare minimum for a testing environment.
If you’re planning to run Harvester inside a production environment, you’ll need 16 cores, 500GB storage, and 64GB RAM on your host machine for this OS. Even the networking provisions are just as high as the other requirements. While you can make do with a 1 Gigabit connection, you’ll need a 10GbE network to hit the minimum criteria of a production-tier Harvester setup.
Speaking of production setups, Harvester is meant to be a Hyper-Converged Infrastructure (HCI) for enterprise-grade projects. While it sounds like a highly technical word, an HCI is essentially a platform that includes everything from storage and network to virtual guest management tools inside a single UI… which makes it somewhat similar to Proxmox, Hyper-V, or a couple of other virtualization environments.
However, Harvester has a couple of notable differences from its rivals. For starters, the OS is built on top of Kubernetes and leverages certain K8s add-ons such as Longhorn and KubeVirt to grant additional functionalities to your home lab. As someone who’s had a love-hate relationship with Kubernetes ever since I set it up on my old PC, I was excited to see the OS in action.
Installing Harvester on my home lab
And testing the OS with a few VMs
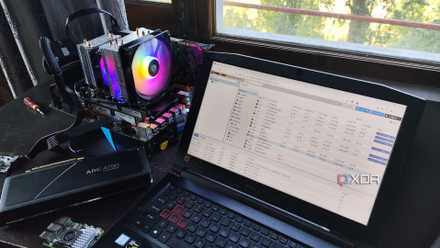
Given the sky-high requirements of Harvester, I decided to whip out my dual-Xeon workstation for this project. As is customary for any bare-metal installation, I flashed the ISO file of Harvester on a flash drive using Balena Etcher and modified the boot order inside the BIOS. The installation wizard is fairly easy to navigate, and most settings are fairly self-explanatory. However, it's worth noting that Harvester requires you to configure two IP addresses during the installation: one for the individual node and another for the cluster.
Once the installation was complete, the Harvester UI popped up on the screen, but I had to wait another five minutes for the Harvester Cluster and Node status to switch from Unavailable to Ready. Accessing the web UI is just as simple, and I was inside the Harvester Dashboard after setting up a password for the node. And let me tell you, Harvester has the cleanest and most organized UI out of every home server OS I’ve used so far.
After uploading some ISO files to Harvester, I used them to spin up a handful of VMs. Since the platform uses KVM, performance was as solid as you’d expect. That said, you’ll have to switch the boot order once you install an operating system to a virtual disk. Otherwise, Harvester keeps booting the device using the ISO file – and that’s something I learned the hard way.
After messing around with the settings, I enabled the monitoring and logging facility, which automatically created Prometheus and Grafana instances to gather the metrics of my virtual machines. Just as I was about to wrap up my tests, I chanced upon the PCI devices setting. So, I attempted to pass my GTX 1080 to a Debian VM, and to my surprise, the virtual machine detected the GPU once I ran the sudo lspci -v | less command in the terminal. With that, it was time to pull the curtain down on this project and assess the utility of Harvester.
Harvester is a great server OS – assuming your hardware can run it
Having tested OmniOS and XCP-ng in the past, I was afraid that I might have to spend some time setting up Harvester on my server PC. However, I was pleasantly surprised by how easy it is to configure the OS. Likewise, the simplicity in passing PCI devices – especially GPUs – was another aspect I loved about Harvester. I’ll probably revisit it soon to test the GPU passthrough provisions of the OS.
All-in-all, I’m really impressed with Harvester and would recommend it to any home lab enthusiast who needs a high-end platform for their virtualization projects. That is, if you’ve got the hardware to run this behemoth OS!