
I’m a fan of impulse-buying new hardware for my home lab as much as the next tinkerer. However, one of the most appealing aspects of home labs is their ability to accommodate any sort of hardware – be it an enterprise-grade rig or a budget-friendly Single-Board Computer. Heck, I began my journey into the wild world of servers and self-hosting with a nearly 10-year-old PC, which remains an important experimentation node to this day.
But aside from PCs, NAS, and SBCs, even old laptops are fair game for server-related tasks. While clearing out my rat’s nest of an apartment last week, I managed to find my old Acer Predator Helios 300 buried under a wreckage of wires. Considering it’s a laptop from 2017, it’s pretty much out of commission for modern gaming. So, I figured I could put it to good use in my home lab. Fast-forward an entire evening of troubleshooting, and I finally managed to transform the old relic into a modest self-hosting system that also doubles as a reliable troubleshooting machine when things go wrong.
Don't just revive your old laptop, turn it into a home server
General-purpose Linux distros aren't the only way to resurrect your outdated computing companion
Choosing the OS was difficult
I didn't want to use a virtualization platform
With all the virtualization platforms and container-hosting tools I’ve tinkered with in the past, I had a never-ending list of distros I could arm the laptop with. Containers, for one, can run on even the most dinosaur rigs – and that’s something I learned after turning a cheap laptop from 2014 into an LXC-hosting system earlier this year. Proxmox was the first name that popped into my head, but I shelved that idea for a few reasons.
I’ve already got five bare-metal Proxmox workstations running my home lab, with two more nodes operating in nested setups (yeah, I like to work with crazy projects). PVE would’ve undoubtedly been useful for the laptop, but I wanted to try something different. Plus, I was planning to use my laptop as a troubleshooting hub – one that lets me access Linux tools directly, so I won’t have to make do with my Windows 11 PC or MacBook.
This self-imposed restriction removed practically every containerization and virtualization platform from the equation. A minimal Linux distribution sounded like a good idea, and considering that DietPi works exceedingly well with SBCs of all shapes and sizes, I figured it would be the perfect option for my self-hosting/troubleshooting hybrid. Unfortunately, it took me four hours to realize I’d made a terrible decision…
For some reason, DietPi refused to run on the laptop
Unlike my experimental PC, I’ve only run Windows 10 on this laptop, so there were a couple of settings that stopped me from booting into DietPi. Since a USB drive flashed with DietPi’s installer image into the laptop wouldn’t even show up in the BIOS, I had to disable Secure Boot. But to unlock the ability to tweak the setting, I had to create a Secure Password. With the new credentials created, I turned Secure Boot off and switched to Legacy BIOS.
At first, the installer booted just fine, and I was able to select my 500GB SSD as the target volume. However, the installer failed the first time, forcing me to restart and switch to the 1TB secondary hard drive. Unfortunately, the partition error codes were still visible even after the change, and they didn’t show any signs of leaving the screen even after I left the Helios 300 untouched for half an hour.
Switching to the UEFI version of the installer didn’t fix anything, leaving me with the PXE route, which ran into the Directory for this image not found error right off the bat. The solution turned out to be as dumb as using the live installer on my makeshift USB drive. Once the installation process was finished, DietPi worked well for ten minutes before refusing to connect to the Internet. After exhausting all the troubleshooting tips my computing career has taught me, I gave up and decided to look into another distribution.
In the end, I went with good ol’ Debian
Since the old laptop was clearly running into some kind of compatibility issues, I decided to go for something that universally supports most hardware – and there’s no other OS that fits this description better than the king of vanilla Linux distros: Debian. I could’ve gone with a CLI version to save some resources, but considering the Intel i7-7700HQ processor and 16GB of RAM inside the laptop, I knew it could handle the likes of a GUI environment. And, well, I wasn’t too keen on diagnosing even more problems using mere terminal commands on the very device I wanted to turn into a troubleshooting box.
So, I flashed my USB drive yet again with Debian, and braced myself for another hour of trial-and-error. To my surprise, Debian booted right away, and heaved a sigh of relief after seeing the KDE Plasma logo. I selected my SSD (the one inside the laptop, not the makeshift external drive) as the boot drive, created an account, and waited a couple of minutes for the installer to work its magic. Soon, Debian was configured on the Helios 300, and with one last restart, it was time to deploy some containers.
Docker lets me self-host useful containers
I’ve already moved half of my monitoring containers to this laptop
I consider myself a member of the Podman faction, but there are cases where I prefer the simplicity of Docker instead – and this is one of those times. Sure, Podman Quadlets can help me spin up containers using config files, but I’ve previously had issues where they couldn’t run recently-converted Docker Compose documents even after putting them through the Podlets utility.
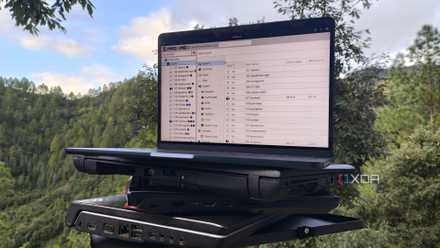
Once I’d installed Docker on the laptop, I began spinning up my favorite home lab tools. Pulse, being the primary monitoring tool for my Proxmox servers, was the first container to go online, followed by Beszel, which I use to keep an eye on non-PVE nodes. I also created a Homepage container and copied config files from an older instance running on my Raspberry Pi. I also use Watchtower in my setup, so I created the same docker-compose.yml file as the one running inside a PVE-based virtual machine to deploy it with the same configuration. I also copied the directories of Gotify, Trillium Notes, and a handful of other containers before redeploying them on the laptop.
It also doubles as an all-in-one troubleshooting machine
It’s armed to the teeth with diagnostics tools
Remember how I wanted my old laptop to function as a portable troubleshooting machine to treat any mishaps in my home lab? One of my main reasons for going with the KDE version of Debian was that the GUI environment would let me access the containers directly from the laptop. Since I wanted to host all my essential home lab containers on it, I won’t have to switch to a different PC if anything happens to my documentation-cum-monitoring suite.
Aside from the containers, I also armed the laptop with Gparted. That way, I could use SATA-to-HDD adapters (and the empty 2.5-inch HDD tray) with Gparted to troubleshoot any failing storage drives. On the networking side, I configured Zenmap for its simple host identification and port scanning facilities. Meanwhile, Wireshark would help me get real-time analysis of my network traffic, while Aircrack-ng would be responsible for conducting tests on my WLAN connections. Finally, I added Tailscale to the laptop and paired it with my tailnet, so I could access my remote NAS and SBCs even when I'm hundreds of miles away.