
When it comes to making office work more efficient, setting up a local network is the classic way to go. For the case of a home network, a peer-to-peer (P2P) network works best. In this guide, we will discuss exactly how to set up a network between two computers, and share files.
What’s the use of a home network?
If you’re new to the world of tech, then let me clue you in a bit. A P2P home network will allow you to seamlessly share files between two or more computers, with each computer acting as both a client and a server. This means that there is no single storage or main server. Instead, everyone is equally privileged.
Using a home network allows you to share files, internet, and games between multiple locally connected computers with nearly non-existent ping, and remotely access printers, cameras, and other devices.
There are two ways to create a home network. You can either set up a wired or a wireless network. This largely depends on what you prioritize more.
Wired network
👁 TP-Link Archer BE800 wired connectivity close
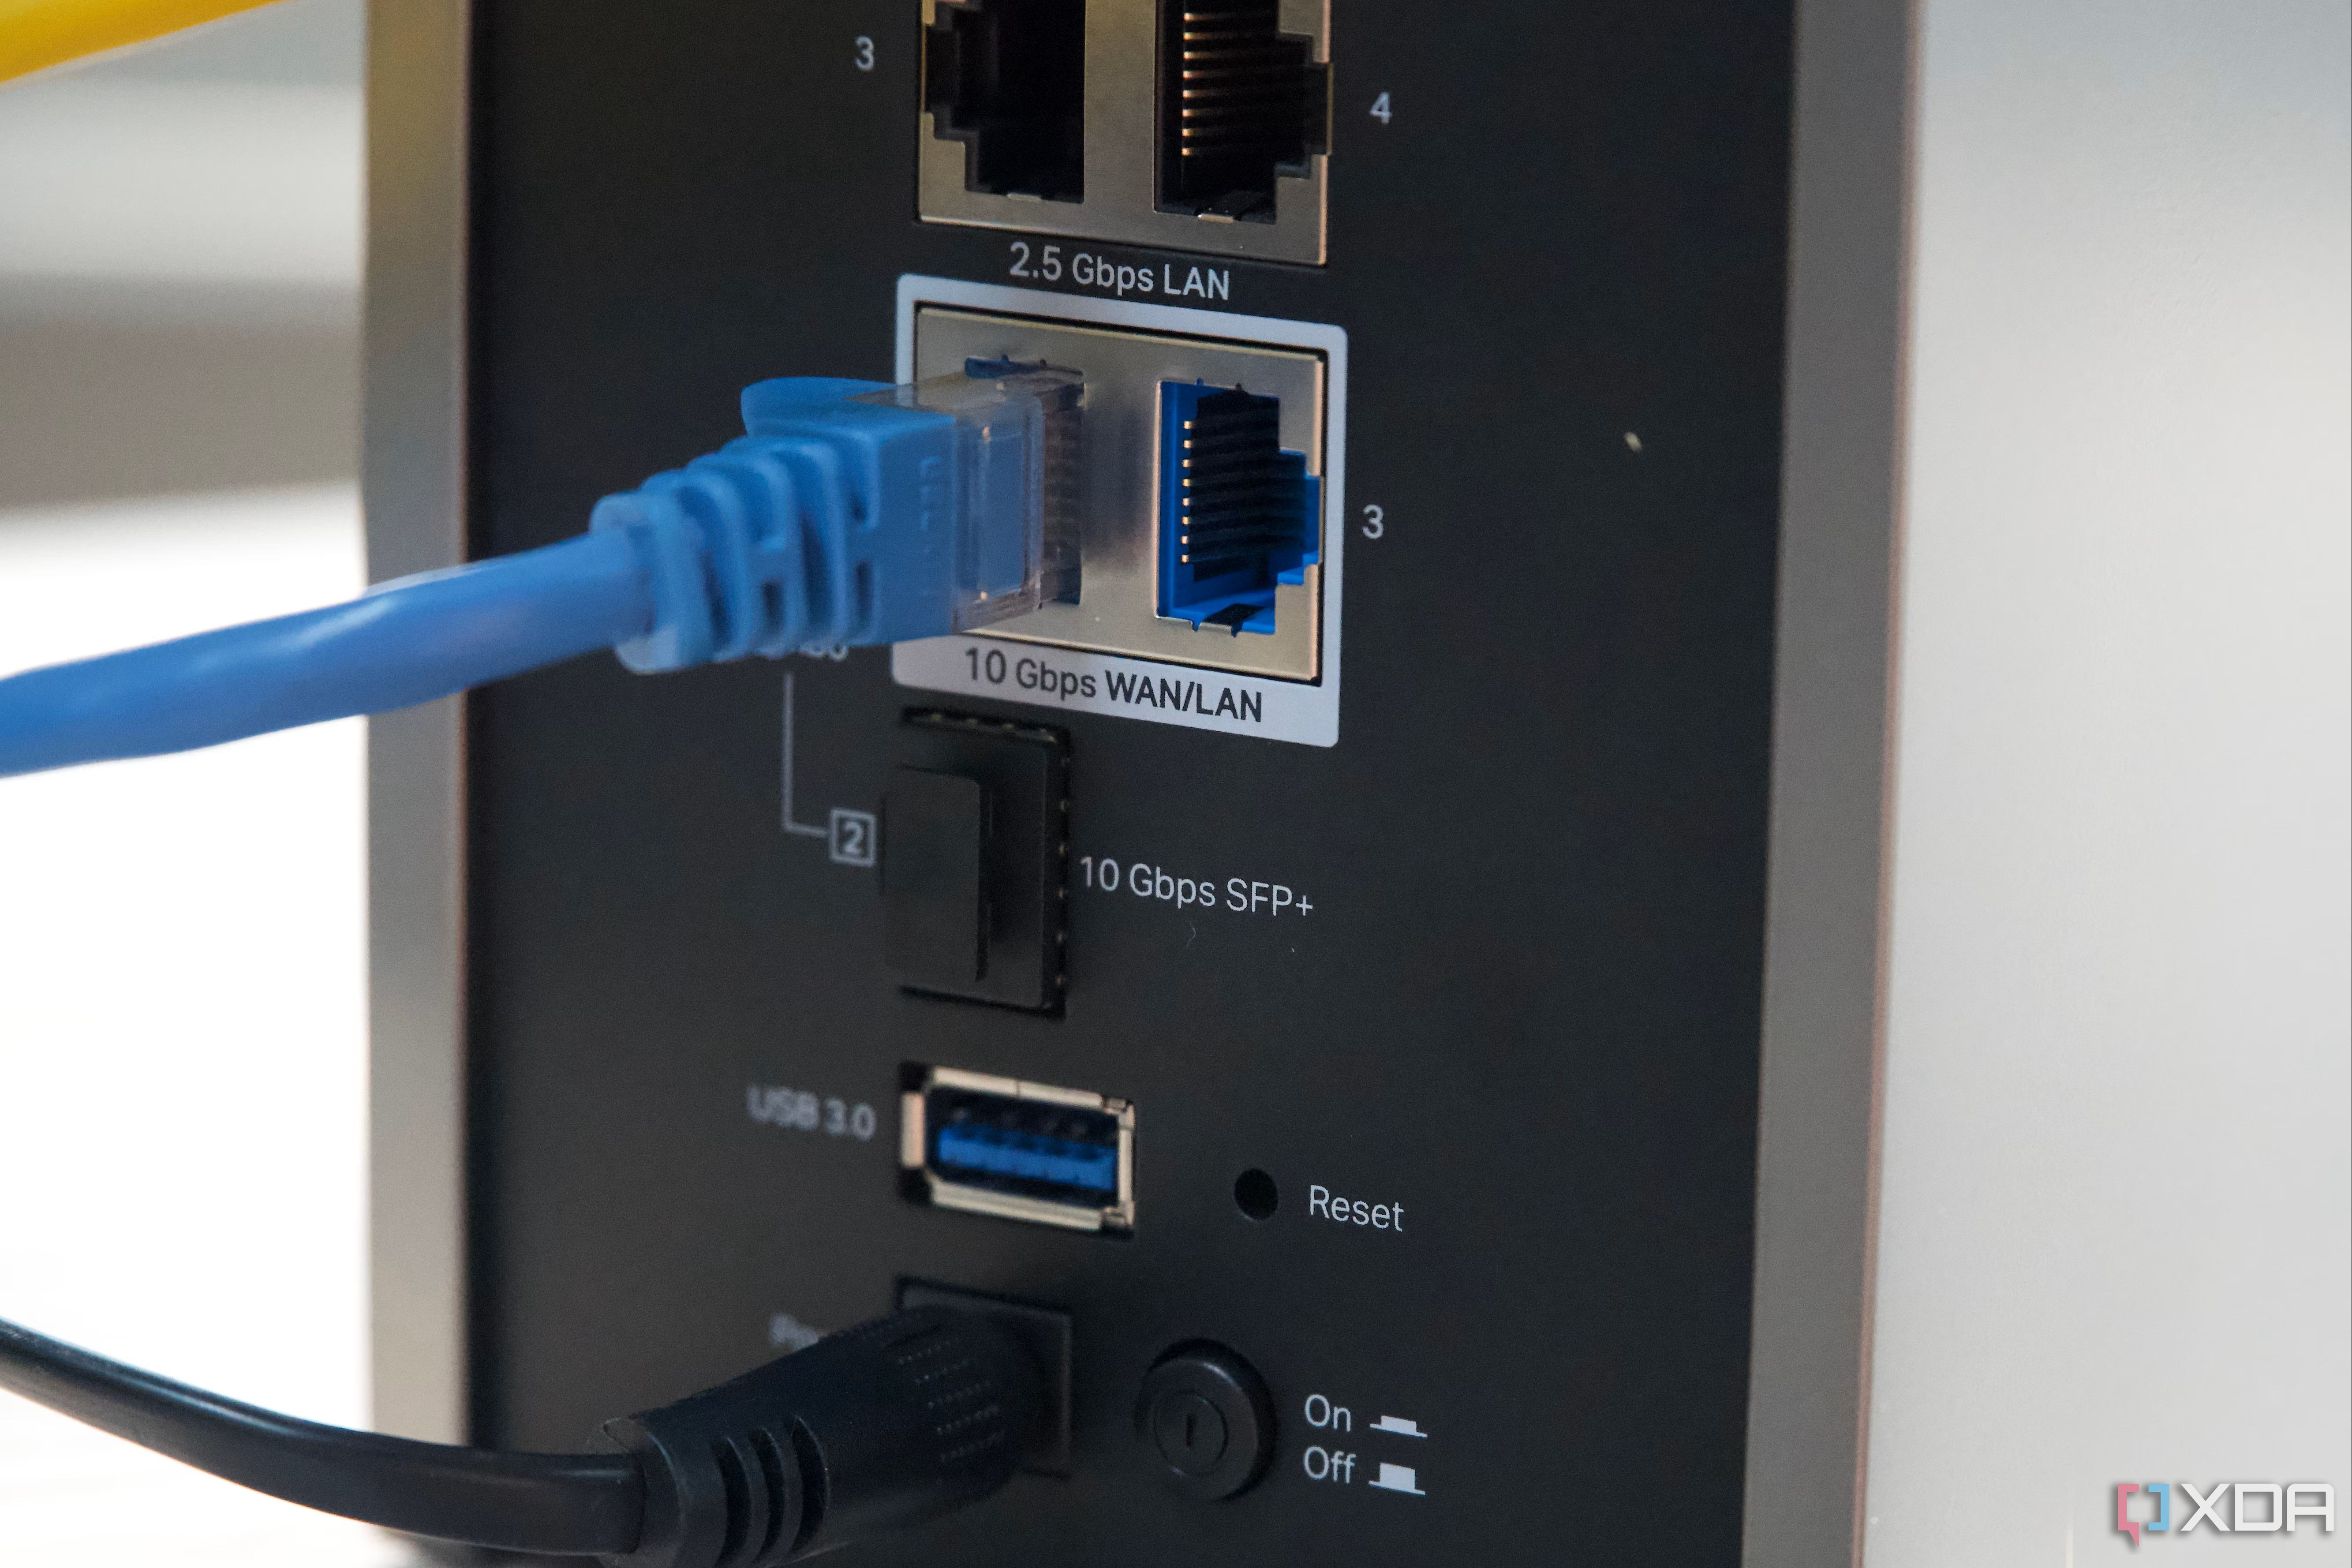
In case you’re going for a wired network, you will have to go with an Ethernet cable.
There are a handful of these, such as the Cat5e and Cat6, with the latter capable of 10 Gbps at around 100 meters. There is even a Cat7 but it is overkill for your home network.
With a wired network, you will see a clear difference in speed compared to wireless options. However, a wired network is also safer. A hacker can only intercept your data physically so you won’t have to worry about security.
However, if you’re using a wired network, you will not be able to connect devices that do not support Ethernet. So this automatically removes mobile phones, iPads, and Kindles from the scenario. But even then, you can use a central router for this with PCs connected to it via LAN cable and other wireless devices connected via the Wi-Fi, and easily share data among them.
Wireless network
If you’re looking to make a home network that does not create wiring issues and can connect a larger range of devices to the network, then wireless is the way to go.
A wireless network is much easier to set up, is cheaper, and also bypasses the need to create a clutter of wires. Plus, you can easily increase the range of a wireless network by simply installing a wireless repeater at the cost of some speed and bandwidth.
The main drawback is that you’ll be compromising on speed and security.
How to set up a home network
Setting up a home network can be done with as little as two computers. We will call these PC A and PC B, respectively. To start off, we will first take an Ethernet cable and connect both computers to each other using it, or you can connect the PCs to your router.
If you cannot find the Ethernet port on your computer, then it may not support one. In this case, you will need to get an Ethernet adapter.
Once you’ve connected both systems together, we can start creating the home network. Let’s take PC A first.
- Open Control Panel. You can press “Windows + R” to open cmd, type “Control Panel”, and press enter.
- Now, type Network and Sharing Center on the search bar at the top right corner of the control panel.
- Select Change Advanced Sharing Settings. You can find this in the upper left corner of the window.
- Enable File And Printer Sharing and Network Sharing under private and public networks.
- Now, repeat this for PC B.
How to set up a Wi-Fi network for a router
You don't need this step if you have a wireless router already set up at home.
Unlike in the case of wired networks where you need an ethernet cable, for a wireless one, you will need a router. Most often your ISP will provide you with a router that can be used for this.
In case you don’t have a router and want to connect multiple devices by ethernet or using Wi-Fi, you will first have to purchase a router. You can then either connect the router directly to the internet modem using an ethernet cable or set it up locally as shown in the steps below.
- Enter the router’s IP address in your browser. You will find your router’s address in the instructions or on the router’s underside. These are usually similar to the “192.168.0.1” format.
- Then, sign in to the router. Your router will also come with instructions and details about the credentials. Most often these are simply “admin” and “password” themselves.
- Once your router’s web page loads, go into the Wireless section and choose your desired unique network name (SSID), encryption type, and password for safety.
- Now connect both computers to this wireless network. It should be shown in Wi-Fi connections.
How to access and share files in a local network
Whether you opted for a wired connection, or a wireless one, once you’ve set up a network, all you need to do is share and access files. So let’s see how we can do that.
To share a folder with other users on the network, follow the steps below.
- Right-click on the folder you want to share and select properties.
- Select Sharing.
- Select Share.
- You can choose who can access this folder. For this case, select Everyone and click Add, then save the changes.
- Now click on Advanced Sharing and enable the Share this folder option.
- To further configure who can edit or read files, you can change that by pressing the permissions button.
And that’s it. You have now successfully shared a file in the network. Anyone can access this file now, by opening the Network Folder and selecting your PC.
Taking things to the next level
Connecting two computers via a network is just the first step. You can also connect your printers, and other devices in the network. And if you’re looking to create a home office for multiple people, you might prefer shifting to a client-server network, or even go for a NAS server. It is nearly the same except one computer with massive storage acts as the server and hosts all files from a centrally controlled system.