
While I enjoy tinkering with Home Assistant to make my smart devices work, I ensure all of them are manageable locally. While axing most cloud-dependent services, the only thing I miss is voice control. Recently, I hooked up a $13 ATOM Echo speaker to Home Assistant, and it has been a game-changer for my smart home. Tumbling down the rabbit hole, I managed to build a private voice assistant that works locally.
Building a private voice assistant requires extra hardware muscle to run Home Assistant and a local LLM, making the most of it. In short, I wanted to self-host a local LLM to manage a private, local voice assistant for controlling my smart home. To get started quickly, I managed to build a private voice assistant for my smart home using a local LLM, Home Assistant, and an inexpensive smart speaker.
Setting up a local LLM to work with Home Assistant
Picking an apt generative AI model
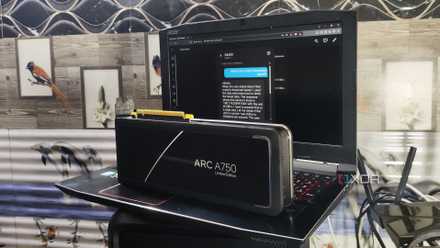
I ditched the supervised method to run Home Assistant and flashed it as the HA OS on a Raspberry Pi 4, making it a dedicated machine for that purpose. That helped since I got a mini PC (HP ProDesk 600 G6) to shoulder the self-hosting duties and ran an Ollama instance on it. While it didn’t have a dedicated GPU, I settled for using a local LLM with CPU support.
Getting Ollama to pull and run different generative AI models on a dedicated machine can be very enticing. Next, I installed the Ollama integration in Home Assistant and added conversation agents that would use these generative AI models. I also installed the Whisper add-on to handle the Speech-to-Text (STT) engine and Piper add-on to manage the Text-to-Speech (TTS) engine duties. That triggered the Wyoming Protocol integration in Home Assistant, which was also easy to set up.
When configuring generative AI models with Ollama integration, select the checkbox for Assist to enable LLM to control smart devices via Home Assistant.
Initially, I downloaded the LlaMa3 and Gemma3 models using the command line. To make them work properly with Home Assistant, I had to choose the ones that supported tool calling. So I downloaded Deepseek-R1 and Qwen3 models with tool calling support to experiment with the voice pipelines.
Raspberry Pi 4
- Storage
- MicroSD card slot
- CPU
- Arm Cortex-a72 (quad-core, 1.8GHz)
Configuring and testing the voice pipeline in Home Assistant
A lot of trial and error helps eventually
For the ATOM Echo speaker to work out of the box, I flashed the firmware from the ESPHome Ready-made Projects page. Configuring it with the ESPHome integration barely took a few minutes, and I chose “Hey Jarvis” as the wake word. I needed to test if it was working with the Voice Assist pipeline that I had planned to use. From the Voice Assistant settings, I created a new voice assistant pipeline profile that utilized faster-whisper for the Speech-to-Text engine and piper for the Text-to-Speech engine, selecting the relevant options from the respective drop-downs.
For the conversation agent, I selected the conversation agents with names representing the generative AI models from the drop-down. I assigned a name to make it easier for me to pick the correct one; otherwise, all would show up with the “Ollama Conversation” name. Of course, I had to ensure that the voice pipeline profile I used matched the one appearing in the ATOM Echo’s configuration under its ESPHome integration.
Instead of using Wyoming’s Whisper and Piper add-ons, I deployed dedicated Docker containers for each to connect them to Wyoming Protocol’s integration with IP addresses and ports. The voice assistant became quite responsive with the dedicated containers for Whisper and Piper.
Making the voice assistant work with Home Assistant
Adding automations to make things work in the background
While I might enjoy trumpeting a private voice assistant, I had to engage in a lot of configurations to make it work close to its cloud alternative. I added several automations that involved listening to sentences and triggering the smart devices. And instead of words, I started using phrases because the voice assistant would pick up a word and trigger an automation to adjust the brightness of a light in my room. For example, I managed to get a weather report by piping the weather data from Pirate Weather integration to a local LLM and fetching the response as a written summary on the Home Assistant’s dashboard alongside a spoken response.
If you have a USB microphone lying around, you can plug it directly into the machine running Home Assistant and use it as the microphone to speak instead of the ATOM Echo. For that, you’ll need to install the Assist Microphone add-on and configure your microphone as a default input. That’s what I did with my Blue Yeti USB microphone, which rests at my desk while the ATOM Echo dangles near my bed for easy access.
I use this tiny LLM to control my smart home
Integrating Ollama with Home Assistant was the best decision I ever made for my smart home
No matter how slow, my Jarvis is a work-in-progress
Asking very open-ended questions sent the local LLM into a long prompt processing loop. While it’s not a direct replacement for the cloud-powered voice assistants, the private voice assistant I built can control smart home devices. Well, occasionally it does provide long-winded answers to the trivia questions I ask. That’s something I can live with. You can also make the voice assistant use custom wake words and give its voice a personality. Check out how my colleague, Adam Conway, added GLaDOS voice to his smart home, managed by Home Assistant.
Ollama
Ollama is a platform to download and run various open-source large language models (LLM) on your local computer.
Home Assistant
- OS
- Windows, macOS, Linux
- iOS compatible
- Yes