
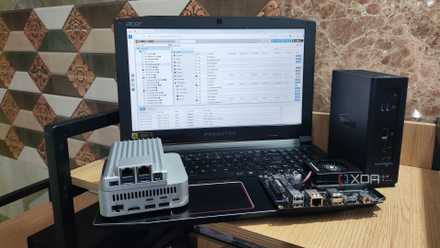
I ran Home Assistant on a Raspberry Pi 4 for over a year. Though the Pi booted from an NVMe SSD, the Pi's 4GB memory limit became difficult to ignore as I built ESPHome devices. Recently, I moved Home Assistant to a mini PC and almost shelved the Pi, since it was just sitting in the corner doing nothing.
So I set it up from scratch and gave it a network monitoring job. Along with a mini PC, the Pi 4 is an essential part of my home lab, keeping an eye on my network, whether I am home or not. Honestly, it turned out to be a far better fit than running it as a smart home hub.
5 "set it and forget it" self-hosted services that will improve your life
Transform your digital life with these low-maintenance, high-impact self-hosted solutions
Pi-hole manages DNS for my entire home network
Eliminating upstream dependency
With a headless OS on Pi, installing Pi-hole felt like an obvious move to keep trackers and malicious sites off the entire network. This one change made the browsing experience noticeably snappier on phones, tablets, smart TVs, and computers. Setting up took less than 15 minutes, but I spent a lot of time pruning the Adlists to keep only the necessary ones.
Instead of relying on Cloudflare and Google’s public DNS services, I paired Pi-hole with a local recursive DNS resolver — Unbound. That stopped my DNS queries from ever reaching any third-party providers. Unbound resolves all the DNS queries directly from its root servers. And that took the third-party DNS providers out of the picture entirely.
Offloading DNS to a dedicated, always-on machine keeps the router and mini PC focused on their workloads without sharing resources. Once configured, Pi-hole and Unbound just run without any maintenance overhead.
Pi 4 tells me what’s happening on my network
The router only shows the device list
My router only shows which devices are connected to the home network. I can’t see what those devices are doing, how much bandwidth they consume, or whether they’re phoning home. So, I installed NetAlertX and ntopng to bridge that gap.
On the Pi, ntopng runs passively to reveal the devices hogging the bandwidth, the active protocols, and whether anything looks unusual. I can now identify the sources of the bandwidth spikes that previously went unnoticed. It helped me solve the mystery of the traffic spikes at midnight – device backups.
Ntopng also revealed all the background chatter, such as ad-targeting requests, software update checks, and telemetry reports, that devices generate even when no one is using them.
NetAlertX watches devices joining the network and sends an alert when something unfamiliar appears. It flags devices that the router’s interface doesn’t show, especially those that keep joining and leaving at odd hours.
Finally, Uptime Kuma monitors all self-hosted services, including Home Assistant, Jellyfin, Immich, and the mini PC. I get an alert if any of the services or VMs on the mini PC go quiet suddenly.
Tailscale makes the entire stack reachable remotely
Installation is easy and clean
Monitoring the network and the self-hosted services stack is useful at home, but I wanted to reach that stack even when I was away, too. So I installed Tailscale on the Pi 4 rather than on a mini PC. It’s not a typical “remote access” setup for my home network. Using Tailscale, I access network monitoring dashboards directly.
I have a two-node setup with one node running Pi 4, which lets me access the NetAlertX, ntopng, Pi-hole, and Uptime Kuma dashboards to check the state of my home network from anywhere. Also, I get a notification if the mini PC goes down.
The mini PC runs another Tailscale node to let me remotely access VMs running on Proxmox. If my mini PC goes down, I can still access my network monitoring stack, especially when away from home.
The entire setup took 15 minutes without port forwarding, changing firewall rules, or tracking IP address changes. Tailscale turned out to be the right tool for reliably reaching the Pi and with minimal maintenance.
Is Tailscale the safest way to access your home network remotely?
Tailscale is easy to set up, but is that trading off your security?
Assigning a new role to the Pi 4
The Pi 4 didn’t need replacing; it just needed a better job. It isn’t the most powerful machine in the home lab, but it still draws between 3 and 5 watts to run the stack. That’s a small price to pay for services that run round the clock.
Pi 4 just needs to be on and run something reliably so that the mini PC can operate without distractions. Clean separation between the two machines makes things easier. When something breaks, it’s immediately obvious which box I need to inspect first.
Most importantly, it now always watches my entire network. It notifies me when something breaks, and I can even access it remotely. By handling everything the mini PC doesn’t need to, Pi 4 earns its place in my home lab by doing less, but better.
Raspberry Pi 4
- Storage
- MicroSD card slot
- CPU
- Arm Cortex-a72 (quad-core, 1.8GHz)
- Memory
- 1GB, 2GB, 4GB, or 8GB of LPDDR4
- Operating System
- Raspberry Pi (Official)