
Building your network-attached storage (NAS) from scratch can be exciting but there are some things to consider before repurposing an old PC. You'll want to back up all the data on the old drives before installing anything and the PC will need a going over with an internal clean, drive check, motherboard I/O analysis, and cooling tests to make sure it's fit for use. A NAS will be running 24/7, so we need to ensure the system can handle this sustained load without failing.
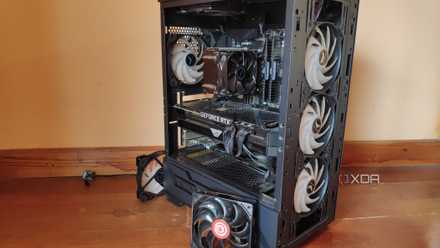
How to turn an old PC into a NAS
If you have an old PC still lying around, you could turn it into a NAS.
6 Back up all data on old drives
I cannot recommend this enough
We've all been there. Repurposing an old drive for a new system, only to completely format the drive and lose everything stored on it without a backup. That's why it's vital you back up your NAS, PC, or any other device before working on it. Even if you're certain you have copies of everything on the drives you plan on using, make new backups just in case. You can never have too many. And once you have your NAS up and running, consider adhering to the 3-2-1 backup rule where you have three copies of all data, stored on two different devices and one stored off-site.
5 Check your OS requirements
You'll want to meet these
Each NAS operating system will have system requirements. You'll want to cross-reference your PC hardware to check you meet (preferably exceed) the minimum requirements to run the OS. Just because you could run some lightweight Linux distro doesn't mean you can fire up TrueNAS and call it a day. Because we're using old PC parts, you'll likely pass this test with flying colors, but things could get interesting depending on the age of the system. If you fall short, consider upgrading the specific part before looking at a complete rebuild. Even older parts can still be sourced.
Building your own NAS? These 5 operating systems are the best
If you prefer building your own NAS from scratch, here are five operating systems you need to check out
4 Calculate the total energy draw
Undervolt to make some savings
No one cares how much their gaming PC sucks from the power outlet since it's only used hard when performing heavier tasks such as enjoying your favorite PC titles or working with video. The same cannot be said when building NAS or home lab equipment. Power is everything since these devices will be running 24/7, adding to your annual utility bill. Standard PC components could be viewed as overkill for a NAS, especially the processor, which is why it can prove useful to undervolt it to reduce power draw. This would result in weaker performance but it's still likely to be overkill for your needs.
Beginner's guide to NAS: Everything to know about RAID, setup, and more
NAS devices are a convenient solution to all your backup and file sharing troubles. Here's how you can configure your personal NAS server.
3 Check the health of your drives
S.M.A.R.T. and transfer tests
SSDs and HDDs will degrade over time through use. It's unfortunately inevitable, which is why it's always important to check the health of any drive you add to a NAS before installation. Run a quick S.M.A.R.T. scan to see if the drive is reporting anything out of the ordinary. There's a better chance of an SSD being healthy than an older HDD, especially if it has seen some operating hours. It's the nature of the beast, having moving physical parts, though HDDs do offer better value and higher capacities. Try to transfer some files to the drive from a PC and check that it's operating normally.
NAS operating systems such as TruenNAS and Unraid will report any issues with an installed drive, so be sure to keep tabs on any alerts.
Best hard drives for NAS
If you're looking for new hard drives to increase the storage capacity of your NAS, you've come to the right place
2 Map the I/O on your motherboard
SATA ports and PCI slots galore!
Not all motherboards are created equal. Some have an abundance of ports and general I/O while others may not have as many. You'll find more affordable motherboards having just enough PCI slots and SATA ports for more basic PC builds where there's likely to be a single discrete GPU and M.2 SSDs directly attached. For a NAS, we need more SATA ports for 2.5-inch and 3.5-inch drives, be it an SSD or HDD. Don't worry if you only have four SATA ports as these can be expanded using available PCI slots. Expansion cards can provide a few per slot, allowing you to install more drives than initially thought.
1 Consider upgrading your case cooling
More drives equals more heat
A NAS isn't like your typical desktop PC. You'll be running the system continuously, which will see the chassis warming up. Increased drive activity and processing power will be required for heavier tasks such as media transcoding and running numerous Docker containers. While you can get away with not having too many fans inside your desktop PC, I recommend fully populating all available fan slots when creating a NAS, especially if you plan on adding a few more drives. Depending on which hardware you plan on using, ensure there's good airflow for SSDs and HDDs.
Getting started with your first DIY NAS
Once you've carried out these checks and installed your chosen NAS OS, it's time to start launching services and storing data. Running a NAS doesn't require many system resources, allowing you to set up your own media streaming service, home surveillance station, password manager, web server, and more. The NAS has evolved over the years to become a fully-fledged server. Repurposing an old PC to become a NAS is a great way to save money, learn some new things, and start your journey to create a home lab.