
I recently made some pretty big upgrades to my home server setup, migrating away from my TrueNAS-based machine and building a whole new beast running Proxmox instead. However, while I plan to eventually migrate everything away from TrueNAS and deploy most of its individual services in LXCs and VMs on the Proxmox host, my stopgap solution has been to migrate everything, including the TrueNAS install, to run from within Proxmox. While I've been doing that, I've also been improving my monitoring capabilities and building out tools to keep tabs on things, and one such investment has been the WT32-SC01 Plus.
This 320x480 3.5-inch IPS display may not seem like much of an upgrade on the surface over the ESP32 CYD that I've been talking about for a while now, but the beauty is in its potential rather than what it can do right now. It has 16MB of flash storage and a couple of Grove ports for expansion, including a dedicated speaker port. It's cheap, it's effective, and it looks good, so I picked up a couple of them for various projects that I knew I'd want to work on... and now one of them has a home sitting on top of my NAS, so I can see statistics at a glance.
I moved my Home Assistant from TrueNAS to a mini PC running Proxmox, and I'm so glad I did
I moved my Home Assistant from TrueNAS to Proxmox, and it's saving me energy, time, and it's just all around better.
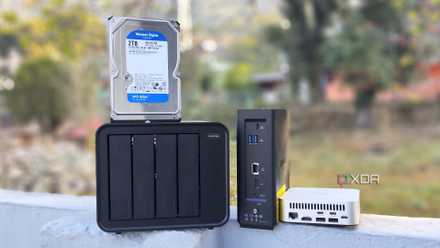
The WT32-SC01 Plus is a pretty great display
And it's easy to get started
This particular display is very much a beast, thanks to both the ESP32 inside and the capabilities the board allows for. It has an ESP32-S3-WROVER inside with 16MB of flash, and those aforementioned Grove ports, too. Plus, it even has an SD card slot built into the board, and I've seen people already build basic ESP32-powered speakers with this board and music loaded on an SD card. It's a great all-rounder package that you can sometimes find for decently cheap.
As for ESPHome support, I got quite lucky in that department. Support was only officially added in March this year, and while it was possible to use external components to get it working, it's nice not to have to deal with that and just be able to use the official ESPHome build without anything else necessary. To instantiate the display and get it working, you can just use this post on the ESPHome community forum (without the external component imported) to get it up and running. After that, you can define your display lambda or your LVGL component as usual, and draw on it like you would any other device.
That's exactly what I did here, too. I took Ryan Ewen's GitHub repository that he used to demonstrate LVGL in ESPHome and modified it for this particular project, which is how I've rendered the same buttons as before. I made some tweaks, though. I also deployed the Proxmox VE integration in Home Assistant, found on HACS, so that I can pull information from my Proxmox host machine and any VMs that I host on it.
Turning an ESP32 display into a NAS monitor
Once you get the hang of things, you'll be able to work quickly
Getting this display up and running with ESPHome and Home Assistant is the same as any of the other ESP32 devices that I've used. You hook the device up to your PC, click Add device in ESPHome, let it flash, and then you're done. You can now modify it and make changes from a single configuration YAML file, and implement C++ snippets in lambdas to control any logic that you may need. It's pretty neat, and once you've spent some time at it, you can pick things up fairly quickly and start deploying new builds of your software a lot faster. This took me considerably less time than my first project, largely thanks to understanding the layout and methods used to get information from Home Assistant to the display.
Like you would have in Home Assistant, you need to define different types of sensors in your ESPHome YAML, so I'll walk you through how I capture my CPU percentage, as it's the one that requires the most processing out of all of the displayed values. You'll first need to go to Home Assistant and pick the entity that you want to track; for me, my Proxmox CPU usage was under the "sensor.node_pve3_cpu_used" entity. The Proxmox integration exposes a lot of information, and we can pick from a lot more than just these basic options I've shown here. In fact, I want to conditionally render pages based on whether VMs are running or not, but for now, I just wanted to get something basic up and running.
Once we've chosen the data we want, we can then read it from Home Assistant in ESPHome with the following YAML:
text_sensor:
 - id: pve3_cpu_sensor
 name: PVE CPU Usage
 platform: homeassistant
 entity_id: sensor.node_pve3_cpu_used
 on_value:
 then:
 - lvgl.widget.refresh:
 id: pve3_cpu
This creates a local variable called "pve3_cpu_sensor", pulling from our Home Assistant CPU entity, and then refreshes the "pve3_cpu" widget every time it receives a value. As for that button, here's how it looks in my YAML, too:
 widgets:
 - obj:
 layout:
 widgets:
 - button:
 width: 49%
 height: 86
 widgets:
 - label:
 id: pve3_cpu_mdi
 text_font: mdi_xxl
 text: "\U000F0EE0"
 align: LEFT_MID
 - label:
 align: CENTER
 id: pve3_cpu
 text_font: roboto_lg
 text: !lambda |-
 std::string cpu = id(pve3_cpu_sensor).state.substr(0,4);
 return "CPU\n" + cpu + "%";
This is using Ewen's layout (as linked previously), and my approach doesn't make too many modifications at all. The primary difference is in the data I pull and the information I display on the buttons. In the above, I create two labels on each button, with one anchored to the left and one centered, containing text. The left anchor contains an emoji glyph that is rendered in the button, and the centered one will just show the text of the button and the measured value. It's quite simple and works surprisingly well. The container styles and button layout values are taken from Ewen's GitHub as well, and make it so the buttons fit the display perfectly.
As for the reason I also use ".state.substr(0,4)", it's because this creates a substring from the 0th character to the 4th, and prevents rendering a string that has, like, nine decimal places in it. I could have gotten around this requirement by treating it as a float value instead and using "%.2f" to print it, but I like dealing with text sensors in ESPHome and using the "atof" function if I plan on mostly using it as a string but sometimes need to convert my string to a float value. For example, I'm currently building an LVGL meter component that will display on one of the pages and show the CPU usage on a gauge, and this requires the use of the "atof" function.
5 household gadgets I've retired after getting a decent NAS
There's a lot more you can do with a NAS besides using it as a file-sharing and backup server
That's it, though! Every object shown on the screen is basically just a copy and paste of the CPU sensor, and the same goes for the VM stats that are shown. Everything else is in the previously linked GitHub repository, which takes a lot of the work out of manually calculating dimensions for buttons and other display elements. I now have a small display that sits on top of my NAS and can give me some stats at a glance, without needing to load up the Proxmox web GUI or Home Assistant to see what I need to see. If my server seems awfully loud, I can glance at it and see if my CPU usage is high or if the power draw is high. If something stands out, I can investigate further.
On my to-do list is to monitor the actual storage of my NAS, but I'm undecided on what way I want to implement that just yet. On the one hand, I could wait until I've wrapped up my TrueNAS VM entirely and then monitor storage through Proxmox like I already have here, but on the other, I could work on implementing the TrueNAS API and pulling the disk information that way. While the latter takes a lot of work, it may not necessarily be worth it if I can migrate everything off of TrueNAS sooner rather than later.
As well, I'm going to be looking into getting a mini speaker for the Grove port on this display, and putting in a small, cheap SD card with some basic sound effects I can play when certain conditions are met. For example, I have a Frigate instance that I've been wrangling with on one of my Proxmox nodes, and it keeps running out of memory. When memory usage is critical, I could play a sound so I know to check it out. It's little things like that that these displays can excel with, and I'm really excited to grow this one's capabilities.