
The file transfer process on a modern Windows 11 PC is quick and responsive. However, transferring large or multiple files at once can be a drag, since it takes longer. You want to get things done and not experience slow file transfer speeds. Luckily, there are ways to speed up the process by installing new hardware, using the correct ports, and utilizing Windows’ built-in system utilities. Even on older systems, you can use these options to make transferring files less painful.
5 Use the Right USB Ports
USB 3.0 or higher is faster
You probably know that a USB 3.x flash drive will transfer files more quickly. But that depends on the USB port you insert into your computer. For example, the transfer speeds are significantly slower if you plug your USB 3.1 flash drive into a USB 2.0 port. So, make sure to use the right ones. The USB 3.x ports on your PC are typically blue or marked in a way that makes them easy to tell apart. You can also decipher them from within Windows by opening Device Manager. Expand the “Universal Serial Bus Controllers” section to see the listed port versions.
Everything you need to know about USB standards, speeds, and port types
The USB or universal serial bus is an industry standard that sets specifications for cables and connectors on devices.
4 Close unneeded background apps
Don’t waste system resources
Whether you want to transfer one large file or several of them quickly requires your PC to use system resources. If you have apps running in the background, those can eat into your CPU, drive, and RAM resources. So, close out the apps you don’t need. Click the X button to close out apps you're not using. You can also close apps and services using Task Manager to force quit what you don’t need.
13 things you didn't know you could do with Task Manager
Level up your Task Manager knowledge
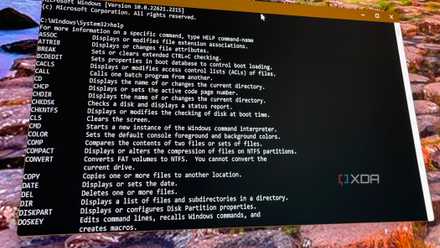
3 Use Robocopy to Copy Files
Ditch the GUI
It’s easy enough to transfer files from one location to another using File Explorer. However, Windows also includes Robocopy, a command-line file copy feature. It allows you to transfer files faster. It disposes the GUI, which can get in the way, and simply gets it done. Open the Command Prompt or PowerShell as administrator. Then enter the file's source path, destination, and multithread parameter for faster copy speed. You can become a master at transferring large files via the command line using Microsoft’s Robocopy commands.
New to the Windows command line? These 10 useful commands are a great way to get started
You can use your keyboard alone for all kinds of things
2 Compress files first
Smaller files reduce transfer speed
Compressing several documents and other files into one container will allow much faster transfer speeds than copying them to another directory individually. Combining multiple docs into one file, but when compressed, those files are made smaller. Windows 11 allows you to easily zip files. Now, it also includes native support for 7zip and TAR archives. In File Explorer, select your files, right-click, and select Compress to -> Zip, 7z, or TAR.
4 common file compression tasks and how to improve their efficiency
Not every compression method works for every file, and you can increase efficiency by changing the file type, codec, or program used.
1 Use SSDs
When you can
Setting SSD speeds aside, it feels like a new computer when replacing a mechanical HHD with an SSD. Windows is more responsive, and you experience blazing-fast file transfers. If you have an older PC, see if you can replace the HDD with an SSD. In some systems, you can replace the old drive with the new one via the SATA cable. If compatible, plug an NVMe M.2 SSD into the motherboard for even faster file transfer speeds. Note that some older systems may require a PCIe adapter for M.2. Still, if you can make it happen, it’s highly recommended, so you’re not stuck on the “copying” screen.
Make transferring files fast again
If you have a modern PC with an M.2 SSD, copying files between locations is a fast experience. However, large file sets can still take time to copy over. If you have an older system or the file transfer process isn’t quick enough, you can use the above tips to shave some valuable seconds off the process.