
If you’ve ever looked into microcontroller projects or complex ideas involving SBCs, you may have come across breadboards. Designed for prototyping, most breadboards let you pair the GPIO pins on your microcontrollers/single-board computers with circuitry components without physically soldering them onto your device.
Despite their usefulness, breadboards may appear rather daunting when you’re just starting out. So, we’ve created a guide containing everything you need to know about breadboards to make full use of them in your next DIY project.
Channel your inner DIY god by building these 10 complex Raspberry Pi projects
Here are ten complex Raspberry Pi projects to train your tinkering muscles
What are breadboards?
In layman's terms, a breadboard is a circuitry component containing numerous miniature sockets where you can insert jumper cables to connect LEDs, ICs, resistors, sensors, and other parts to an SBC/microcontroller (or even a 5V battery). Often used synonymously with solderless boards, most breadboards let you plug in and remove components as you please, making it easy to prototype your circuits and test out different configurations without soldering everything together.
Of course, there are solderable breadboards, but a majority of the ones you’ll find online don’t require soldering in order to work with your devices.
On the inside, the breadboard has its own set of components: two power rails at the top and bottom, alongside a number of terminal strips present in the middle of the board. Without going into too many technical details, the power rails are rows marked with + and -. As you may have guessed, these symbols refer to the positive and negative sides. Each socket in the + row of the power rail is internally connected, and the same applies to the holes in the row marked as -. The power rail is where you’ll usually connect the power supply. However, the top and bottom power rails aren’t connected to each other, meaning you’ll need to pair them using jumper cables if you wish to use the same power supply on both.
Meanwhile, the rows of holes in the middle of the power rails are called terminal strips, and this is where you’ll attach most of the components to your breadboard. You may have noticed some markings on the terminal strips, and these can help you build the circuit. Unlike the power rails, terminal strips are connected vertically, meaning the points a1, b1, c1, d1, and e1 are connected to each other. However, a2, b2, c2, d2, and e2 aren’t connected to the points occupying the first column. Likewise, the upper and lower sections of the terminal strips are separated by a dividing line. This segment also provides the proper spacing needed to connect dual-inline ICs with the breadboard.
REXQualis Breadboards Kit
When should you use a breadboard?
While breadboards are almost essential for circuitry projects, the situation is a bit different for those interested in programming SBCs. If you’ve read my articles on turning the Raspberry Pi into a weather station or using a TEA5767 radio module with the SBC, you may have noticed that I didn’t use a breadboard, even though both projects involve jumper cables and sensors.
The thing is, if you can attach the components to your SBC (or even your microcontroller, for that matter) without soldering, chances are, you probably won’t need a breadboard at all. But in case you’re working with resistors, LEDs, or other components that usually won’t work unless you physically solder everything to the GPIO pins, then breadboards can save you the pain of desoldering everything when you make a mistake or decide to build a new project.
How to connect an SBC to a breadboard?
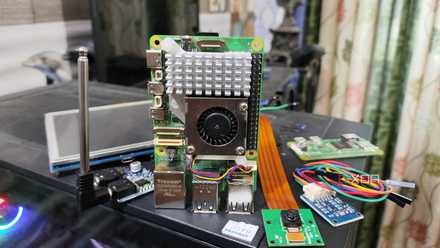
Despite sharing similar appearances, SBCs have vastly different numbers and layouts of GPIO pins. As such, the exact connections you’ll need to make will vary depending on your particular board, and it’s a good idea to consult the technical manual of your SBC. We’ll demonstrate the procedure using a Raspberry Pi 5, TEA5767 module, and female-to-male jumper cable for this demonstration, though there are other ways to pair the breadboard to the SBC.
-
Power off the SBC and keep its GPIO diagram open on another device.
Source: Raspberry Pi Foundation - Connect the female end of the jumper cable to the +5V pin on the SBC.
- Plug the male end of the wire into any of the + (positive) sockets on either power rail.
- Similarly, connect another jumper wire to the GND pin.
- Insert the other end of the cable into the - (negative) slot on the same side of the power rail you used for the + socket.
With that, you’ve successfully connected the breadboard to the Raspberry Pi. For sensors, you can follow the same procedure to link the +5V and GND pins to the same power rail where you fixed the SBC's pins. As for the interface pins, those can vary depending on your sensor.
Let’s say you need to connect the SDA pins of your Raspberry Pi and TEA5767 sensor. Simply plug one end of the jumper cable into the SDA pin on the Raspberry Pi and the other end into any random socket in the terminal strip. Do the same for the SDA pin on the TEA5767, except, connect the male end of the jumper wire to any hole along the same column where you fixed the SDA pin of the Raspberry Pi earlier.
-
Antrader Breadboard Jumper Wires
$5 $7 Save $2 -
Raspberry Pi 5
- CPU
- Arm Cortex-A76 (quad-core, 2.4GHz)
- Memory
- Up to 8GB LPDDR4X SDRAM
- Operating System
- Raspberry Pi OS (official)
- Ports
- 2× USB 3.0, 2× USB 2.0, Ethernet, 2x micro HDMI, 2× 4-lane MIPI transceivers, PCIe Gen 2.0 interface, USB-C, 40-pin GPIO header
- GPU
- VideoCore VII
- Starting Price
- $60
How to connect a microcontroller to a breadboard?
Depending on the type of microcontroller you’re using, you may need to follow different methods to pair the device with a breadboard. Full-sized boards, like the Arduino Uno and Mega, have an identical process as the Raspberry Pi SBCs, though they require male-to-male jumper cables instead of female-to-male ones. These boards also have analog pins in addition to digital ones, and I recommend keeping things simple by using the latter. Once you’ve connected the microcontroller to the breadboard, you can follow the same procedure as the SBC section to pair any circuitry components to it.
Meanwhile, the second type of microcontrollers, like the ESP32 and ESP8266, alongside the Raspberry Pi Pico and Arduino Nano models with pre-soldered pins, can be plugged directly into the breadboard. To do so,
- Line up the microcontroller's pins with the holes on both terminal strip sections in such a way that the dividing bridge/ravine/groove lies in the middle of the microcontroller.
- Push the device down until it’s firmly slotted into the breadboard.
As for these small-sized boards, you can connect interface pins on the circuitry components along the same column as their respective GPIO pins on the microcontroller.
-
Arduino Uno REV3
$23 $28 Save $5 -
Raspberry Pi Pico
-
- Brand
- AITRIP
- Connectivity Features
- UART, USB
Prototyping your favorite DIY projects with the help of breadboards
That was everything you needed to know to integrate breadboards into your project workflow. Of course, not every DIY idea needs a breadboard, especially those centered around programming. So, if you’re not too fond of circuitry-related ideas, there are still a lot of projects you can build with your SBCs and microcontrollers.
5 simple projects anyone can build with an ESP32 microcontroller
Who says you need a high skill-level to create cool ESP32 projects?