 |
VOOZH | about |
|
VOOZH | about |
The Replay is a weekly newsletter for dev and engineering leaders.
Delivered once a week, it's your curated guide to the most important conversations around frontend dev, emerging AI tools, and the state of modern software.
Astro is a powerful Static Site Generator that lets you create highly performant websites while shipping zero JavaScript.
👁 Using Astro And Netlify To Build And Deploy A Web AppAstro ships zero JavaScript in your final build by default, but for cases where you need the interactivity that JavaScript provides, Astro can automatically hydrate interactive components when they become visible on the page.
With Astro, you can use UI components from any JavaScript framework (React, Svelte, Vue). During build time, these components will be rendered as static HTML. Check out this article to learn more about Astro.
Netlify is a web hosting platform that simplifies the process of hosting and deploying your static websites.
Netlify has many features, including continuous integration and deployment, functions that allow us to perform backend operations without a server, and many more. Netlify is also commonly used to build Jamstack applications because of its robustness and simplicity.
In this tutorial, you’ll learn how to build a web application using Astro and deploy it to Netlify.
Jump ahead:
Create a project using the Astro CLI, starting by running the following command in your terminal:
npm create astro@latest
Once the command has run, a script installation will take place.
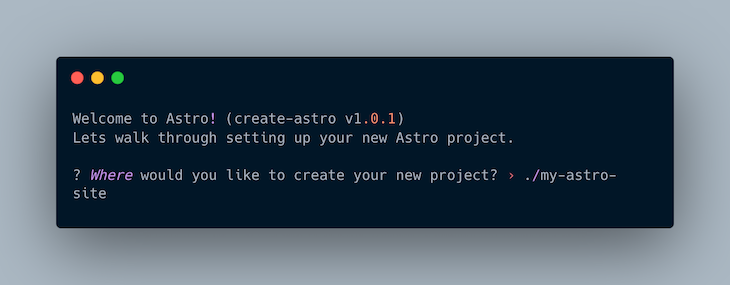
The following prompt will come up on the terminal.
Either press Enter to proceed and a folder will be created in your current directory with the name my-astro-site, or you can rename the folder by typing your desired folder beginning with ./, followed by the name, such as ./desired-name.
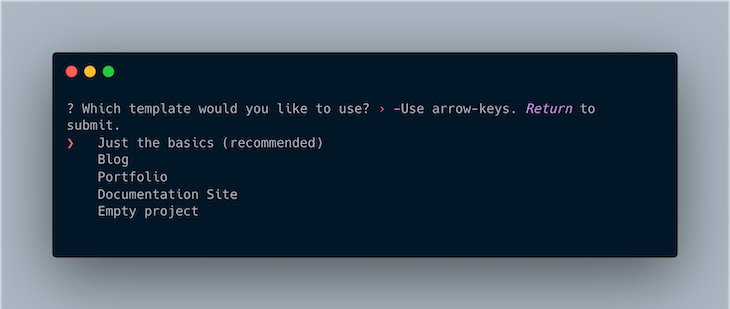
Next, you’ll see a prompt to choose a template to get started with. For the sake of this tutorial, select the Just the basics template and press ENTER to proceed.
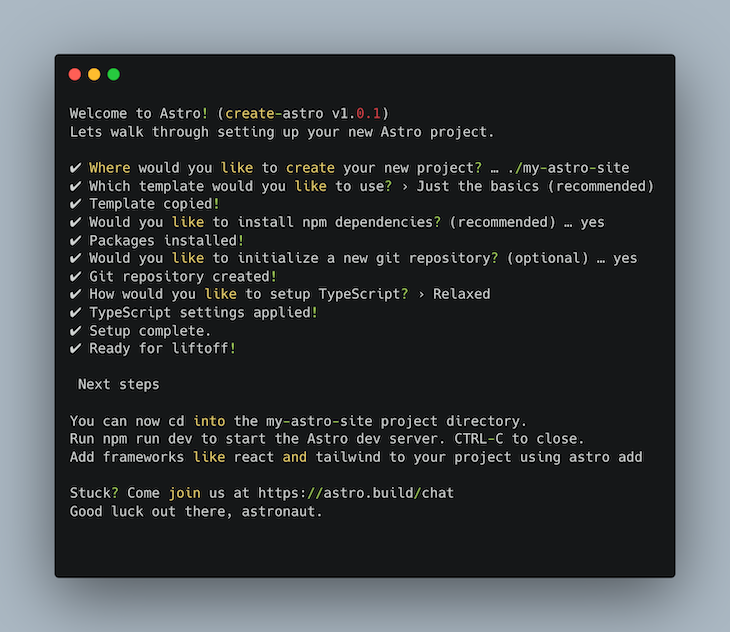
Next, you’ll be prompted to choose whether to install npm dependencies or not. Press ENTER to continue, because “Yes” is the recommended answer.
Then, you’ll be asked whether you want to initialize your project as a Git repository. I recommend doing so, because you’ll need this later to deploy to Netlify.
Finally, select your level of TypeScript strictness, or opt out of using TypeScript entirely. I chose the relaxed option for this, but it’s totally up to you.
👁 Selecting TypeScript Strictness
Now that the setup is complete, type cd into my-astro-site directory and run the command:
npm run dev
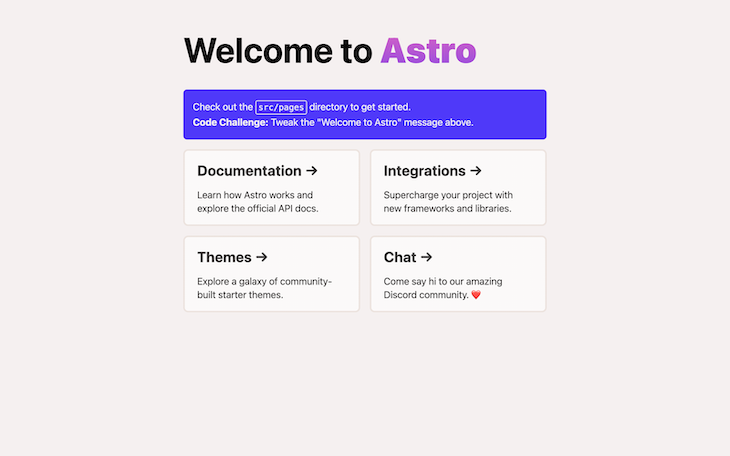
This will open up a server at http://localhost/3000/.
Here’s what it should look like:
The application you’ll create while following this tutorial is a country directory application. You’ll make an HTTP request to an endpoint to fetch and render all countries, each with their own detailed page, and through this you’ll learn dynamic routing with Astro.
Let’s get started.
First, open up your newly created project folder in your code editor of choice.
Navigate to the Card.astro file in the /src/components folder to modify it to suit what you’re building.
Then, replace the code in the Card.astro file with the code below:
//Card.astro
---
export interface Props {
 name: string;
 capital: string;
 population: number;
 cca3: string;
 flag: string;
}
const { name, capital, population, flag, cca3 } = Astro.props;
---
<li class="country">
 <a href={`country/${cca3}`}>
 <img src={flag} alt={name} class="countryflag" />
 <h3>{name}</h3>
 <p>
 <strong>Population:</strong>{
 new Intl.NumberFormat("en-US").format(population)
 }
 </p>
 <p><strong>Capital:</strong>{capital}</p>
 </a>
</li>
<style>
 .country {
 list-style-type: none;
 height: 350px;
 width: 30ch;
 margin: 0 auto;
 border-radius: 10px;
 box-shadow: 1.5px 1.5px 11px hsla(208.4, 23.5%, 31.8%, 0.39),
 -1.5px -1.5px 11px rgba(0, 0, 0, 0);
 }
 .country h3,
 p {
 margin-left: 10px;
 }
 p {
 font-size: 16px;
 font-weight: 500;
 }
 .countryflag {
 aspect-ratio: 2/1;
 width: 100%;
 height: auto;
 }
 a {
 text-decoration: none;
 color: black;
 }
</style>
At the top of the component file, you’ll notice the Props interface. This helps define the properties of the data the component expects to receive.
Then, on line 9, the props are destructured for use within the component.
It’s probably worth mentioning that Astro components are demarcated into three: the JavaScript section is demarcated using three hyphens, the HTML section is demarcated by the use of HTML element tags, and the style section is demarcated by the use of style tags.
Next, go to the index.astro file located in the pages folder and replace it with the code below:
// index.astro
---
import Layout from "../layouts/Layout.astro";
import Card from "../components/Card.astro";
const allCountries = await fetch("https://restcountries.com/v3/all").then(
 (res) => res.json()
);
---
<Layout title="Welcome to Astro.">
 <main>
 <h1>Welcome to <span class="text-gradient">Astro</span></h1>
 <ul role="list" class="countries">
 {
 allCountries.map((country: any) => {
 return (
 <Card
 name={country.name.common}
 capital={country.capital}
 cca3={country.cca3}
 population={country.population}
 flag={country.flags[1]}
 />
 );
 })
 }
 </ul>
 </main>
</Layout>
<style>
 :root {
 --astro-gradient: linear-gradient(0deg, #4f39fa, #da62c4);
 }
 .countries {
 display: grid;
 grid-template-columns: repeat(auto-fill, minmax(260px, 1fr));
 grid-gap: 3rem;
 grid-auto-rows: minmax(100px, auto);
 margin: 70px auto;
 }
 h1 {
 margin: 2rem 0;
 }
 main {
 margin: auto;
 padding: 1em;
 max-width: 100ch;
 }
 .text-gradient {
 font-weight: 900;
 background-image: var(--astro-gradient);
 -webkit-background-clip: text;
 -webkit-text-fill-color: transparent;
 background-size: 100% 200%;
 background-position-y: 100%;
 border-radius: 0.4rem;
 animation: pulse 4s ease-in-out infinite;
 }
</style>
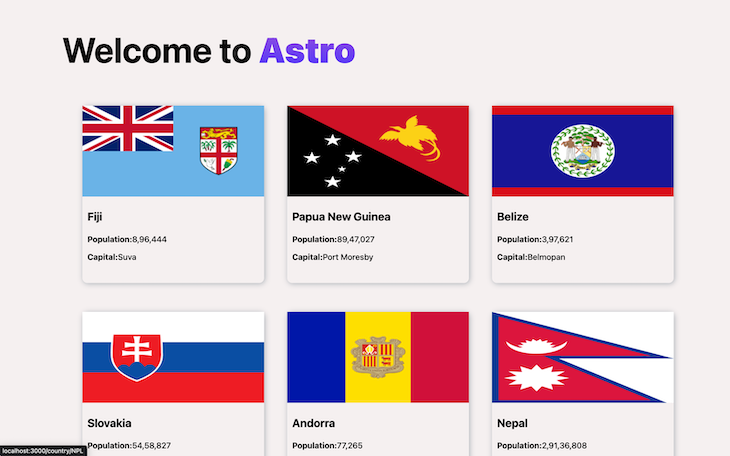
Here, an HTTP request is being made to the endpoint to fetch a list of all the countries. Then, data for each country is being passed as props to the Card.astro component. There’s a bit of styling added to make the app look nice.
Here’s what the app should look like now:
Routing in Astro is done with the HTML a (anchor) element because it doesn’t come shipped with a custom Link component.
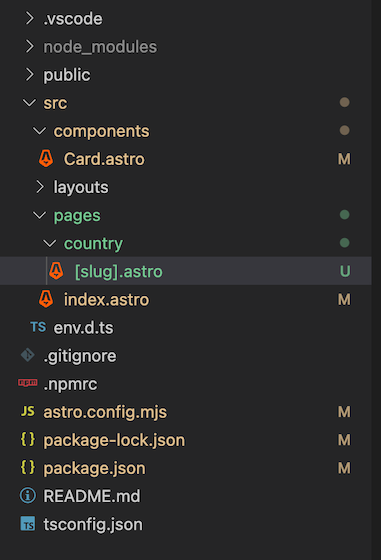
From the Cards.astro component, there’s the a element with its “href” attribute pointing to /country/cca3. For this to work, create a country folder in the pages directory.
Once you’ve created the folder, create a file with the name [slug].astro inside of it.
N.B., Astro uses bracket notation to define dynamic routes.
👁 Country Folder In Astro Pages Directory
Next, open up the [slug].astro file, and paste in the following code:
//[slug].astro

---
import Layout from "../../layouts/Layout.astro";
export async function getStaticPaths() {
 const characters = await fetch("https://restcountries.com/v3/all").then(
 (res) => res.json()
 );
 return characters.map((el: any) => ({
 params: {
 slug: el.cca3,
 },
 }));
}
const { slug } = Astro.params;
const data = await fetch(`https://restcountries.com/v3.1/alpha/${slug}`).then(
 (res) => res.json()
);
---
<Layout title={data[0]?.name}>
 <section class="page-content">
 <div class="container">
 <img src={data[0].flags.svg} alt="" />
 <h2>{data[0].name.common}</h2>
 <ul>
 <li>Official Name: {data[0]?.name.official}</li>
 <li>Independent: {data[0]?.independent ? `Yes` : `No`}</li>
 <li>Continents: {data[0]?.continents}</li>
 <li>Sub Region: {data[0]?.subregion}</li>
 <li>Timezones: {data[0]?.timezones}</li>
 <li>
 Population: {
 new Intl.NumberFormat("en-US").format(data[0]?.population)
 }
 </li>
 </ul>
 </div>
 </section>
</Layout>
<style>
 .page-content {
 display: flex;
 flex-direction: column;
 padding-top: 100px;
 align-items: center;
 justify-content: center;
 }
 .container {
 display: flex;
 flex-direction: column;
 align-items: center;
 justify-content: center;
 }
 img {
 aspect-ratio: 2/1;
 width: 50%;
 }
</style>
For dynamic routing to work in Astro, all possible routes need to be pre-generated. The way to do this is with the getStaticPaths function.
In the code above, the getStaticPaths function is made asynchronous as an HTTP request is made to the https://restcountries.com/v3/all endpoint to fetch all countries. Then, the unique three-letter cca3 identifier from each country is used as the params.
The “slug” property is then destructured from Astro.params and used to fetch the details of a particular country when the user navigates to that route. The data is then accessible in the template part of the component.
Here’s what your app should look like so far:
In order to host your Astro application on Netlify and benefit from continuous deployment, I recommend deploying your application to a remote Git repository such as GitHub, GitLab, or Bitbucket. For this project, I’ll be using GitHub.
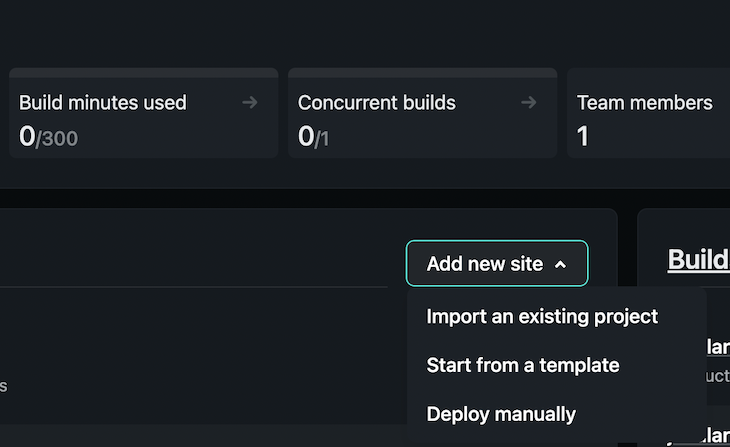
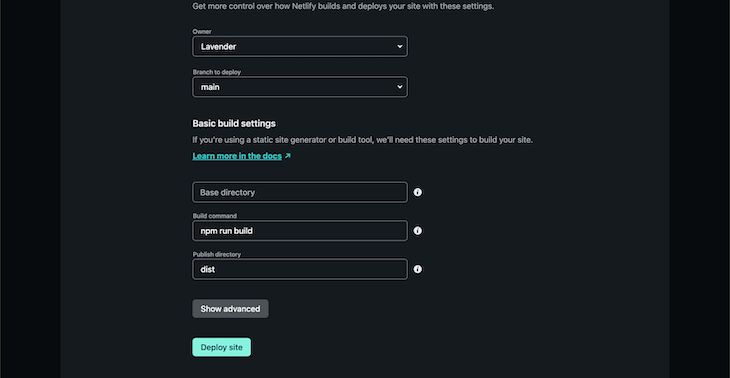
Once you’ve deployed your app to a Git repository, go to Netlify, click on Add new site and choose Import an existing project. You’ll be redirected to a three-step configuration process.
astro-netlify-demo.Now all you have to do is wait for Netlify to finish deploying your project, and you can access your hosted URL in the dashboard.
This tutorial covered how to set up an Astro project with Astro components, dynamic routing with Astro, and deploying your web app to Netlify.
I hope you enjoyed! Let me know if you have any questions or suggestions.
There’s no doubt that frontends are getting more complex. As you add new JavaScript libraries and other dependencies to your app, you’ll need more visibility to ensure your users don’t run into unknown issues.
LogRocket is a frontend application monitoring solution that lets you replay JavaScript errors as if they happened in your own browser so you can react to bugs more effectively.
👁 LogRocket Dashboard Free Trial BannerLogRocket works perfectly with any app, regardless of framework, and has plugins to log additional context from Redux, Vuex, and @ngrx/store. Instead of guessing why problems happen, you can aggregate and report on what state your application was in when an issue occurred. LogRocket also monitors your app’s performance, reporting metrics like client CPU load, client memory usage, and more.
Build confidently — start monitoring for free.
Install LogRocket via npm or script tag. LogRocket.init() must be called client-side, not
server-side
$ npm i --save logrocket

// Code:

import LogRocket from 'logrocket';
LogRocket.init('app/id');
// Add to your HTML:

<script src="https://cdn.lr-ingest.com/LogRocket.min.js"></script>
<script>window.LogRocket && window.LogRocket.init('app/id');</script>
Learn how next-browser gives AI agents runtime context for debugging Next.js apps, including React props, hydration, PPR, forms, and performance.
Build dynamic LLM routing in Next.js with OpenRouter, TanStack AI, task classification, model fallbacks, and cost-aware routing.
TSRX adds first-class control flow, conditional hooks, and scoped styles to React via a TypeScript compiler extension — no new framework required.
Learn how to build a full React Native auth system using Better Auth and Expo — with email/password login, Google OAuth, session persistence, and protected routes.
Hey there, want to help make our blog better?
Join LogRocket’s Content Advisory Board. You’ll help inform the type of content we create and get access to exclusive meetups, social accreditation, and swag.
Sign up now