 |
VOOZH | about |
|
VOOZH | about |
Editor’s note: This article was updated on 19 February 2024 to discuss new file conventions (layouts and templates) introduced in Next.js 14, demonstrate how component remounting and state management differ in layouts vs. templates, add a section on parallel routes, and ensure all code examples are up to date and compile correctly.
👁 Guide To Next Js Layouts And Nested LayoutsWhen building projects with Next.js, we typically create an entire user interface by assembling isolated components. However, some parts of the interface require the same code snippets across multiple routes — for example, the navigation header, footer, and sidebar.
To manage this, we use layouts to structure the interface in a way that contains shared code snippets. In this lesson, we’ll delve into managing layouts and nested layouts in Next.js using the Pages Router and the App Router.
Check out the demo project I’ve put together to see it in action:
You can see the project source code on GitHub as well. Here are the layout details for the project:
Home and /dashboard/* routes share header and footer contentNewsletter route has a different footer content and no header/dashboard/* routes implement a nested layout sharing sidebar navigation/dashboard/settings route is an implementation of a parallel route that renders multiple views simultaneouslyTo follow along with this tutorial, you’ll need a basic understanding of Next.js. Let’s get started!
The Replay is a weekly newsletter for dev and engineering leaders.
Delivered once a week, it's your curated guide to the most important conversations around frontend dev, emerging AI tools, and the state of modern software.
Next.js recommends starting a new project with the App Router. However, in this tutorial, we’ll also discuss how to implement layouts and nested layouts with the Pages Router for users who have yet to migrate to the new Next.js routing system.
To help illustrate the differences between the two approaches, we’ll create a similar application using both methods and compare how the new App Router simplifies the process of implementing nested layouts.
To start, let’s take a look at a typical folder structure for the Pages Router in Next.js:
...
├── components
│ ├── Footer.js
│ └── Header.js
├── pages
│ ├── dashboard
│ │ ├── account.js
│ │ ├── analytics.js
│ │ └── settings.js
│ ...
│ ├── index.js
│ └── newsletter.js
...
To define a layout with the Pages routing system, we create a Layout component that renders any shared user interface and its children.
Create a components/Layout.js file and render the shared header and footer content:
import Header from './Header';
import Footer from './Footer';

const RootLayout = ({ children }) => {
 return (
 <>
 <Header />
 <main>{children}</main>
 <Footer />
 </>
 );
};

export default RootLayout;
The Layout component takes a children prop that serves as a placeholder for the active page content.
In the final project, we use Tailwind CSS for styling purposes. As a result, the updated markup includes class utilities:
const RootLayout = ({ children }) => {
 return (
 <div className="flex flex-col min-h-screen mx-auto max-w-2xl px-4 pt-8 pb-16">
 <div className="flex-grow">
 <Header />
 <main className="my-0 py-16">{children}</main>
 </div>
 <Footer />
 </div>
 );
};
A beginner’s approach might be to wrap each page’s rendered markup with the <RootLayout> component. For example, wrapping the Home component render would look like this:
import RootLayout from '@/components/Layout';

const Home = () => {
 return (
 <RootLayout>
 <main>{/* ... */}</main>
 </RootLayout>
 );
};
export default Home;
By doing this, we’ll get the desired UI for the pages:
However, this implementation doesn’t preserve the state between page transitions. For example, the search field’s input text gets cleared when navigating between pages that share a common layout. This isn’t the experience we expect from a single-page application.
In the next section, we’ll discuss how to preserve the state in a shared layout.
If we examine the pages/_app.js file that Next.js calls during each page initialization, we’ll see an App component that includes a Component prop representing the active page:
import '@/styles/globals.css'

export default function App({ Component, pageProps }) {
 return <Component {...pageProps} />
}
In this file, we can load the shared layout and other global files, such as the global CSS file. So, let’s wrap the page content with the <RootLayout> like so:
import '@/styles/globals.css';
import RootLayout from '@/components/Layout';

export default function App({ Component, pageProps }) {
 return (
 <RootLayout>
 <Component {...pageProps} />
 </RootLayout>
 );
}
With this implementation, the RootLayout component is reused between page transitions. As a result, the state in the shared component, such as the Header, will be preserved.
We no longer need to wrap each page’s render with the <RootLayout> component.
After saving all files and revisiting the application, we can write in the search field and see that the state now persists between page changes, which is an improvement!
Note that you may need to restart the development server if it doesn’t work as expected.
To create a nested shared layout, as demonstrated in the /dashboard/* pages, we need to nest a new layout that renders the sidebar navigation within the root layout.
However, with the current implementation, simply wrapping the active route within the root layout — as we did in the pages/_app.js file — only works if we require one layout for the entire application.
To achieve a nested layout, Next.js provides a way to compose layouts on a per-page basis.
getLayout functionWith the Next.js pages directory, we can create multiple layouts and nest them, or create a custom layout that applies to specific routes using a per-page implementation. That means, instead of rendering a root layout in the pages/_app.js file, we’ll let each individual page component be in charge of its entire layout.
Let’s begin with the Home page. We can achieve a per-page layout by applying a getLayout property on the page component:
import RootLayout from '@/components/Layout';

const Home = () => {
 return <main>{/* ... */}</main>;
};

Home.getLayout = (page) => {
 return <RootLayout>{page}</RootLayout>;
};

export default Home;
We defined a function that takes the current page as a parameter and returns the desired UI for the index page. Note that we don’t have to use the name getLayout — it can be any name.
We can now invoke that function in the pages/_app.js file, and pass the current page as an argument. To achieve this, we’ll modify the App component in the pages/_app.js as follows:
export default function App({ Component, pageProps }) {
 // If page layout is available, use it. Else return the page
 const getLayout = Component.getLayout || ((page) => page);
 return getLayout(<Component {...pageProps} />);
}
When Next.js initializes a page, it checks if a per-page layout is defined in the page component using the getLayout function. If the layout is defined, it is used to render the page. Otherwise, the page is rendered as is.
After saving the file, the Home page should now render with the specified layout.
DashboardLayoutTo create a nested layout for pages under the /dashboard/* route segments, we need to create a new layout file called components/DashboardLayout.js. This file should export a component that returns a shared UI for these pages and uses the children prop to render their respective content:
const DashboardLayout = ({ children }) => {
 return (
 <div className="flex gap-8">
 <aside className="flex-[2]">
 {/* Include shared UI here e.g. a sidebar */}
 </aside>
 <div className="bg-gray-100 flex-[8] p-4 rounded min-h-[300px]">
 {children}
 </div>
 </div>
 );
};

export default DashboardLayout;
Now, in each of the /dashboard/* page files, we need to apply a getLayout property on the page component and return the desired layout tree.
For example, the /dashboard/account.js file will look like this:
import RootLayout from '@/components/Layout';
import DashboardLayout from '@/components/DashboardLayout';

const Account = () => {
 return <div>Account screen</div>;
};

Account.getLayout = (page) => (
 <RootLayout>
 <DashboardLayout>{page}</DashboardLayout>
 </RootLayout>
);

export default Account;
Notice how the DashboardLayout is nested within the RootLayout.
If we apply the getLayout property to the other page components under the /dashboard/* route, we’ll also get the desired layout where the state persists between page transitions:
Check out the GitHub files for the other page components to double-check your work so far.
You may want to create a custom layout as we have done on the Newsletter page in the final project. That layout renders different footer content, with no navigation bar or sidebar.
We’ll create a new layout file called components/OnlyFooterLayout.js that returns the custom footer and children prop. The code for this component would look like this:
import NewsletterFooter from './NewsletterFooter';

const OnlyFooterLayout = ({ children }) => {
 return (
 <div className="flex flex-col min-h-screen mx-auto max-w-2xl px-4 pt-8 pb-16">
 <div className="flex-grow">
 <main className="my-0 py-16">{children}</main>
 </div>
 <NewsletterFooter />
 </div>
 );
};

export default OnlyFooterLayout;
Next, we’ll create the components/NewsletterFooter.js file and render some custom footer content:
const NewsletterFooter = () => {
 return (
 <footer className="flex items-center justify-between">
 {/* ... */}
 </footer>
 );
};

export default NewsletterFooter;
Finally, in the pages/newsletter.js file, we’ll apply a getLayout property on the page component, then return the desired UI for the Newsletter page:
import OnlyFooterLayout from '@/components/OnlyFooterLayout';

export const Newsletter = () => {
 return (
 // ...
 );
};

Newsletter.getLayout = (page) => (
 <OnlyFooterLayout>{page}</OnlyFooterLayout>
);

export default Newsletter;
If we save all files, the page should now render with the custom layout.
See the project source code.
Next.js 13 introduced the App Router file system, which enables first-class support for layouts, nested routes, and nested layouts. In light of our project routes, the app directory structure would look something like this:
...
├── app
│ ...
│ ├── dashboard
│ │ ├── account
│ │ │ └── page.js
│ │ ├── analytics
│ │ │ └── page.js
│ │ └── settings
│ │ └── page.js
│ ├── newsletter
│ │ └── page.js
│ ├── layout.js
│ └── page.js
├── components
│ ...
│
...
Each folder or nested folder in the app directory defines a route or nested route and requires a special page.js file to render its respective UI. For instance:
app/newsletter/page.js will render the http://localhost:3000/newsletter pageapp/dashboard/account/page.js will render the http://localhost:3000/dashboard/account pageThe app directory itself represents the root segment, so the app/page.js file will render the UI of the index page:
const Home = () => {
 return <main>{/* ... */}</main>;
};
export default Home;
layout.js fileTo define a layout for any route segment within the App routing system, we will export a default React component from a special file called layout.js.
In the folder structure above, we have a top-level layout.js file that will be shared across all pages in the application. A root layout file is required and should include the <html> and <body> tags as follows:
export default function RootLayout({ children }) {
 return (
 <html lang="en">
 <body>{children}</body>
 </html>
 );
}
Next.js uses this root layout to wrap the page content or any nested layouts that may be present during rendering.
Similar to what we did in the pages directory, we can also include the top-level shared components within this root layout like so:
import Header from '@/components/Header';
import Footer from '@/components/Footer';

export default function RootLayout({ children }) {
 return (
 <html lang="en">
 <body>
 <div className="flex flex-col min-h-screen mx-auto max-w-2xl px-4 pt-8 pb-16">
 <div className="flex-grow">
 <Header />
 <main className="my-0 py-16">{children}</main>
 </div>
 <Footer />
 </div>
 </body>
 </html>
 );
}
This layout will persist across routes and maintain component state, as anticipated.
template.js fileWhen we want to change the usual behavior defined by the layout file convention, we can utilize a template.js file. For example, we could do this if we don’t want to keep the state between page transitions or if we want to incorporate features that depend on useState or useEffect Hooks, such as logging page views.
Previously, we observed the search field’s input text getting cleared when navigating between pages that share a common layout. We’ll get that behavior by utilizing the template.js file. The template remounts each time the user navigates to a new page, leading the component state to reset and any effects to re-sync.
Similar to a layout file, a template.js file exports a default React component that then accepts a children prop, as demonstrated below:
export default function Template({ children }) {
 return (
 // ...
 );
}
It’s worth noting that components in the app directory are React Server Components by default, unlike those in the pages directory. As a result, we cannot use client-side Hooks in these components.
Therefore, to address this issue, we have extracted the logic for the active menu class and the search functionality — which utilize the usePathname and useState client-side Hooks, respectively — from the Header component and placed them in their separate client components.
To create a nested shared layout, specifically for pages under the /dashboard/* route segments, all we need to do is add a layout.js file inside the dashboard folder to define the UI:
const DashboardLayout = ({ children }) => {
 return (
 <div className="flex gap-8">
 <aside className="flex-[2]">
 {/* Include shared UI here e.g. a sidebar */}
 </aside>
 <div className="bg-gray-100 flex-[8] p-4 rounded min-h-[300px]">
 {children}
 </div>
 </div>
 );
};

export default DashboardLayout;
This layout will be nested within the root layout and will wrap all the pages in the /dashboard/* route segment, providing a more specific and targeted UI for those pages.
That’s all. As we can see, creating a nested layout in the App Router is incredibly easy and intuitive.
In order to design a personalized layout for the Newsletter page, we must isolate that specific route segment from the shared layouts. To accomplish this, we will employ route groups.
Route groups are a way to group related routes. For our project, we’ll create two route groups:
custom route group containing the Newsletter route: The layout for this group will render a custom layout with no navigation bar or sidebar and a different footerprimary route group containing both the index route and the /dashboard/* routes, since they share the same root layoutNote that we can name the route group anything we want. It’s only for organizational purposes.
To create a route group, we’ll wrap the group name in parentheses. If we reorganize the app directory into two groups, we’ll have the following structure:
...
├── app
│ ├── (primary)
│ │ ├── dashboard
│ │ │ ├── account
│ │ │ │ └── page.js
│ │ │ ├── analytics
│ │ │ │ └── page.js
│ │ │ ├── settings
│ │ │ │ └── page.js
│ │ │ └── layout.js
│ │ ├── layout.js
│ │ └── page.js
│ ├── (custom)
│ │ ├── newsletter
│ │ │ └── page.js
│ │ └── layout.js
│ └── layout.js
│ ...
│
...
Each of the groups has its respective layout, allowing us to customize the UI as desired. The (primary)/layout.js now looks like so:
export default function MainLayout({ children }) {
 return (
 <div className="flex flex-col min-h-screen mx-auto max-w-2xl px-4 pt-8 pb-16">
 <div className="flex-grow">
 <Header />
 <main className="my-0 py-16">{children}</main>
 </div>
 <Footer />
 </div>
 );
}
Meanwhile, the (custom)/layout.js looks like so:
import NewsletterFooter from '@/components/NewsletterFooter';

export default function CustomLayout({ children }) {
 return (
 <div className="flex flex-col min-h-screen mx-auto max-w-2xl px-4 pt-8 pb-16">
 <div className="flex-grow">
 <main className="my-0 py-16">{children}</main>
 </div>
 <NewsletterFooter />
 </div>
 );
}
Finally, the top-level app/layout.js file should now include the <html> and <body> tags as follows:
export default function RootLayout({ children }) {
 return (
 <html lang="en">
 <body>{children}</body>
 </html>
 );
}
If we save all the files, each route should render as expected!
So far, we’ve learned how the App Routing system simplifies layouts, nested routes, and nested layouts. In the next section, we’ll take a look at another important feature called “parallel routes” that help simplify how we implement parallel streaming.
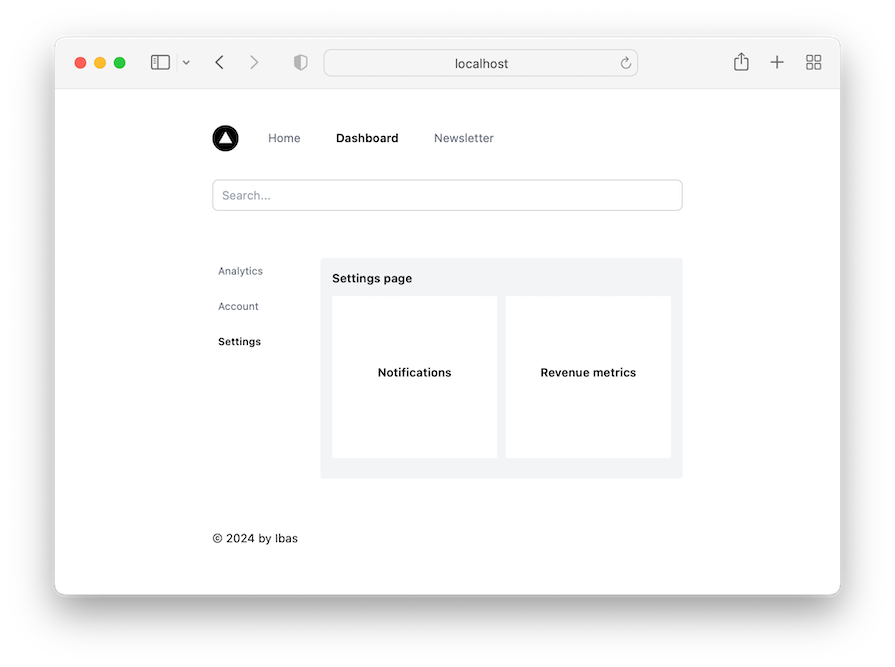
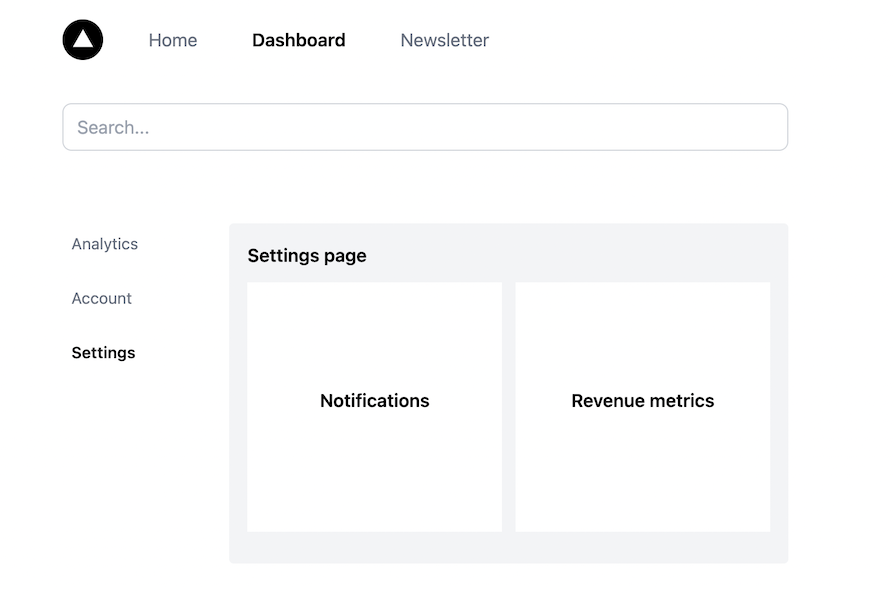
Parallel routes allow for simultaneous or conditional rendering of multiple pages within the same layout. Let’s say we want to simultaneously load different sections on the /dashboard/settings page whose content comes from different data sources — for example, Notifications and Revenue metrics.
Typically, we can create components for each of the sections and compose them within a /dashboard/settings/layout.js file:
import { Suspense } from 'react';

const SettingsPageLayout = ({ children }) => {
 return (
 <>
 {children}
 <div className="flex gap-3 h-[82%]">
 <div className="bg-white flex-1 p-3 flex justify-center items-center">
 <Notification />
 </div>
 <div className="bg-white flex-1 p-3 flex justify-center items-center">
 <Suspense fallback={<h2>Loading revenue...</h2>}>
 <Revenue />
 </Suspense>
 </div>
 </div>
 </>
 );
};

export default SettingsPageLayout;

const Notification = async () => {
 return <h2>Notification</h2>;
};

const Revenue = async () => {
 await new Promise((resolve) => setTimeout(resolve, 4000));
 return <h2>Revenue metrics</h2>;
};
We introduced a delay for the Revenue component to simulate an asynchronous operation in data fetching. We also used the Suspense boundary to show a fallback while the operation was ongoing.
As expected, the children prop in the layout file serves as a placeholder for the page content — i.e., the Settings page. Then, alongside the Notifications and Revenue metrics components, we have rendered multiple views within a layout:
👁 Multiple Views Rendered In Next Js Layout
Although this method of composing components is effective, employing parallel routing can yield the same results with added advantages.
To create parallel routes, we’ll define slots with the @folder convention. Let’s create slots for the Notifications and Revenue metrics. The folder structure should look like so:
dashboard
 ...
 ├── settings
 │ ├── @notifications
 │ │ └── page.js
 │ ├── @revenue
 │ │ └── page.js
 │ ├── layout.js
 │ └── page.js
Inside the individual slot page.js, we can render their respective component code. For instance, @revenue/page.js will contain the Revenue component:
export default async function Revenue() {
 await new Promise((resolve) => setTimeout(resolve, 5000));
 return <h2>Revenue metrics</h2>;
}
Each slot is then automatically passed to the layout in the same route segment as the prop. We can now access these props from the /dashboard/settings/layout.js file and render them in parallel alongside the children prop:
const SettingsPageLayout = ({ children, notifications, revenue }) => {
 return (
 <>
 {children}
 <div className="flex gap-3 h-[82%]">
 <div className="bg-white flex-1 p-3 flex justify-center items-center">
 {notifications}
 </div>

 <div className="bg-white flex-1 p-3 flex justify-center items-center">
 {revenue}
 </div>
 </div>
 </>
 );
};

export default SettingsPageLayout;
Now that we can stream pages independently, we can define the loading and error states for each of the routes or the entire route segment:
dashboard
 ...
 ├── settings
 │ ├── @notifications
 │ │ ├── error.js
 │ │ ├── loading.js
 │ │ └── page.js
 │ ├── @revenue
 │ │ ├── error.js
 │ │ ├── loading.js
 │ │ └── page.js
 │ ├── error.js
 │ ├── layout.js
 │ ├── loading.js
 │ └── page.js
If we trigger an error from the Revenue component, the loading state and error state should behave like so:
👁 Multiple Views Rendered In Next Js Layout Demonstrating Loading And Error States
See the full project source code on GitHub.
Understanding how layouts work in Next.js is crucial for building complex projects with the framework. In this guide, we’ve covered all the necessary steps to structure the rendered UI with shared content and use it across multiple routes.
We discussed how to achieve layouts and nested layouts in both the Pages Router and the new App Router. Additionally, we saw how to use route groups to create custom layouts for specific route segments. Finally, we learned how to implement parallel routes for the simultaneous rendering of multiple pages within a layout.
If you found this guide helpful, we encourage you to share it with others. If you have any questions or contributions, feel free to leave a comment.
See the final project hosted on Vercel.
Debugging Next applications can be difficult, especially when users experience issues that are difficult to reproduce. If you’re interested in monitoring and tracking state, automatically surfacing JavaScript errors, and tracking slow network requests and component load time, try LogRocket.
LogRocket captures console logs, errors, network requests, and pixel-perfect DOM recordings from user sessions and lets you replay them as users saw it, eliminating guesswork around why bugs happen — compatible with all frameworks.
LogRocket's Galileo AI watches sessions for you, instantly identifying and explaining user struggles with automated monitoring of your entire product experience.
The LogRocket Redux middleware package adds an extra layer of visibility into your user sessions. LogRocket logs all actions and state from your Redux stores.
👁 ImageModernize how you debug your Next.js apps — start monitoring for free.
Learn how to test Nuxt apps with Vitest, @nuxt/test-utils, runtime mocks, server route mocks, and Playwright e2e tests.
I had four weeks to build a complete app from scratch using AI tools like OpenCode and Claude Opus: here’s how it went.
Learn how to build a reusable Vue 3 table engine that powers tables, cards, and lists with shared sorting and pagination logic.
Compare the best React chart libraries for 2026, including Recharts, Nivo, visx, Apache ECharts, MUI X Charts, and more.
Hey there, want to help make our blog better?
Join LogRocket’s Content Advisory Board. You’ll help inform the type of content we create and get access to exclusive meetups, social accreditation, and swag.
Sign up now