 |
VOOZH | about |
|
VOOZH | about |
A table is a representation of data that typically uses rows and columns but sometimes employs a more complex structure. Tables support a variety of parameters and can be used to keep track of frequencies, records, and more.
👁 Vue Bootstrap Table ComponentWith Vue, we can easily build and implement tables for single-page applications using components, reusable pieces of code that build functional web applications. In this tutorial, we’ll learn the step-by-step approach for building a table component in Vue 3 with Bootstrap. You can find the complete code for the full implementation in this GitHub repo. Let’s get started!
The Replay is a weekly newsletter for dev and engineering leaders.
Delivered once a week, it's your curated guide to the most important conversations around frontend dev, emerging AI tools, and the state of modern software.
To follow along with this tutorial, you’ll need basic knowledge of Vue and Node.js installed on your local development machine. You can verify that you have Node.js installed by running the command below in your terminal:
node -v
First, run the code below to install the latest Vue CLI:
npm install -g @vue/cli
Create a new Vue 3 project using the Vue CLI:
vue create vue3-table
Bootstrap, a popular CSS framework for developing responsive and customizable features in mobile-friendly web apps, can also easily be used in different components. To set up Bootstrap for this project, first, we’ll install Bootstrap as follows:
npm i bootstrap
Then, import the CSS file to the project:
import "bootstrap/dist/css/bootstrap.min.css";
At the time of writing, Vue 3 is set as the default version in all Vue projects. Vue 3 introduces features to build efficient and robust applications, one of which is the Composition API.
The Composition API is an umbrella term that consists of a set of APIs that allow us to author Vue components using imported functions instead of declaring options. The Composition API is primarily used together with the <script setup> syntax in single-file components, enabling clean, efficient logic reuse in the form of composable functions for your codebase.
In this section, we’ll build a reactive table component from scratch, then add extra features to the table component. Let’s go through each part step-by-step.
To start, let’s create a component inside of our components folder named Table.vue. In defining the component, we’ll use the HTML table elements to set up the layout of the table. We can easily style the component using the CSS classes from Bootstrap:
<template>
 <table id="tableComponent" class="table table-bordered table-striped">
 </table>
</template>
A table consists of the table header, thead, and the table body, tbody. When building the component, we’ll consider separate data to pass as props for the header and footer, then create a for loop using the v-for directive to get each value for the table.
In the component, we’ll also create props that the component will receive as data from the parent component:
 <thead>
 <tr>
 <!-- loop through each value of the fields to get the table header -->
 <th v-for="field in fields" :key='field' @click="sortTable(field)" >
 {{field}} <i class="bi bi-sort-alpha-down" aria-label='Sort Icon'></i>
 </th>
 </tr>
 </thead>
 <tbody>
 <!-- Loop through the list get the each student data -->
 <tr v-for="item in filteredList" :key='item'>
 <td v-for="field in fields" :key='field'>{{item[field]}}</td>
 </tr>
 </tbody>
The final implementation of the table component is seen in the code below:
<template>
 </div>
<table id="tableComponent" class="table table-bordered table-striped">
 <thead>
 <tr>
 <!-- loop through each value of the fields to get the table header -->
 <th v-for="field in fields" :key='field' @click="sortTable(field)" >
 {{field}} <i class="bi bi-sort-alpha-down" aria-label='Sort Icon'></i>
 </th>
 </tr>
 </thead>
 <tbody>
 <!-- Loop through the list get the each student data -->
 <tr v-for="item in filteredList" :key='item'>
 <td v-for="field in fields" :key='field'>{{item[field]}}</td>
 </tr>
 </tbody>
</table>
</template>
<script>
export default {
 name: 'TableComponent',
 props:{
 //
 studentData:{
 type: Array,
 },
 fields:{
 type: Array,
 }
 },
}
</script>
Now that our table component is complete, we’ll import the table component and declare it with the props. Add the following code to the App.vue file:
<template>
 <div class="container text-center mt-5 mb-5">
 <h1 class="mt-5 fw-bolder text-success "> Student's Database </h1>
 <div class="table-responsive my-5">

 <!-- The table component -->
 <Table :fields='fields' :studentData ="studentData"></Table>
 </div>

</div>
</template>
<script>
// Importing the table component
import Table from './components/Table.vue'
export default {
 name: 'App',
 components: {
 Table
 },
 setup(){
 //An array of values for the data
 const studentData = [
 {ID:"01", Name: "Abiola Esther", Course:"Computer Science", Gender:"Female", Age:"17"},
 {ID:"02", Name: "Robert V. Kratz", Course:"Philosophy", Gender:"Male", Age:'19'},
 {ID:"03", Name: "Kristen Anderson", Course:"Economics", Gender:"Female", Age:'20'},
 {ID:"04", Name: "Adam Simon", Course:"Food science", Gender:"Male", Age:'21'},
 {ID:"05", Name: "Daisy Katherine", Course:"Business studies", Gender:"Female", Age:'22'},
 ]
 const fields = [
 'ID','Name','Course','Gender','Age'
 ]
 return{studentData,fields}
 },
}
</script>
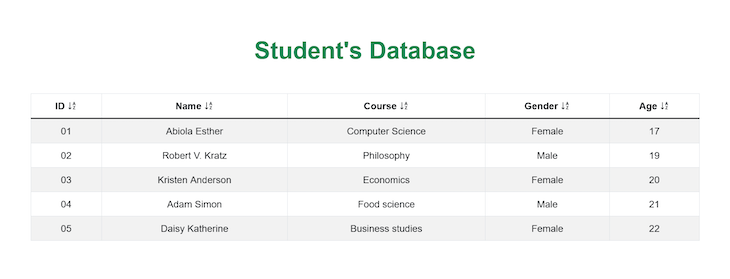
The output of the code above is as follows:
Depending on the use case of the table component in the application you’re building, there are different features you can include in the component to improve the user experience, like multiple column sorting and filtering. In this section, we’ll learn how to include these features in your table component.
Sorting can be in either ascending or descending order. For a table, it depends on the particular column selected. You can easily implement multiple column sorting using the default JavaScript function or other external plugins like Lodash, which provides different template functions that are easier to add to the component.
Install Lodash with the command below:
npm i --save lodash
The Lodash library provides various functions that can work with arrays, collection, strings, objects, and numbers. We then import the sort function from lodash directly:
// Importing the lodash library
import { sortBy} from 'lodash';
We then create a sortTable() function to handle clicking the event. A new list is also created to update the data with the sorted values in real time:
// a value to check for sort
let sort = ref(false);
let updatedList = ref([])
// a function to sort the table
const sortTable = (col) => {
 sort.value = true
 // Use of _.sortBy() method
 updatedList.value = sortBy(props.studentData,col)
 }
To specify the column to be sorted, the col parameter is passed to each header. When a user clicks on either of the headers, the column is set to sort in ascending order:
<th v-for="field in fields" :key='field' @click="sortTable(field)" >
 {{field}} <i class="bi bi-sort-alpha-down" aria-label='Sort Icon'></i>
</th>
Items are sorted from lowest to highest, i.e. A to Z, and will be displayed with the lowest value in the first row with progressively higher values in the following rows:
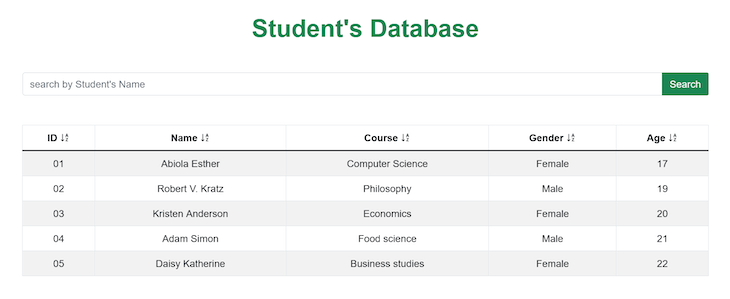
In the table, we could also search for data by a specified condition or query. We can implement filtering using the JavaScript filter function. First, we create a search bar layout:
<div class="searchBar">
 <!-- Filter Search -->
 <div class="input-group mb-5">
 <input type="search" class="form-control" v-model='searchQuery' placeholder="Student's Name" aria-label="Recipient's username" aria-describedby="button-addon2">
 </div
 </div>
Using the computed property, we create a new list that updates the old list based on the return value of the filter function:
const filteredList = computed(() => {
 return sortedList.value.filter((product) => {
 return (
 // converts the query and value to lower case index
 product.Name.toLowerCase().indexOf(searchQuery.value.toLowerCase()) != -1
 )
 });
Tables represent data in a visual format that is easier for users to view and understand in a web application. In this article, we’ve built a responsive, accessible table component from scratch in Vue 3. We also used the Bootstrap framework for custom styling, then went further to add sorting and filtering features to the component.
You can build on the foundation laid out in this article to include more features that improve your overall UX. I hope you enjoyed this tutorial, and be sure to reach out to me on Twitter for any questions. Happy coding!
Debugging Vue.js applications can be difficult, especially when users experience issues that are difficult to reproduce. If you’re interested in monitoring and tracking Vue mutations and actions for all of your users in production, try LogRocket.
👁 LogRocket Dashboard Free Trial BannerLogRocket lets you replay user sessions, eliminating guesswork by showing exactly what users experienced. It captures console logs, errors, network requests, and pixel-perfect DOM recordings — compatible with all frameworks.
With Galileo AI, you can instantly identify and explain user struggles with automated monitoring of your entire product experience.
Modernize how you debug your Vue apps — start monitoring for free.
Learn how next-browser gives AI agents runtime context for debugging Next.js apps, including React props, hydration, PPR, forms, and performance.
Build dynamic LLM routing in Next.js with OpenRouter, TanStack AI, task classification, model fallbacks, and cost-aware routing.
TSRX adds first-class control flow, conditional hooks, and scoped styles to React via a TypeScript compiler extension — no new framework required.
Learn how to build a full React Native auth system using Better Auth and Expo — with email/password login, Google OAuth, session persistence, and protected routes.
Hey there, want to help make our blog better?
Join LogRocket’s Content Advisory Board. You’ll help inform the type of content we create and get access to exclusive meetups, social accreditation, and swag.
Sign up now