 |
VOOZH | about |
|
VOOZH | about |
AI coding CLIs are quickly becoming must-have tools for developers, but not all of them are worth your time. To see which ones actually deliver, I tested five AI CLI tools by building the same application with each and evaluating them on four dimensions: code quality, speed, ease of use, and reliability. In this article, we’ll explore how each tool performs in practice, where they fall short, and which ones genuinely fit into a real-world workflow, so you can choose the right one with confidence.
👁 ImageThe Replay is a weekly newsletter for dev and engineering leaders.
Delivered once a week, it's your curated guide to the most important conversations around frontend dev, emerging AI tools, and the state of modern software.
For a fair, apples-to-apples comparison, I ran all five CLIs against the same React codebase, scaffolded with Vite. Tailwind CSS was already set up. I duplicated this boilerplate five times and used each copy as the starting point for one CLI.
Each tool was asked to build the same Todo app using React and TypeScript. That way, every CLI was evaluated on the same playing field.
The AI CLIs tested were:
For each tool, I focused on a few core questions:
One last thing: always review AI-generated code before using it in a production environment.
This is the prompt I used to generate the test application:
In this React project, modify the application to build a Todo app with the following requirements:
TodoList.tsxsrc/App.tsx to remove its existing content and render only the <TodoList /> componentThat’s the exact prompt each CLI received, unchanged, to keep the comparison fair.
The Gemini CLI is a free, open-source AI agent that brings Gemini’s capabilities right into your terminal.
Let’s quickly see how to set it up.
To install Gemini CLI, you must have Node.js version 20 or higher before running the following command:
npm install -g @google/gemini-cli
After installation and setting up with your Google AI account, just run:
gemini
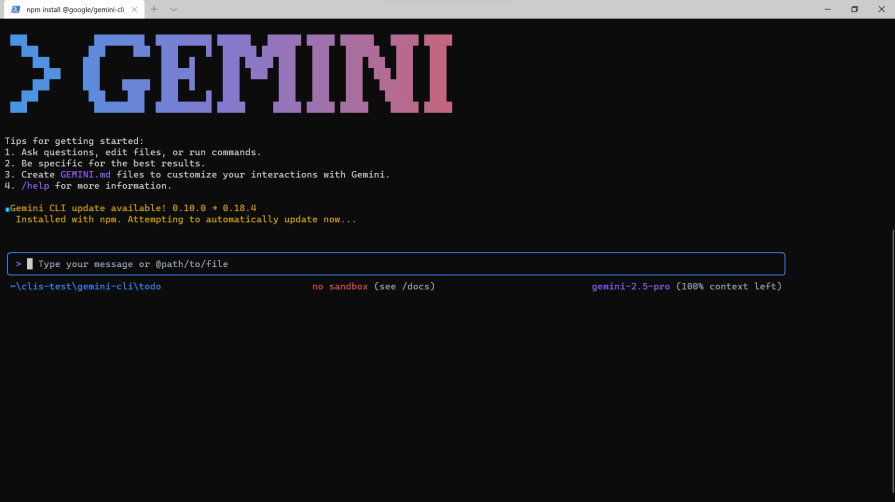
One thing to note is that Gemini CLI was already installed and set up on my machine before this testing.
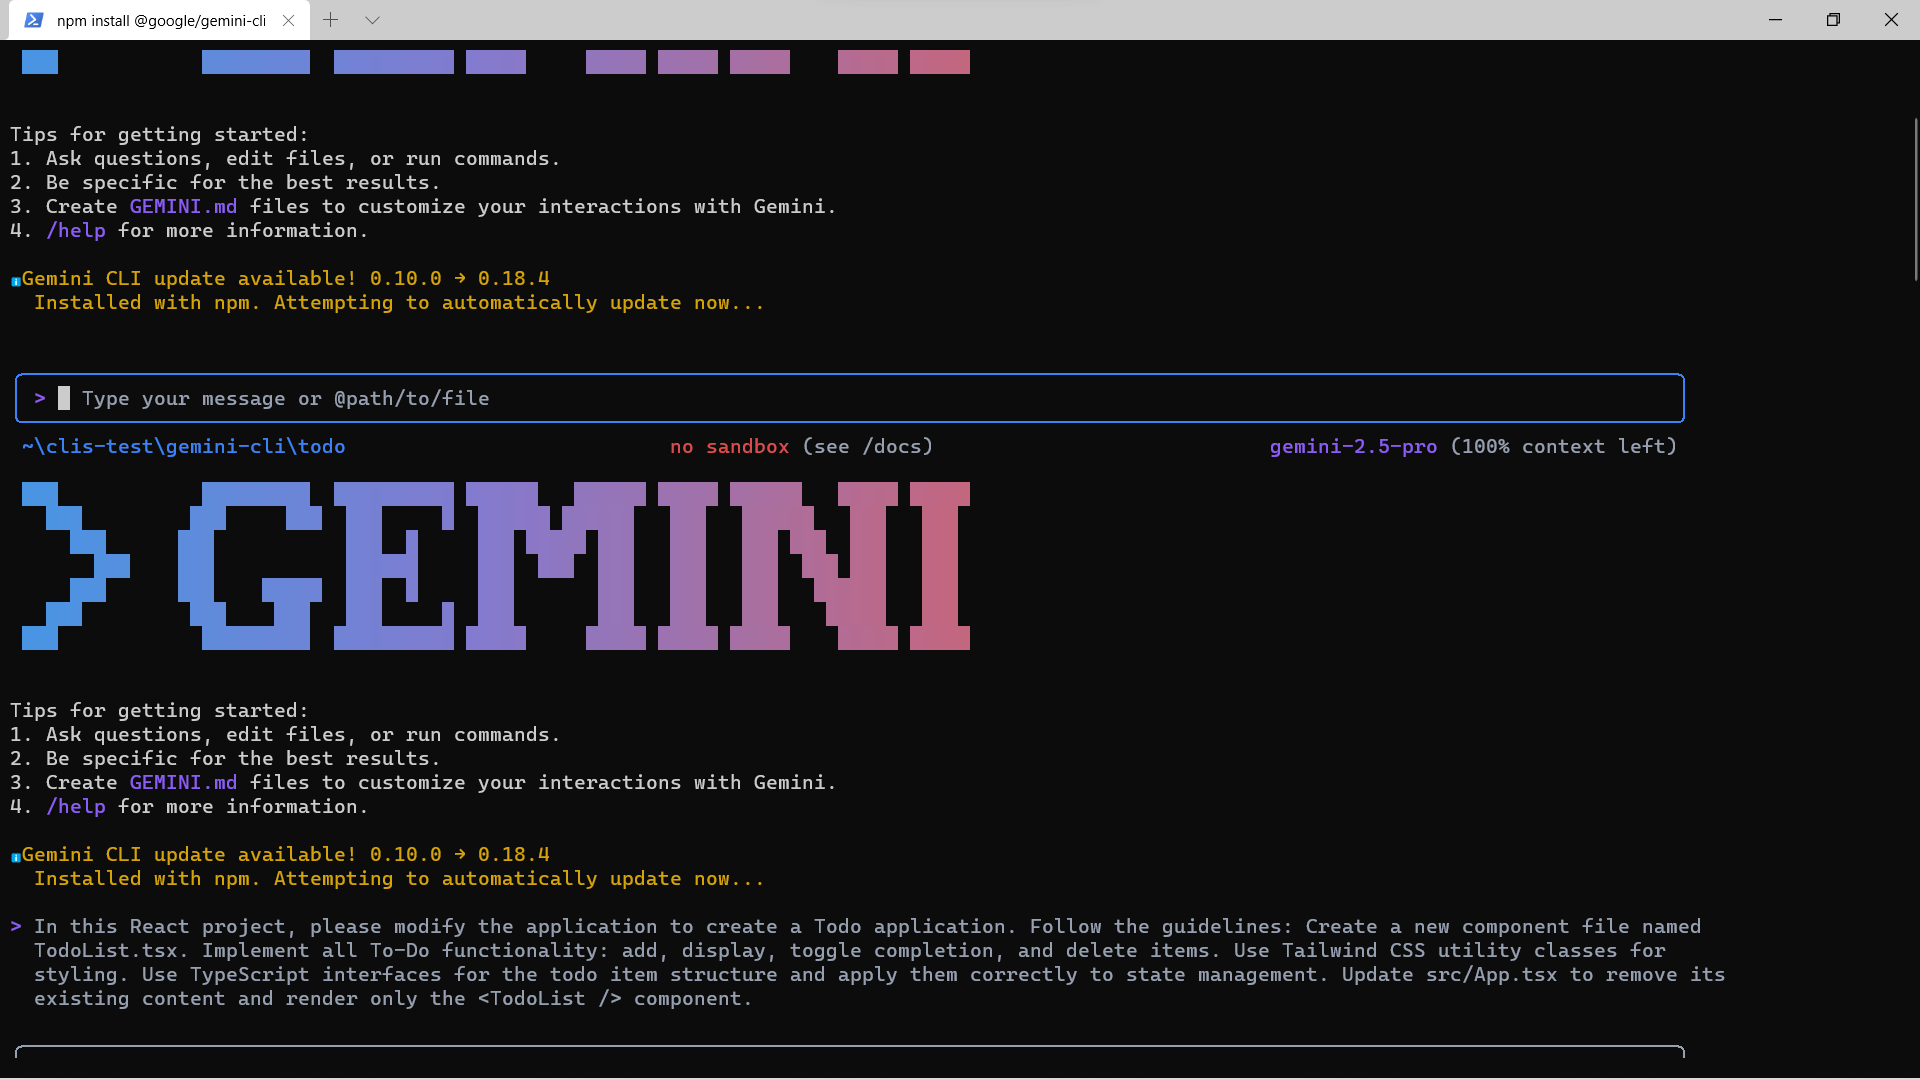
I quickly ran the prompt to see what Gemini CLI would come up with:
In under 2 minutes, Gemini CLI was able to come up with the Todo application:
Let’s check out the code it generated:
import React, { useState } from 'react';

interface Todo {
 id: number;
 text: string;
 completed: boolean;
}

const TodoList: React.FC = () => {
 const [todos, setTodos] = useState<Todo[]>([]);
 const [input, setInput] = useState<string>('');

 const handleAddTodo = () => {
 if (input.trim() !== '') {
 const newTodo: Todo = {
 id: Date.now(),
 text: input,
 completed: false,
 };
 setTodos([...todos, newTodo]);
 setInput('');
 }
 };

 const handleToggleComplete = (id: number) => {
 setTodos(
 todos.map(todo =>
 todo.id === id ? { ...todo, completed: !todo.completed } : todo
 )
 );
 };

 const handleDeleteTodo = (id: number) => {
 setTodos(todos.filter(todo => todo.id !== id));
 };

 return (
 <div className="min-h-screen bg-gray-100 flex items-center justify-center">
 <div className="bg-white p-8 rounded-lg shadow-lg w-full max-w-md">
 <h1 className="text-2xl font-bold mb-4 text-center">Todo List</h1>
 <div className="flex mb-4">
 <input
 type="text"
 className="flex-grow p-2 border rounded-l-lg focus:outline-none"
 value={input}
 onChange={e => setInput(e.target.value)}
 placeholder="Add a new todo"
 />
 <button
 onClick={handleAddTodo}
 className="bg-blue-500 text-white p-2 rounded-r-lg hover:bg-blue-600"
 >
 Add
 </button>
 </div>
 <ul>
 {todos.map(todo => (
 <li
 key={todo.id}
 className={`flex items-center justify-between p-2 mb-2 rounded-lg ${
 todo.completed ? 'bg-green-100' : 'bg-gray-200'
 }`}
 >
 <span
 className={`flex-grow cursor-pointer ${
 todo.completed ? 'line-through text-gray-500' : ''
 }`}
 onClick={() => handleToggleComplete(todo.id)}
 >
 {todo.text}
 </span>
 <button
 onClick={() => handleDeleteTodo(todo.id)}
 className="bg-red-500 text-white p-1 rounded-lg ml-2 hover:bg-red-600"
 >
 Delete
 </button>
 </li>
 ))}
 </ul>
 </div>
 </div>
 );
};

export default TodoList;
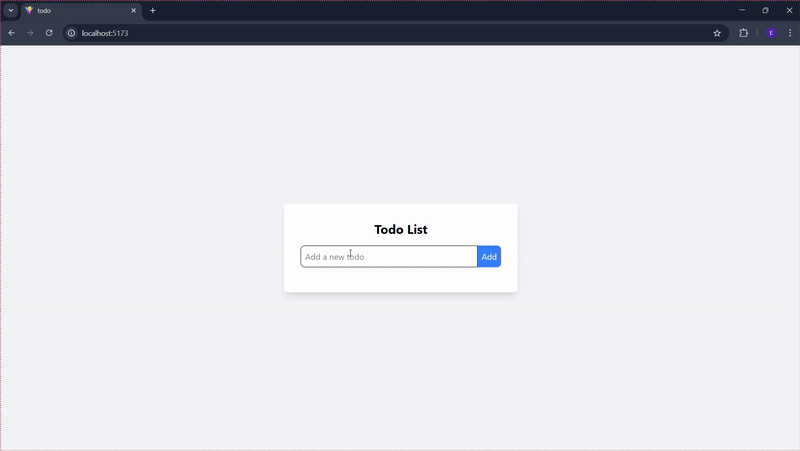
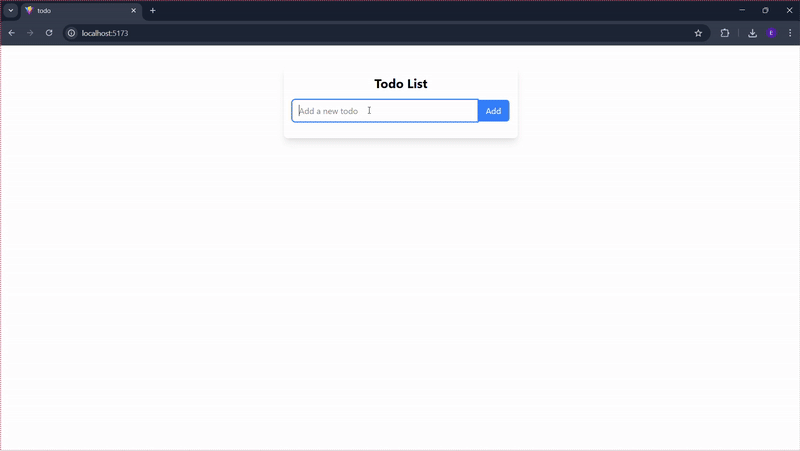
On the downside, there’s no Enter key support for submitting new todos. Completion can only be toggled by clicking the text, which is less accessible than using a checkbox. You can see this behavior directly in the browser:
The generated code was production-ready, but the UX fell short. There’s no Enter key support for adding todos, and completion is toggled by clicking the text instead of a checkbox. That said, the logic was clean and easy to follow. Gemini CLI completed the task in under two minutes.
Qwen CLI is a research-purpose clone of Gemini CLI. Just like Gemini CLI, it is completely free to use.
To get Qwen CLI running on your machine, ensure you have Node.js version 20 or higher installed.
Then run the following npm command:
npm install -g @qwen-code/qwen-code@latest
When you are done installing Qwen, run the command below to get it started:
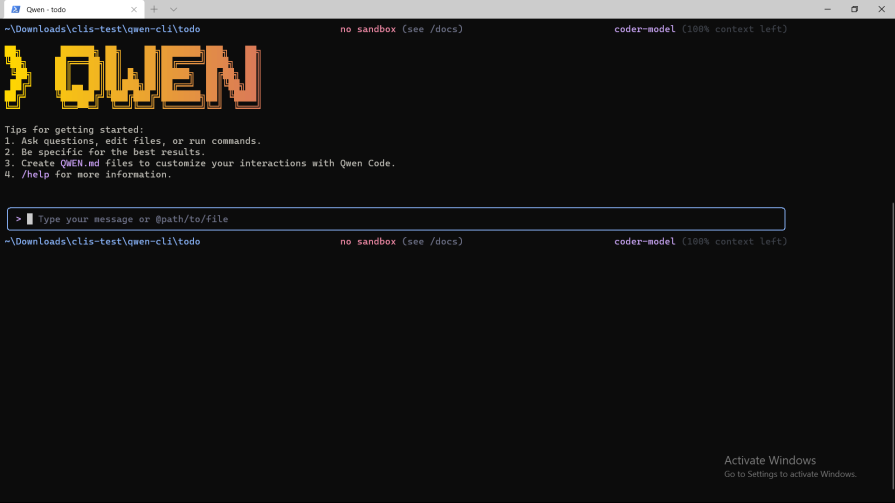
qwen
You will be greeted with a similar screen to this on logging in:
On giving it the prompt, Qwen CLI quickly went to work:
Qwen CLI used more than 2 minutes to come up with the test application.
Check out the code it generated:
import React, { useState } from 'react';

// TypeScript interface for todo items
interface Todo {
 id: string;
 text: string;
 completed: boolean;
}

const TodoList: React.FC = () => {
 const [todos, setTodos] = useState<Todo[]>([]);
 const [inputValue, setInputValue] = useState<string>('');

 // Function to add a new todo
 const addTodo = () => {
 if (inputValue.trim() !== '') {
 const newTodo: Todo = {
 id: Date.now().toString(),
 text: inputValue.trim(),
 completed: false,
 };
 setTodos([...todos, newTodo]);
 setInputValue('');
 }
 };

 // Function to toggle todo completion status
 const toggleTodo = (id: string) => {
 setTodos(
 todos.map((todo) =>
 todo.id === id ? { ...todo, completed: !todo.completed } : todo
 )
 );
 };

 // Function to delete a todo
 const deleteTodo = (id: string) => {
 setTodos(todos.filter((todo) => todo.id !== id));
 };

 // Handle Enter key press in input
 const handleKeyPress = (e: React.KeyboardEvent) => {
 if (e.key === 'Enter') {
 addTodo();
 }
 };

 return (
 <div className="max-w-md mx-auto p-6 bg-white rounded-lg shadow-lg">
 <h1 className="text-3xl font-bold text-center text-gray-800 mb-6">Todo List</h1>


 {/* Input section */}
 <div className="flex mb-6">
 <input
 type="text"
 value={inputValue}
 onChange={(e) => setInputValue(e.target.value)}
 onKeyPress={handleKeyPress}
 placeholder="Add a new task..."
 className="flex-grow px-4 py-2 border border-gray-300 rounded-l-lg focus:outline-none focus:ring-2 focus:ring-blue-500"
 />
 <button
 onClick={addTodo}
 className="bg-blue-500 hover:bg-blue-600 text-white px-4 py-2 rounded-r-lg transition duration-200"
 >
 Add
 </button>
 </div>

 {/* Todo list */}
 <ul className="space-y-3">
 {todos.map((todo) => (
 <li
 key={todo.id}
 className="flex items-center justify-between p-3 border-b border-gray-200 hover:bg-gray-50"
 >
 <div className="flex items-center">
 <input
 type="checkbox"
 checked={todo.completed}
 onChange={() => toggleTodo(todo.id)}
 className="h-5 w-5 text-blue-600 rounded focus:ring-blue-500"
 />
 <span
 className={`ml-3 ${todo.completed ? 'line-through text-gray-500' : 'text-gray-800'}`}
 >
 {todo.text}
 </span>
 </div>
 <button
 onClick={() => deleteTodo(todo.id)}
 className="text-red-500 hover:text-red-700 ml-4 px-2 py-1 rounded transition duration-200"
 >
 Delete
 </button>
 </li>
 ))}
 </ul>

 {/* Empty state */}
 {todos.length === 0 && (
 <p className="text-center text-gray-500 mt-6">No tasks yet. Add one above!</p>
 )}
 </div>
 );
};

export default TodoList;
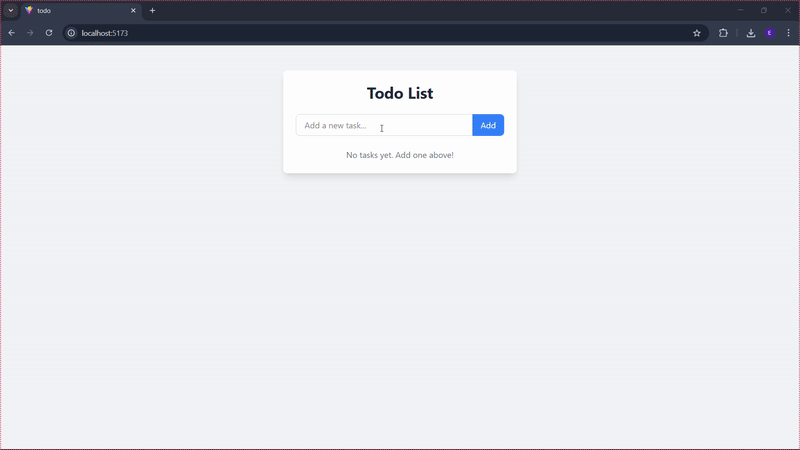
A look through the codebase shows that Qwen CLI includes Enter key submission, which is good for user experience.
It also included a checkbox for toggling completion. Qwen CLI also added a helpful empty state message for better user feedback.
Below is how it looks in the browser:
For this test, Qwen CLI delivered production-ready code. The quality was excellent, with solid UX improvements like Enter-key submission, a clearer checkbox, and an empty-state message. The functions were well named, and the logic was easy to follow.
The only drawback is speed, as Qwen CLI took a little over 2 minutes to generate the app, which is slower than some competitors.
Crush CLI is a fast, responsive AI-powered CLI coding assistant built with Charm libraries, supporting multiple models, LSP, and plugins. It is one of the most aesthetically pleasing AI CLI tools in the market.
With its colourful interface and nice aesthetics, we will see if it is more than this.
To install Crush CLI, run the following command:
npm install -g @charmland/crush
Thereafter, you can then start it with:
crush
I used the same prompt as the other CLIs:
Crush CLI used about a minute and some seconds to come up with the code below:
import React, { useState } from 'react';

interface Todo {
 id: number;
 text: string;
 completed: boolean;
}

const TodoList: React.FC = () => {
 const [todos, setTodos] = useState<Todo[]>([]);
 const [newTodo, setNewTodo] = useState('');

 const addTodo = () => {
 if (newTodo.trim()) {
 setTodos([...todos, { id: Date.now(), text: newTodo, completed: false }]);
 setNewTodo('');
 }
 };

 const toggleComplete = (id: number) => {
 setTodos(todos.map(todo => todo.id === id ? { ...todo, completed: !todo.completed } : todo));
 };

 const deleteTodo = (id: number) => {
 setTodos(todos.filter(todo => todo.id !== id));
 };

 return (
 <div className="container mx-auto mt-10 p-5 bg-white shadow-md rounded-lg">
 <h1 className="text-2xl font-bold mb-4">Todo List</h1>
 <div className="flex">
 <input
 type="text"
 className="shadow appearance-none border rounded w-full py-2 px-3 mr-4 text-gray-700 leading-tight focus:outline-none focus:shadow-outline"
 placeholder="Add New Todo"
 value={newTodo}
 onChange={e => setNewTodo(e.target.value)}
 />
 <button
 className="bg-blue-500 hover:bg-blue-700 text-white font-bold py-2 px-4 rounded focus:outline-none focus:shadow-outline"
 onClick={addTodo}
 >
 Add
 </button>
 </div>
 <ul>
 {todos.map(todo => (
 <li
 key={todo.id}
 className={`flex justify-between items-center py-2 border-b border-gray-200 ${todo.completed ? 'line-through text-gray-500' : ''}`}
 >
 <span onClick={() => toggleComplete(todo.id)} className="cursor-pointer">
 {todo.text}
 </span>
 <div>
 <button
 className="bg-red-500 hover:bg-red-700 text-white font-bold py-1 px-2 rounded focus:outline-none focus:shadow-outline"
 onClick={() => deleteTodo(todo.id)}
 >
 Delete
 </button>
 </div>
 </li>
 ))}
 </ul>
 </div>
 );
};

export default TodoList;
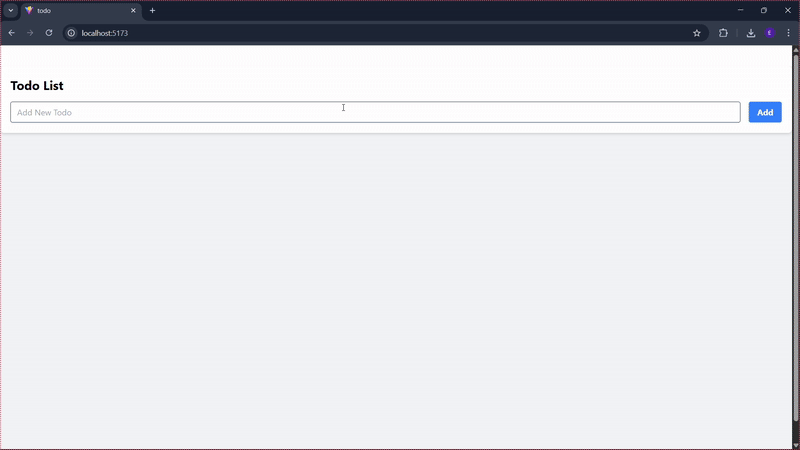
Crush CLI implemented all the required features correctly and generated clean, concise component logic with clear state names.
However, it didn’t support submitting with the Enter key and relied on clickable text to toggle completed todos.
This is how it looks in the browser:
Generated code was suitable for production environments.
The code quality was good, featuring clean and concise component logic with clear state variable names. However, it lacked Enter-key submission, and using clickable text to toggle a todo isn’t as user-friendly as a checkbox.
On the plus side, Crush CLI finished the entire task in about 1.5 minutes.
Kilocode CLI is one of the CLI tools tested.
It prides itself on accelerating development with AI-driven code generation and task automation
To install the Kilocode CLI, run the command below:
npm install -g @kilocode/cli
On sign-in, you will be presented with a screen like this:
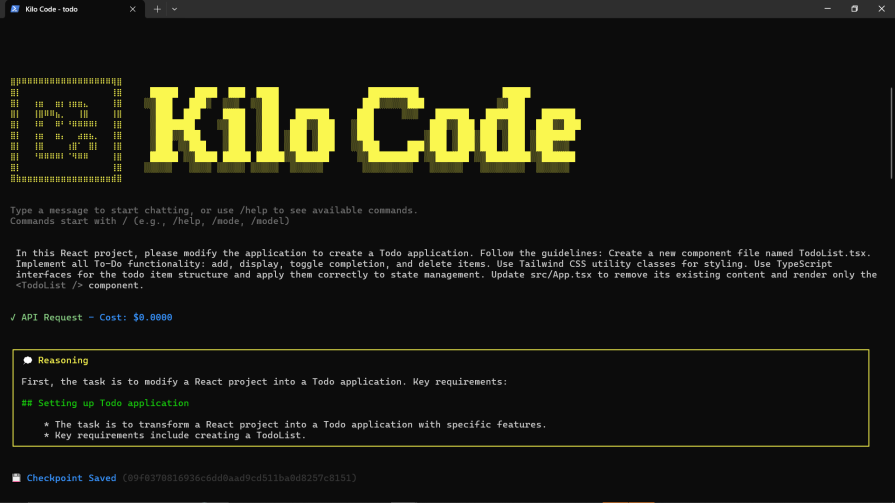
Like the rest of the CLIs, I used the prompt below to generate the test Todo application:
Apart from the difficulty with Kilocode writing to file sometimes, it took less than a minute to come up with the code:
import React, { useState } from 'react';

interface Todo {
 id: number;
 text: string;
 completed: boolean;
}

const TodoList: React.FC = () => {
 const [todos, setTodos] = useState<Todo[]>([]);
 const [inputValue, setInputValue] = useState<string>('');

 const addTodo = () => {
 if (inputValue.trim()) {
 const newTodo: Todo = {
 id: Date.now(),
 text: inputValue.trim(),
 completed: false,
 };
 setTodos([...todos, newTodo]);
 setInputValue('');
 }
 };

 const toggleTodo = (id: number) => {
 setTodos(todos.map(todo =>
 todo.id === id ? { ...todo, completed: !todo.completed } : todo
 ));
 };

 const deleteTodo = (id: number) => {
 setTodos(todos.filter(todo => todo.id !== id));
 };

 return (
 <div className="max-w-md mx-auto mt-10 p-4 bg-white rounded-lg shadow-lg">
 <h1 className="text-2xl font-bold mb-4 text-center">Todo List</h1>
 <div className="flex mb-4">
 <input
 type="text"
 value={inputValue}
 onChange={(e) => setInputValue(e.target.value)}
 placeholder="Add a new todo"
 className="flex-1 px-3 py-2 border border-gray-300 rounded-l-md focus:outline-none focus:ring-2 focus:ring-blue-500"
 />
 <button
 onClick={addTodo}
 className="px-4 py-2 bg-blue-500 text-white rounded-r-md hover:bg-blue-600 focus:outline-none focus:ring-2 focus:ring-blue-500"
 >
 Add
 </button>
 </div>
 <ul className="space-y-2">
 {todos.map(todo => (
 <li key={todo.id} className="flex items-center justify-between p-2 bg-gray-100 rounded-md">
 <div className="flex items-center">
 <input
 type="checkbox"
 checked={todo.completed}
 onChange={() => toggleTodo(todo.id)}
 className="mr-2"
 />
 <span className={`flex-1 ${todo.completed ? 'line-through text-gray-500' : ''}`}>
 {todo.text}
 </span>
 </div>
 <button
 onClick={() => deleteTodo(todo.id)}
 className="px-2 py-1 bg-red-500 text-white rounded-md hover:bg-red-600 focus:outline-none focus:ring-2 focus:ring-red-500"
 >
 Delete
 </button>
 </li>
 ))}
 </ul>
 </div>
 );
};

export default TodoList;
Kilocode used a checkbox for toggling completion, a major UX win over Gemini/Crush CLIs. It also used clear function names.
On the downside, it missed the Enter key submission and the Empty state message.
Check out the result in the browser:
Kilocode CLI delivered production-grade code. The code quality was good, featuring clear function names. A significant UX win was the inclusion of a dedicated checkbox for toggling completion. However, it lacked Enter key submission and an empty state message. The logic was concise.
Kilocode CLI was the fastest among the tested tools, completing the task in less than 1 minute.
Additionally, there were occasional difficulties with Kilocode CLI writing directly to files.
Codex CLI is an AI coding CLI tool from OpenAI.
Codex CLI primarily works on Mac and Linux. It offers no direct support for Windows.
To run it on Windows, I used the Windows Subsystem for Linux (WSL).
After setting up Wsl on Windows. You can then run the following command to install Codex CLI:
npm install -g @openai/codex
Below is how the test went with Codex CLI:
Codex CLI took more than 3 minutes to come up with the code below:
import React, { useState } from 'react';

// TypeScript interface for todo item structure
interface TodoItem {
 id: number;
 text: string;
 completed: boolean;
}

const TodoList: React.FC = () => {
 const [todos, setTodos] = useState<TodoItem[]>([]);
 const [inputText, setInputText] = useState<string>('');

 // Add new todo item
 const addTodo = () => {
 if (inputText.trim() === '') return;

 const newTodo: TodoItem = {
 id: Date.now(),
 text: inputText.trim(),
 completed: false,
 };

 setTodos([...todos, newTodo]);
 setInputText('');
 };

 // Toggle completion status
 const toggleTodo = (id: number) => {
 setTodos(
 todos.map(todo =>
 todo.id === id ? { ...todo, completed: !todo.completed } : todo
 )
 );
 };

 // Delete todo item
 const deleteTodo = (id: number) => {
 setTodos(todos.filter(todo => todo.id !== id));
 };

 // Handle Enter key press
 const handleKeyPress = (e: React.KeyboardEvent) => {
 if (e.key === 'Enter') {
 addTodo();
 }
 };

 return (
 <div className="min-h-screen bg-gray-50 py-8">
 <div className="max-w-2xl mx-auto px-4">
 <div className="bg-white rounded-lg shadow-lg p-6">
 <h1 className="text-3xl font-bold text-gray-800 mb-6 text-center">
 Todo Application
 </h1>

 {/* Input section */}
 <div className="flex gap-3 mb-6">
 <input
 type="text"
 value={inputText}
 onChange={(e) => setInputText(e.target.value)}
 onKeyPress={handleKeyPress}
 placeholder="What needs to be done?"
 className="flex-1 px-4 py-3 border border-gray-300 rounded-lg focus:outline-none focus:ring-2 focus:ring-blue-500 focus:border-transparent"
 />
 <button
 onClick={addTodo}
 className="px-6 py-3 bg-blue-500 text-white font-semibold rounded-lg hover:bg-blue-600 focus:outline-none focus:ring-2 focus:ring-blue-500 focus:ring-offset-2 transition-colors"
 >
 Add Todo
 </button>
 </div>

 {/* Todo list */}
 <div className="space-y-3">
 {todos.length === 0 ? (
 <div className="text-center text-gray-500 py-8">
 No todos yet. Add one above!
 </div>
 ) : (
 todos.map(todo => (
 <div
 key={todo.id}
 className={`flex items-center gap-3 p-4 rounded-lg border-2 transition-all ${
 todo.completed
 ? 'bg-green-50 border-green-200'
 : 'bg-white border-gray-200 hover:border-blue-300'
 }`}
 >
 <button
 onClick={() => toggleTodo(todo.id)}
 className={`w-5 h-5 rounded border-2 flex items-center justify-center transition-all ${
 todo.completed
 ? 'bg-green-500 border-green-500'
 : 'border-gray-400 hover:border-blue-500'
 }`}
 >
 {todo.completed && (
 <svg className="w-3 h-3 text-white" fill="none" stroke="currentColor" viewBox="0 0 24 24">
 <path strokeLinecap="round" strokeLinejoin="round" strokeWidth={3} d="M5 13l4 4L19 7" />
 </svg>
 )}
 </button>

 <span
 className={`flex-1 text-lg ${
 todo.completed
 ? 'text-green-800 line-through'
 : 'text-gray-800'
 }`}
 >
 {todo.text}
 </span>

 <button
 onClick={() => deleteTodo(todo.id)}
 className="px-3 py-1 text-red-600 hover:text-red-800 hover:bg-red-50 rounded transition-colors"
 >
 Delete
 </button>
 </div>
 ))
 )}
 </div>

 {/* Summary */}
 {todos.length > 0 && (
 <div className="mt-6 text-sm text-gray-600">
 {todos.filter(t => t.completed).length} of {todos.length} completed
 </div>
 )}
 </div>
 </div>
 </div>
 );
};

export default TodoList;
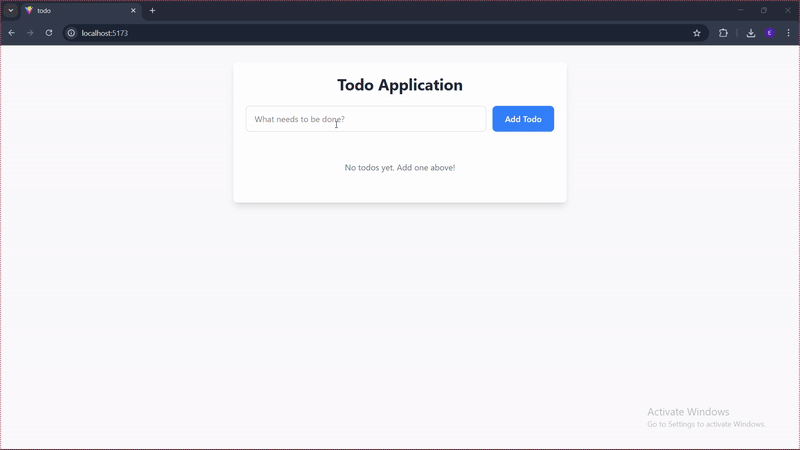
Codex CLI included Enter key submission and an empty state message.
Finally, it included a completion summary at the bottom, a feature none of the other CLIs added.
See how it looks in the browser:
Codex CLI generated code suitable for production use.
The code quality was excellent. It offered superior UX with features like Enter key submission, a custom-styled completion toggle, an empty state message, and a unique completion summary at the bottom. The logic was well-structured.
Codex CLI was the slowest among the tested tools, taking over 3 minutes to generate the application.
Here’s a summary of how the five CLIs performed across key evaluation criteria:
| Tool | Produces production-ready code? | Code quality and UX | Concise logic? | Time taken |
|---|---|---|---|---|
| Gemini CLI | Yes | Good code quality, but the UX was lacking | Yes | Under 2 minutes |
| Qwen CLI | Yes | Excellent code quality with significant UX improvements | Yes | Over 2 minutes |
| Crush CLI | Yes | Good code quality | Yes | Approx. 1.5 minutes |
| Kilocode CLI | Yes | Good code quality with average UX | Yes | Under 1 minute |
| Codex CLI | Yes | Excellent code quality with superior UX | Yes | Over 3 minutes |
All five AI CLI tools were able to generate functional, production-ready code, but they differ in meaningful ways. The right choice ultimately depends on what you value most in your workflow. If speed is your priority, Kilocode stands out. If you want a balance of speed and basic usability, Gemini or Crush are solid options. And if polished UX and feature completeness matter most, Qwen and Codex clearly lead the pack.
No matter which tool you choose, always review AI-generated code before shipping it to production.
Claude Code vs. OpenCode in a real Next.js refactor: benchmark results, mistakes, prompts, and when to use each CLI agent.
Every time you explain your team’s coding standards to Claude, you are doing work that should be reusable. The same […]
Learn how to move beyond one-shot prompting in Claude with structured workflows for AI-assisted coding, debugging, PR reviews, documentation, testing, and automation.
Learn how to build advanced Next.js forms with rule engines, client-side previews, Server Actions, and server-validated form logic.
Would you be interested in joining LogRocket's developer community?
Join LogRocket’s Content Advisory Board. You’ll help inform the type of content we create and get access to exclusive meetups, social accreditation, and swag.
Sign up now