 |
VOOZH | about |
|
VOOZH | about |
ESLint is an amazing tool that enforces code styles and helps keep our code clean. It can help prevent bugs and allow us to write much more readable code. In addition to independent developers, using this tool will also help if you working on a team and help maintain some consistency throughout projects across multiple developers.
👁 ImageIn this article, I’m going to show you how to set up and troubleshoot with ESLint in a Next.js application.
The Replay is a weekly newsletter for dev and engineering leaders.
Delivered once a week, it's your curated guide to the most important conversations around frontend dev, emerging AI tools, and the state of modern software.
Inside your Next.js app, add a new script called lint — its value should be next lint:
"scripts" : {
 ...
 "lint": "next lint"
}
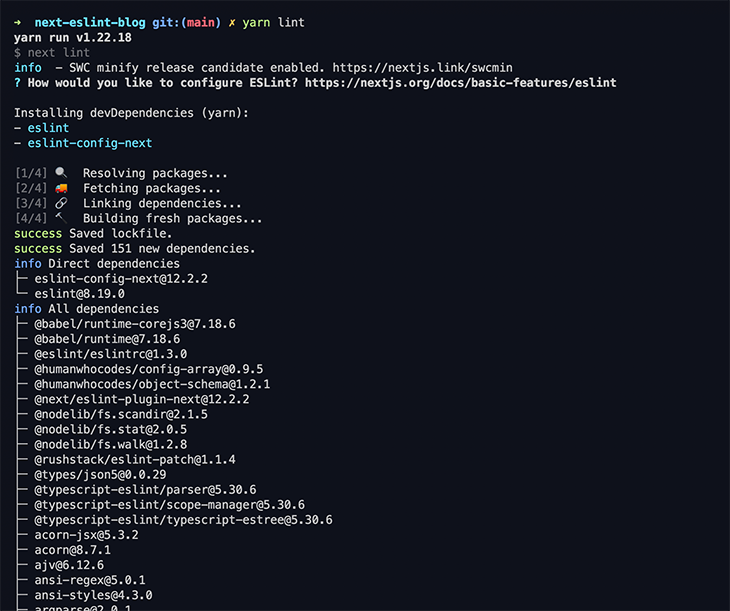
Now run:
yarn lint
You will be shown a message saying, “How would you like to configure ESLint?” I recommend using “Strict”, but you can choose whatever your needs require.
👁 How to enable strict configuration in ESLint
You will now see a new .eslintrc.json file has been created for you. You can use this file to customize the rules.
Custom rules and plugins are of great importance while using ESLint, as they define how you want to structure the code, when to give warnings, and when to give errors.
Firstly, rename .eslintrc.json to .eslintrc.js. Now, let’s look at how we can apply some strict rules to maintain a good code structure. This is the ESLint config that I like to use:
const prettierConfig = require("./.prettierrc.js");

module.exports = {
 env: {
 browser: true,
 commonjs: true,
 es2021: true,
 node: true,
 },
 extends: [
 "eslint:recommended",
 "plugin:react/recommended",
 "plugin:react-hooks/recommended",
 "plugin:prettier/recommended",
 "plugin:@typescript-eslint/eslint-recommended",
 "plugin:@typescript-eslint/recommended",
 "next/core-web-vitals",
 ],
 parserOptions: {
 ecmaFeatures: {
 jsx: true,
 },
 ecmaVersion: 12,
 sourceType: "module",
 },
 plugins: ["react"],
 rules: {
 // Possible errors
 "no-console": "warn",
 // Best practices
 "dot-notation": "error",
 "no-else-return": "error",
 "no-floating-decimal": "error",
 "no-sequences": "error",
 // Stylistic
 "array-bracket-spacing": "error",
 "computed-property-spacing": ["error", "never"],
 curly: "error",
 "no-lonely-if": "error",
 "no-unneeded-ternary": "error",
 "one-var-declaration-per-line": "error",
 quotes: [
 "error",
 "single",
 {
 allowTemplateLiterals: false,
 avoidEscape: true,
 },
 ],
 // ES6
 "array-callback-return": "off",
 "prefer-const": "error",
 // Imports
 "import/prefer-default-export": "off",
 "sort-imports": [
 "error",
 {
 ignoreCase: true,
 ignoreDeclarationSort: true,
 },
 ],
 "no-unused-expressions": "off",
 "no-prototype-builtins": "off",
 // REACT
 "react/jsx-uses-react": "off",
 "react/react-in-jsx-scope": "off",
 "jsx-a11y/href-no-hash": [0],
 "react/display-name": 0,
 "react/no-deprecated": "error",
 "react/no-unsafe": [
 "error",
 {
 checkAliases: true,
 },
 ],
 "react/jsx-sort-props": [
 "error",
 {
 ignoreCase: true,
 },
 ],
 "react-hooks/rules-of-hooks": "error",
 "react-hooks/exhaustive-deps": 0,
 // Prettier
 // eslint looks for the prettier config at the top level of the package/app
 // but the config lives in the `config/` directory. Passing the config here
 // to get around this.
 "prettier/prettier": ["error", prettierConfig],
 },
 settings: {
 react: {
 version: "detect",
 },
 },
};
Let’s go over this file in more detail.
Here, I am using the React and react-hooks plugin, as it comes with some default configurations and also helps to customize the code structure.
You can set it to show errors on things like using deprecated/unsafe things, sorting props, etc. To use this, add the following packages:
npm i -D eslint-plugin-react eslint-plugin-react-hooks # npm

yarn add -D eslint-plugin-react eslint-plugin-react-hooks # yarn
Here are some examples where the ESLint React and react-hooks plugins will help you troubleshoot faster:
Formatting is an important issue, as some people might not follow a style, which can cause further issues, so here we are using Prettier and the Prettier plugin to make sure that the formatting is maintained.
I have created this .prettierrc.js file to add some formatting options:
module.exports = {
 arrowParens: 'avoid',
 singleQuote: true,
 trailingComma: 'all',
 tabWidth: 4,
 endOfLine: 'auto',
};
You need to install the Prettier plugin to use this:
npm i -D eslint-config-prettier # npm

yarn add -D eslint-config-prettier # yarn
And as you can see, I have also added the sort import options in the ESLint config. These make sure that the imports are also sorted properly. There is a Prettier plugin for this called @trivago/prettier-plugin-sort-imports.
So, basically, if the code is not formatted in the correct format or the imports are not sorted, then this plugin will shout at you!
There is another ESLint plugin for typescript that improves the typings, and typing errors in general, if you are not passing the correct value or type. This also gives warnings where you use types like any, which should not be used.
npm i -D @typescript-eslint/eslint-plugin # npm

yarn add -D @typescript-eslint/eslint-plugin # yarn
There is a plugin made by the Next.js team that prompts you to use more of the amazing features of Next.js; for example, using the Next <Image /> component instead of the normal <img />.
This also gives warnings about more Next.js components like <Link>. So, for example, if you don’t pass in passHref where it is needed, it would warn you that you should pass in the passHref prop. This helps in the _document.tsx file as well, because some of the imports for this file are different from the rest of the files!
Installation:
npm i eslint-config-next -D # npm

yarn add -D eslint-config-next # yarn
I also have some general rules for clean code, like no else return statements, using const where possible, no unneeded ternary, and giving warnings if there are console logs present, because usually in production there typically shouldn’t be any console logs. These make sure that code is consistent throughout the codebase. You can add or reduce this config as your preference dictates!
ESLint is extremely useful and using it in Next.js will help you and your teammates ready your code easily and troubleshoot bugs easily 🚀. It will take some time to get used to it but it will definitely help you in the long run!
Debugging Next applications can be difficult, especially when users experience issues that are difficult to reproduce. If you’re interested in monitoring and tracking state, automatically surfacing JavaScript errors, and tracking slow network requests and component load time, try LogRocket.
LogRocket captures console logs, errors, network requests, and pixel-perfect DOM recordings from user sessions and lets you replay them as users saw it, eliminating guesswork around why bugs happen — compatible with all frameworks.
LogRocket's Galileo AI watches sessions for you, instantly identifying and explaining user struggles with automated monitoring of your entire product experience.
The LogRocket Redux middleware package adds an extra layer of visibility into your user sessions. LogRocket logs all actions and state from your Redux stores.
👁 ImageModernize how you debug your Next.js apps — start monitoring for free.
Learn how next-browser gives AI agents runtime context for debugging Next.js apps, including React props, hydration, PPR, forms, and performance.
Build dynamic LLM routing in Next.js with OpenRouter, TanStack AI, task classification, model fallbacks, and cost-aware routing.
TSRX adds first-class control flow, conditional hooks, and scoped styles to React via a TypeScript compiler extension — no new framework required.
Learn how to build a full React Native auth system using Better Auth and Expo — with email/password login, Google OAuth, session persistence, and protected routes.
Would you be interested in joining LogRocket's developer community?
Join LogRocket’s Content Advisory Board. You’ll help inform the type of content we create and get access to exclusive meetups, social accreditation, and swag.
Sign up now