 |
VOOZH | about |
|
VOOZH | about |
In today’s mobile app development landscape, the demand for feature-rich, visually appealing applications is higher than ever. Among the myriad features that can enhance the user experience, access to a user’s camera roll or photo gallery is a valuable asset.
👁 Using react-native-cameraroll to Enable Camera Roll AccessThis is where react-native-cameraroll comes into play, offering developers a simple and efficient way to incorporate this functionality into their React Native applications. In this article, we’ll introduce you to CameraRoll and delve into the compelling reasons for using it in your React Native projects.
You can find the complete code used in this tutorial on GitHub.
Jump ahead:
useCameraRoll HookLet’s start by creating a new React Native project and adding the react-native-cameraroll dependency to the project. To create a new React Native project, run the following command in your preferred terminal:
npx react-native init <YourProjectName>
If you are new to React Native or haven’t set up your development environment yet, you can follow these steps.
After running the above command, you’ll have a new React Native project. Now let’s change our working directory to the newly created project:
cd <YourProjectName>

// Run Android app on emulator
yarn android

// Install cocoapods dependencies for iOS project
cd ios && pod install && cd ..

// Run iOS app on simulator
yarn ios
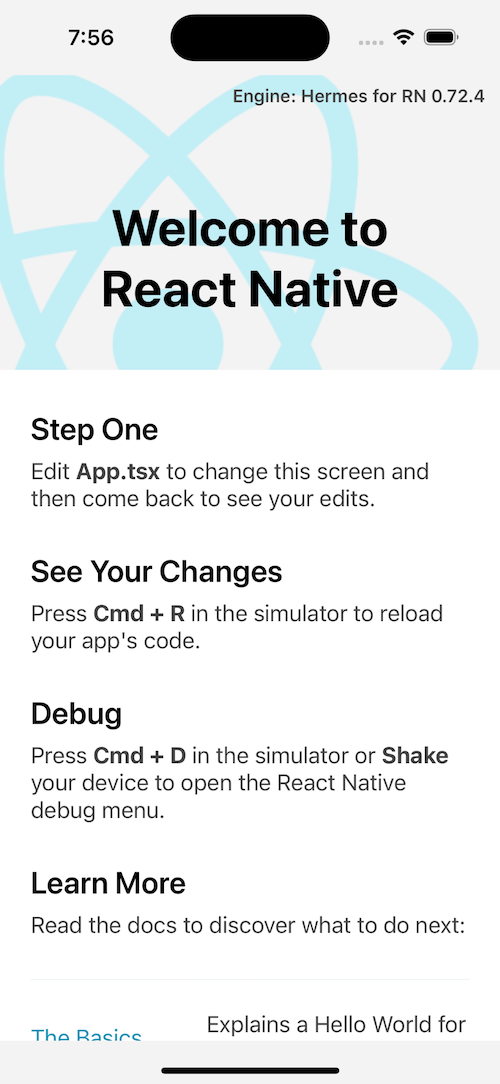
If everything goes right, you will now see your React Native app running on your Android or iOS simulator:
👁 A New React Native Project Running on an iOS Device
N.B., the previews here will show our app running on iOS, but you can view the same previews on an Android device in the GitHub repo.
Now that our project is up and running, let’s also remove the boilerplate code inside App.tsx:
// App.tsx

import React from 'react';
import {SafeAreaView, Text} from 'react-native';

const App: React.FC = () => {
 return (
 <SafeAreaView>
 <Text>{'Hello 🌎'}</Text>
 </SafeAreaView>
 );
};

export default App;
Now we’ll install the dependency into our project:
yarn add @react-native-camera-roll/camera-roll
OR
npm i @react-native-camera-roll/camera-roll

cd ios && pod install && cd .. // For iOS cocoapods dependency
That’s it — the installation is pretty simple.
In order to access multimedia on the user’s device, we need to add some permission strings in iOS’ info.plist file and Android’s AndroidManifest.xml file.
You can edit your iOS project’s info.plist file directly from Xcode, or open the file <projectName>/ios/<projectName>/info.plist in your preferred code editor and add the below keys:
// info.plist

<plist version="1.0">
<dict>
...
<key>NSPhotoLibraryUsageDescription</key>
<string>Allow app to access device photo library</string>

// If you want to request write access to Photo Library
<key>NSPhotoLibraryAddUsageDescription</key>
<string>Allow app to add photos to device photo library</string>
...
</dict>
</plist>
You’ll need to rebuild the app after making the above changes.
For Android, open the <projectName>/android/app/src/main/AndroidManifest.xml
file and add the below code:
// AndriodManifest.xml

....
<uses-permission android:name="android.permission.READ_MEDIA_IMAGES" />
<uses-permission android:name="android.permission.READ_MEDIA_VIDEO" />
<uses-permission android:name="android.permission.READ_EXTERNAL_STORAGE"
 android:maxSdkVersion="32" />
<uses-permission android:name="android.permission.WRITE_EXTERNAL_STORAGE" />
....
Rebuild the app once you’ve made the changes.
These were all the native code changes we needed to access multimedia on the user’s device, but we need to explicitly seek the user’s permission to allow our app to access their files. We’ll do that from the JavaScript side.
To handle permissions more eloquently, we will use the react-native-permissions library. Let’s add it to our project now:
yarn add react-native-permissions
OR
npm i react-native-permissions
To set up the library for iOS, follow these instructions; no extra setup is necessary for Android.
Handling permissions for accessing photos and videos is crucial to ensure that your app respects the user’s privacy and functions smoothly. Both iOS and Android have different permission systems, so you’ll need to handle them separately.
Add the below code to your App.tsx file to integrate permission handling for accessing photos and videos on the user’s device for both iOS and Android:
// App.tsx
import React, {useCallback, useEffect, useState} from 'react';
import {Alert, Linking, Platform, SafeAreaView, Text} from 'react-native';
import Permissions, {PERMISSIONS} from 'react-native-permissions';

const App: React.FC = () => {
 const [hasPermission, setHasPermission] = useState<boolean>(false);

 const openSettingsAlert = useCallback(({title}: {title: string}) => {
 Alert.alert(title, '', [
 {
 isPreferred: true,
 style: 'default',
 text: 'Open Settings',
 onPress: () => Linking?.openSettings(),
 },
 {
 isPreferred: false,
 style: 'destructive',
 text: 'Cancel',
 onPress: () => {},
 },
 ]);
 }, []);

 const checkAndroidPermissions = useCallback(async () => {
 if (parseInt(Platform.Version as string, 10) >= 33) {
 const permissions = await Permissions.checkMultiple([
 PERMISSIONS.ANDROID.READ_MEDIA_IMAGES,
 PERMISSIONS.ANDROID.READ_MEDIA_VIDEO,
 ]);
 if (
 permissions[PERMISSIONS.ANDROID.READ_MEDIA_IMAGES] ===
 Permissions.RESULTS.GRANTED &&
 permissions[PERMISSIONS.ANDROID.READ_MEDIA_VIDEO] ===
 Permissions.RESULTS.GRANTED
 ) {
 setHasPermission(true);
 return;
 }
 const res = await Permissions.requestMultiple([
 PERMISSIONS.ANDROID.READ_MEDIA_IMAGES,
 PERMISSIONS.ANDROID.READ_MEDIA_VIDEO,
 ]);
 if (
 res[PERMISSIONS.ANDROID.READ_MEDIA_IMAGES] ===
 Permissions.RESULTS.GRANTED &&
 res[PERMISSIONS.ANDROID.READ_MEDIA_VIDEO] ===
 Permissions.RESULTS.GRANTED
 ) {
 setHasPermission(true);
 }
 if (
 res[PERMISSIONS.ANDROID.READ_MEDIA_IMAGES] ===
 Permissions.RESULTS.DENIED ||
 res[PERMISSIONS.ANDROID.READ_MEDIA_VIDEO] === Permissions.RESULTS.DENIED
 ) {
 checkAndroidPermissions();
 }
 if (
 res[PERMISSIONS.ANDROID.READ_MEDIA_IMAGES] ===
 Permissions.RESULTS.BLOCKED ||
 res[PERMISSIONS.ANDROID.READ_MEDIA_VIDEO] ===
 Permissions.RESULTS.BLOCKED
 ) {
 openSettingsAlert({
 title: 'Please allow access to your photos and videos from settings',
 });
 }
 } else {
 const permission = await Permissions.check(
 PERMISSIONS.ANDROID.READ_EXTERNAL_STORAGE,
 );
 if (permission === Permissions.RESULTS.GRANTED) {
 setHasPermission(true);
 return;
 }
 const res = await Permissions.request(
 PERMISSIONS.ANDROID.READ_EXTERNAL_STORAGE,
 );
 if (res === Permissions.RESULTS.GRANTED) {
 setHasPermission(true);
 }
 if (res === Permissions.RESULTS.DENIED) {
 checkAndroidPermissions();
 }
 if (res === Permissions.RESULTS.BLOCKED) {
 openSettingsAlert({
 title: 'Please allow access to the photo library from settings',
 });
 }
 }
 }, [openSettingsAlert]);

 const checkPermission = useCallback(async () => {
 if (Platform.OS === 'ios') {
 const permission = await Permissions.check(PERMISSIONS.IOS.PHOTO_LIBRARY);
 if (permission === Permissions.RESULTS.GRANTED ||
 permission === Permissions.RESULTS.LIMITED) {
 setHasPermission(true);
 return;
 }
 const res = await Permissions.request(PERMISSIONS.IOS.PHOTO_LIBRARY);
 if (res === Permissions.RESULTS.GRANTED ||
 res === Permissions.RESULTS.LIMITED) {
 setHasPermission(true);
 }
 if (res === Permissions.RESULTS.BLOCKED) {
 openSettingsAlert({
 title: 'Please allow access to the photo library from settings',
 });
 }
 } else if (Platform.OS === 'android') {
 checkAndroidPermissions();
 }
 }, [checkAndroidPermissions, openSettingsAlert]);

 useEffect(() => {
 checkPermission();
 }, [checkPermission]);

 return (
 <SafeAreaView>
 <Text
 style={{
 fontSize: 22,
 textAlign: 'center',
 fontWeight: '600',
 padding: 24,
 }}>
 {`Permission: ${hasPermission ? 'Granted ✅' : 'Denied ❌'}`}
 </Text>
 </SafeAreaView>
 );
};

export default App;
The code above is responsible for checking and requesting permissions to access photos and videos from the device’s gallery on both Android and iOS platforms. Let’s break down what each part of the code does:
hasPermission stateThis is a piece of component-level state initialized as false. It’s used to track whether the required permissions have been granted.
openSettingsAlert functionThis function displays an alert dialog that prompts the user to open their device settings. It takes an object with a title property as an argument to specify the alert’s title. The alert provides two options: Open Settings and Cancel. The Open Settings option navigates the user to their device settings.
checkAndroidPermissions functionThis function checks and requests Android permissions for accessing media, specifically photos and videos.
It first checks the Android version. If the version is ≥33, it uses Permissions.checkMultiple to check both READ_MEDIA_IMAGES and READ_MEDIA_VIDEO permissions. If both permissions are granted, it sets hasPermission to true. If any permission is denied or blocked, it continues to request permissions and opens settings as needed.
If the Android version is ≤33, it uses Permissions.check and Permissions.request to handle permission checks and requests for READ_EXTERNAL_STORAGE.
checkPermission functionThis function checks and requests permissions based on the platform (iOS or Android). On iOS, it checks for permission to access the photo library using PERMISSIONS.IOS.PHOTO_LIBRARY. It also considers the LIMITED permission status as granted. On Android, it delegates permission checks to the checkAndroidPermissions function described above.
useEffect HookThis Hook executes the checkPermission function when the component mounts. It ensures that permission checks and alerts are triggered as soon as the component is rendered.
In summary, this code aims to ensure that the necessary permissions for accessing photos and videos are granted on both iOS and Android platforms. The useEffect Hook ensures that these permissions checks occur when the component is initially loaded.
After writing the above code, our app behaves like this:
👁 Allowing Photo Library Permissions in iOS
👁 Denying Photo Library Permissions in iOS
To fetch images from the user’s device, we will use CameraRoll’s getPhotos method. This method returns an array of objects that contains all metadata about the images/videos.
Add the code below to your App.tsx file to fetch photos from the device:
import {
 CameraRoll,
 PhotoIdentifier,
} from '@react-native-camera-roll/camera-roll';
....

const [photos, setPhotos] = useState<PhotoIdentifier[]>([]);
....
const fetchPhotos = useCallback(async () => {
 const res = await CameraRoll.getPhotos({
 first: 10,
 assetType: 'Photos',
 });
 setPhotos(res?.edges);
}, []);

useEffect(() => {
 if (hasPermission) {
 fetchPhotos();
 }
}, [hasPermission, fetchPhotos]);

return (
 ....
 <View>
 {photos?.map(item => {
 return (
 <Text key={item?.node?.image?.uri}>{item?.node?.image?.uri}</Text>
 );
 })}
 </View>
 ....
)
In the above code, we call the fetchPhotos method when our state hasPermission changes to true. The fetchPhotos method makes an asynchronous call to the CameraRoll.getPhotos function, passing an object with two properties: first and assetType.
The first property specifies the maximum number of photos to retrieve — in this case, 10 — and the assetType property specifies that only photos should be retrieved.
The result of the CameraRoll.getPhotos call is stored in a variable called res. We use the optional chaining operator ?. to safely access the edges property of res (if it exists) and set it as the value of the photos state variable using the setPhotos function.
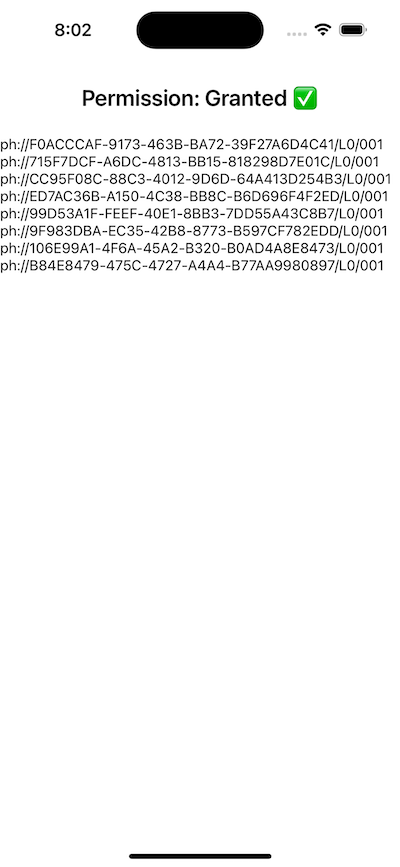
In the end, we simply render each image’s uri path on the screen:
👁 Rendering the Image URI Paths on the Screen in iOS
Next, we will see how to render a list of images.
Now that we can access images from the user’s device, let’s create a list that displays the image on our React Native app screen. To improve our app’s UX, we will show a skeleton loading screen until the images are fetched.
A skeleton loader, also known as a skeleton screen or shimmer effect, is a UI pattern used in mobile and web applications to provide a visual indication of content loading. The primary purpose of a skeleton loader is to improve the perceived performance and user experience by showing a skeletal outline or placeholder for content that is yet to be loaded.
Let’s start by creating a shimmering component to use in our skeleton loading screen. Create a new file <projectname>/src/components/ShimmerView.tsx and add the below code to it:
// ShimmerView.tsx
import {Animated, Easing, StyleSheet, ViewProps} from 'react-native';
import React, {useEffect, useRef} from 'react';

interface IProps extends ViewProps {
 width?: number | `${number}%`;
 height?: number | `${number}%`;
 delay?: number;
}
export const ShimmerView: React.FC<IProps> = ({
 height,
 width,
 delay,
 ...props
}) => {
 const pulseAnim = useRef(new Animated.Value(0)).current;

 useEffect(() => {
 const sharedAnimationConfig = {
 duration: 600,
 useNativeDriver: true,
 };
 Animated.loop(
 Animated.sequence([
 Animated.timing(pulseAnim, {
 ...sharedAnimationConfig,
 delay: delay || 0,
 toValue: 1,
 easing: Easing.inOut(Easing.circle),
 }),
 Animated.timing(pulseAnim, {
 ...sharedAnimationConfig,
 delay: delay || 0,
 toValue: 0,
 easing: Easing.inOut(Easing.circle),
 }),
 ]),
 ).start();

 return () => {
 pulseAnim.stopAnimation();
 };
 }, [pulseAnim, delay]);

 const opacityAnim = pulseAnim.interpolate({
 inputRange: [0, 1],
 outputRange: [0.06, 0.18],
 });

 return (
 <Animated.View
 style={[
 styles.container,
 {width: width || 100, height: height || 120},
 {opacity: opacityAnim},
 props.style,
 ]}
 />
 );
};

const styles = StyleSheet.create({
 container: {
 backgroundColor: '#444',
 borderRadius: 4,
 marginRight: 4,
 marginBottom: 4,
 },
});
In the code above, we created a ShimmerView component, which uses a simple opacity animation to create a shimmer effect when rendered. When the component mounts, we trigger an animation in a loop that changes the value of pulseAnim from 1 to 0, which is further interpolated to create an animation that controls the opacity of our rendered view:
👁 Preview of the Shimmer View Component in iOS
Now, let’s create a list view with three columns and apply the shimmer effect across each component in the list while the media is loading. Add the below code to your App.tsx file’s return method:
// App.tsx
....
return (
 <SafeAreaView>
 <FlatList
 numColumns={3}
 data={Array(15).fill('')}
 keyExtractor={(_, index) => index.toString()}
 renderItem={({_, index}) => (
 <ShimmerView key={index} delay={index * 100} width={'33%'} />
 )}
 style={styles.list}
 />
 </SafeAreaView>
 );
....

const styles = StyleSheet.create({
 list: {padding: 16},
});
In the above code, we created a FlatList and passed in 15 empty elements, which we’re using to display 15 of our ShimmerView components across three columns. The output should look like this:
👁 FlatList of 15 Shimmer View Components in iOS
Now that our loading screen is complete, let’s add logic to handle the loading state and completed state. Add the code below to the App.tsx file:
....
// Adding a state variable that handles the loading state
const [isLoading, setIsLoading] = useState<boolean>(true);

....

const fetchPhotos = useCallback(async () => {
 const res = await CameraRoll.getPhotos({
 first: 10,
 assetType: 'Photos',
 });
 setPhotos(res?.edges);
 // 👇 Add this line to set loading to false once images are fetched
 setIsLoading(false);
}, []);

....

<FlatList
 numColumns={3}
 data={isLoading ? Array(15).fill('') : photos}
 keyExtractor={(_, index) => index.toString()}
 renderItem={({item, index}) => {
 if (isLoading) {
 return (
 <ShimmerView key={index} delay={index * 100} width={'33%'} />
 );
 }
 return (
 <Image
 key={item?.node?.image?.uri}
 source={{uri: item?.node?.image?.uri}}
 height={140}
 style={styles.image}
 />
 );
 }}
 style={styles.list}
/>

....

const styles = StyleSheet.create({
 list: {padding: 16},
 image: {
 height: 120,
 width: '33%',
 borderRadius: 4,
 marginRight: 4,
 marginBottom: 4,
 },
});
In the above code, we created a state variable isLoading with an initial value of true, and we toggle it to false once we get the photos data from the getPhotos method. Then we use this method to handle what data we show in the FlatList. When the loading is complete, we show a list of images on the UI. Here’s how it looks:
👁 Final App Demo Using react-native-cameraroll
That’s it — we have now integrated an image list that displays a list of photos from the user’s device. If you want, you can add more features to this list, like image selection and other cool stuff as per your requirements.
Now let’s see how we can easily save remote images onto the user’s camera roll/photo library using CameraRoll’s save method. Let’s dive right in.
Let’s display an image on the UI, and if the user long presses the image, we will ask if they want to save the image to their gallery. If they agree, then we call the save method with the image URI:
....
const savePhoto = useCallback(() => {
 Alert.alert('Do you want to save this image?', '', [
 {
 isPreferred: true,
 text: 'Yes',
 onPress: async () => {
 const res = await CameraRoll.save(
 'https://fastly.picsum.photos/id/400/2440/1400.jpg?hmac=qSYbRbCQhkj1aMCy6AEHbsrcbXalaPHr6hPCPdxlO5o',
 );
 console.log(res);
 if (res) {
 Alert.alert('Image saved');
 }
 },
 style: 'default',
 },
 {
 isPreferred: false,
 text: 'No',
 onPress: () => {},
 style: 'destructive',
 },
 ]);
}, []);
....
<TouchableOpacity activeOpacity={0.8} onLongPress={savePhoto}>
 <Image
 source={{
 uri: 'https://fastly.picsum.photos/id/400/2440/1400.jpg?hmac=qSYbRbCQhkj1aMCy6AEHbsrcbXalaPHr6hPCPdxlO5o',
 }}
 style={styles.image}
 />
</TouchableOpacity>
....

const styles = StyleSheet.create({
 image: {
 height: 600,
 width: '100%',
 },
});
The above code presents an alert dialog to the user when they long press an image on the UI. The dialog offers the option to either save or not save the image. If the user chooses to save, it attempts to save the image to the device’s camera roll and displays a confirmation message if the operation is successful.
Unfortunately, we cannot save remote assets on Android yet, so this will only work for iOS. Here’s what it looks like:
👁 Saving an Image to the Photo Gallery in iOS
useCameraRoll hookThe useCameraRoll Hook is a valuable feature provided by the react-native-cameraroll library that enables developers to seamlessly interact with the device’s camera roll or photo gallery.
This is mainly a utility Hook that exposes the below methods and variables we just implemented:
import {useCameraRoll} from "@react-native-camera-roll/camera-roll";
....
const [photos, getPhotos, save] = useCameraRoll();
For comprehensive details on available functions, query parameters, and advanced options, refer to the official documentation for the react-native-cameraroll library.
Integrating camera roll access into your React Native app can greatly enhance user engagement and overall functionality. The react-native-cameraroll library simplifies the process of fetching media from the user’s gallery and displaying it within your app’s UI.
Remember to handle permissions responsibly and consider user privacy when implementing this feature. By leveraging the power of React Native and the react-native-cameraroll module, you can create a seamless and immersive experience for your app’s users.
Thank you for reading!
LogRocket's Galileo AI watches sessions for you and and surfaces the technical and usability issues holding back your React Native apps.
LogRocket also helps you increase conversion rates and product usage by showing you exactly how users are interacting with your app. LogRocket's product analytics features surface the reasons why users don't complete a particular flow or don't adopt a new feature.
Start proactively monitoring your React Native apps — try LogRocket for free.
We built the same app in TanStack Start RSC and Next.js RSC. TanStack shipped 40% less JS and built 4x faster — but Next.js is still the safer production bet.
From RSC vulnerabilities and the Vercel breach to TypeScript 7.0 Beta and AI agents — the nine frontend storylines that defined H1 2026, ranked.
AI tools generate working React code fast, but miss race conditions, empty states, debouncing, and accessibility. Here’s how to catch bugs before production.
Learn how to use Gemini CLI subagents to delegate frontend, backend, testing, and docs tasks to specialized agents with guardrails and clear ownership.
Hey there, want to help make our blog better?
Join LogRocket’s Content Advisory Board. You’ll help inform the type of content we create and get access to exclusive meetups, social accreditation, and swag.
Sign up now