
Atlassian Data Center documentation
- Data Center architecture and infrastructure options
- Data Center infrastructure recommendations
- Migrate from Server to Data Center
- Backup and restoration for Atlassian Data Center
- Running Data Center products on a Kubernetes cluster
- Disaster recovery for Atlassian Data Center
- About Data Center approved apps
- Data Center performance
- In-product diagnostics administration and support
- SSO for Atlassian Data Center
- Using Personal Access Tokens
- User data compatiblity
- Diagnosing runtime issues using the Java Flight Recorder
- Deploy Data Center products with the Azure template
- Deploy Data Center products with the AWS Quick Start template
- Getting started with Data Center products on AWS
- Getting started with Data Center products on Azure
- Best practices for Atlassian Data Center
- Atlassian Data Center FAQ
- Manage two-step verification for your Atlassian account
- Sharing usage data in Data Center
- Service accounts in Crowd Data Center
On this page
Related content
- No related content found
Personal access tokens (PATs) are a secure way to use scripts and integrate external applications with your Atlassian application. If an external system is compromised, you simply revoke the token instead of changing the password and consequently changing it in all scripts and integrations.
Personal access tokens are a safe alternative to using username and password for authentication with various services.
This page explains how to create personal access tokens in Jira and Confluence.
For information on using personal access tokens in other Atlassian products, see:
Before you begin
You can create and use personal access tokens in Data Center and Server versions of the following Atlassian applications:
- Jira Core 8.14 and later
- Jira Software 8.14 and later
- Jira Service Management 4.15 and later
- Confluence 7.9 and later
The admin view of personal access tokens is available in the Data Center version of these applications.
On this page:
Creating PATs in the application
All users are allowed to create their own PATs, which will match their current permission level. To create the tokens, you may follow these steps:
- In your Atlassian application go to:
- In Confluence, select your avatar at the top right of the screen, then go to Settings and select Personal access tokens.
- In Jira, select your avatar at the top right of the screen, then select Profile. Once you access your profile, select Personal access tokens in the left-hand menu.
- Select Create token.
- Give your new token a name.
Optionally, for security reasons, you can set your token to automatically expire after a set number of days.
The EXPIRES SOON status appears 5 days before the actual expiration date. Once the token expires, you can't reactivate it. You must create a new token.
Select Create.
Your personal access token is created. Copy the token and store it in a safe space.
Creating PATs using REST API
To create the PAT using REST API, you can send a POST HTTP request as exemplified below, and in response, you'll receive the PAT. Please note that you cannot create PATs on behalf of someone else.
👁 (info)
Be sure to replace the {{baseUrlOfYourInstance}} with the actual URL for your Jira/Confluence instance.
{{baseUrlOfYourInstance}}/rest/pat/latest/tokens{
"name": "tokenName",
"expirationDuration": 90
}Through the expirationDuration parameter, you can define the number of days for which your token will remain valid.
The expirationDuration is optional in the JSON body.
👁 (warning)
In order to create the PAT through the REST endpoint you'll need to make sure to authenticate yourself on the request, so that Jira can verify if you are eligible to create a PAT, and also to which user associate it to.
- Example of how the request can be made with authentication using curl:
curl -X POST {{baseUrlOfYourInstance}}/rest/pat/latest/tokens -H "Content-Type: application/json" -d '{"name": "tokenName","expirationDuration": 90}' --user "username:password"curl -X POST {{baseUrlOfYourInstance}}/rest/pat/latest/tokens -H "Authorization: Bearer <Token>" -H "Content-Type: application/json" -d '{"name": "tokenName","expirationDuration": 90}'Using PATs
To use a personal access token for authentication, you have to pass it as a bearer token in the Authorization header of a REST API call.
Here's an example using cURL to call the REST API with a bearer token:
curl -H "Authorization: Bearer <yourToken>" https://{baseUrlOfYourInstance}/rest/api/content👁 (info)
A couple of important notes:
- The
{{baseUrlOfYourInstance}}tag is an example, and should be replaced with the actual URL for your Jira/Confluence instance. - The
/rest/api/contentendpoint is not a valid one, and should also only be considered as an example. A listing of the REST API endpoints for Jira & Confluence can be found on the Jira Server platform REST API reference and Confluence Server platform REST API reference pages respectively. - For the PAT authentication, you should only replace
<yourToken>with the actual PAT. The "Bearer" part should not be changed, nor should you need to inform which user is making the request. - If attempting to use the PAT on a script or with some other method, you should still follow the Bearer Token OAuth standard.
Revoking PATs
If for any reason, for instance, a security breach, you need to revoke your token, you can do it quickly from your Atlassian application:
- In your Atlassian application go to:
- In Jira select your avatar at the top right of the screen, then select Personal access tokens.
- In Confluence, select your avatar at the top right of the screen, then go to Settings and select Personal access tokens.
- Select Revoke next to the token you want to delete.
- Confirm your choice.
Your token is now revoked and can't be used for further authentication.
Limit token creation
Administrators can use system properties to limit the number of tokens people can create, and set expiry rules.
| Property | Default value | Description |
|---|---|---|
-Datlassian.pats.enabled | true | Whether personal access tokens are globally enabled. |
-Datlassian.pats.eternal.tokens.enabled | true | If users should be able to create tokens that do not expire. |
-Datlassian.pats.mail.notifications.enabled | true | Whether mail notifications are globally enabled. |
-Datlassian.pats.last.used.update.interval.mins | 1 | The interval at which the scheduler job is updating the 'last accessed at' property of each token, in minutes. |
-Datlassian.pats.pruning.schedule.cron | '0 0 0 * * ?' - 12 am local time, every day | The CRON expression for the expired token pruning scheduler job. 👁 (info) |
-Datlassian.pats.pruning.delay.days | 30 | The delay before expired tokens are removed from the database, in days. |
-Datlassian.pats.max.tokens.expiry.days | 365 | Maximum number of days for a token to expire. If you decide to change this property, the new value will apply only to tokens created after your change and won't affect already created tokens. |
-Datlassian.pats.max.tokens.per.user | 10 | Maximum number of tokens allowed per user at any given time regardless if the tokens are expired or not. |
-Datlassian.pats.auth.cache.expiry.mins | 60 | The length of time, in minutes, an item can stay in the Authentication Cache before being removed. |
-Datlassian.pats.auth.cache.max.items | 5000 | The maximum number of items allowed in the Authentication Cache. |
-Datlassian.pats.expiry.check.schedule.cron | '0 0 * * * ?' - every hour | The CRON expression for the scheduler job that sends notifications about expired tokens and about tokens that will expire soon. 👁 (info) |
-Datlassian.pats.expiry.warning.days | 5 | How many days before sending an e-mail notification about tokens that will expire soon. |
-Datlassian.pats.invalidate.session.enabled | true | If the session should be invalidated after successful authentication using personal access token. |
-Datlassian.pats.token.name.length | 40 | The maximum number of characters to be used for Token Name |
To find out how to apply system properties in your application:
- For Jira, see Setting properties and options on startup
- For Confluence, see Configuring System Properties
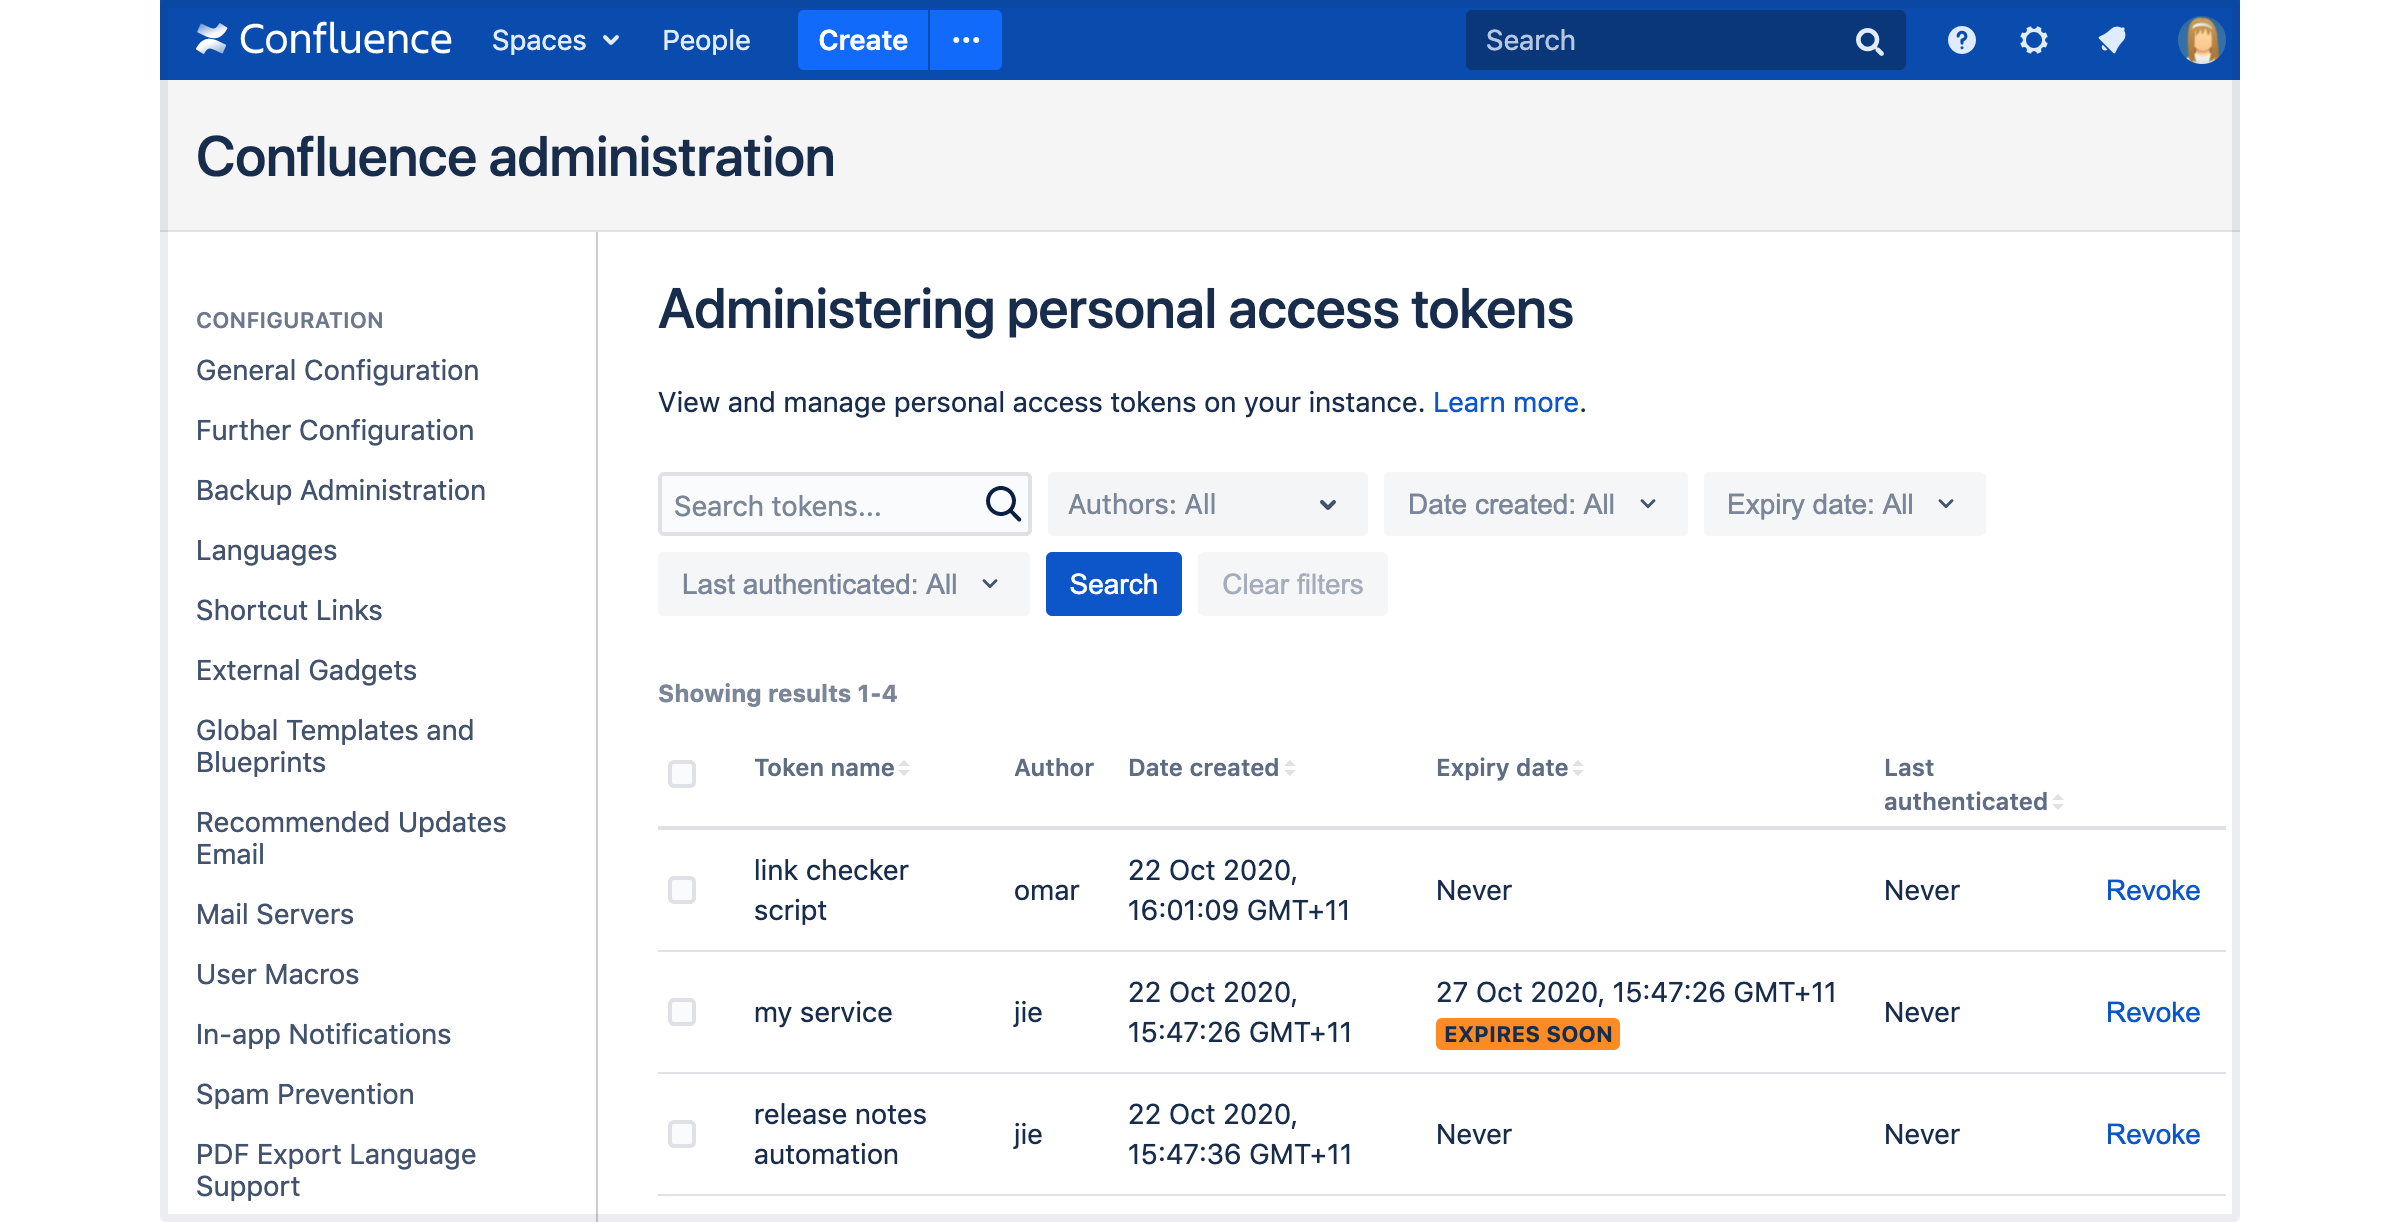
Administer personal access tokens
This feature is available with a Data Center license.
In Data Center applications, administrators can see a list of all tokens created in the site, and revoke any of these tokens.
To administer personal access tokens:
- In your Atlassian application go to:
In this view, you can filter your tokens by the author, creation and expiration date, and the last time the token was used for authentication. Admins can revoke individual tokens and delete multiple tokens at once. To bulk revoke, select tokens you want to revoke, and click Bulk revoke.
Was this helpful?
Related content
- No related content found