 |
VOOZH | about |
|
VOOZH | about |
Content Security Policy (CSP) is a browser feature that blocks unsafe content. It tells the browser what resources it can load, which can prevent attacks like cross‑site scripting (XSS). It also helps stop mixed content issues, which occur when secure pages load insecure files.
While CSP sounds complicated, you don’t need advanced technical experience to use it — just a simple starting policy, a safe way to test, and a little fine-tuning. This guide explains how to plan a policy, test it safely, enforce it, and maintain it over time. It includes a beginner path using a plugin and a developer path using server or code-level headers.
This guide supports two experience levels:
You can read the shared foundation first, then jump to your path.
To deploy a solid policy, you need to understand a few terms:
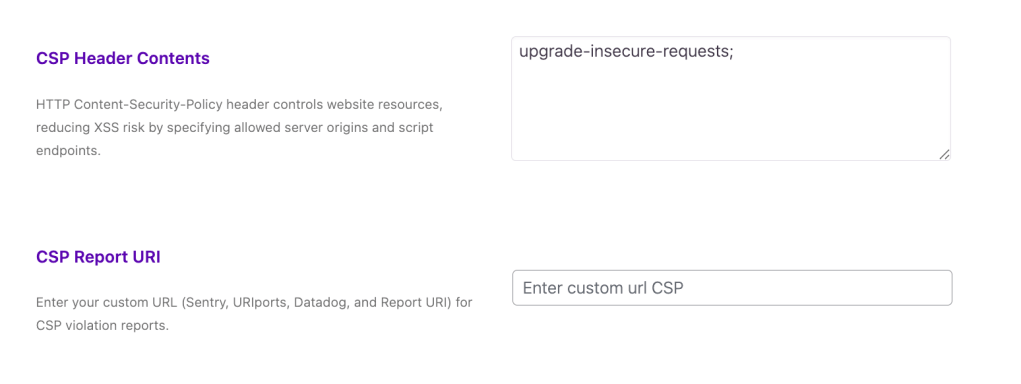
A CSP header is a semicolon separated list of directives. Browsers apply the rules to every page response that includes the header.
Before you set up CSP, make sure that:
When choosing which resources to allow, consider:
Start with a simple policy. For example:
default‑src 'self';script‑src 'self' https://www.google‑analytics.com;style‑src 'self' 'unsafe‑inline';img‑src 'self' data:;This allows files from your site, Google Analytics scripts, inline styles, and inline images. You can expand later.
At this point, it’s time to choose your track. If you’re a beginner, read on to the next line. If you’re more experienced, skip down to the developer track.
We’ll use the Headers Security Advanced & HSTS WP plugin here, but any plugin that allows you to set custom response headers works.
Pick one that matches your setup, then refine it.
Standard template:
• default-src 'self';• script-src 'self';• style-src 'self' 'unsafe-inline';• img-src 'self' data:;• font-src 'self';• connect-src 'self';Typical WordPress setup with Google Fonts and Google Analytics:
• default-src 'self';• script-src 'self' https://www.google-analytics.com https://www.googletagmanager.com;• style-src 'self' 'unsafe-inline' https://fonts.googleapis.com;• font-src 'self' https://fonts.gstatic.com data:;• img-src 'self' data:;• connect-src 'self';WordPress with YouTube embeds:
• default-src 'self';• script-src 'self';• style-src 'self' 'unsafe-inline';• img-src 'self' data: https://i.ytimg.com;• frame-src https://www.youtube.com https://www.youtube-nocookie.com;After enabling report-only mode, browse your site and watch for reports. You can do this with tools like Chrome DevTools, keeping an eye out for CSP warnings.
A typical report contains keys such as:
Your job is simple:
Repeat until your critical pages generate no important violations.
Once reports are clean, switch to enforcement mode.
You’ll still see violations, but now the browser will block what breaks the policy.
Are you a developer who wants more control? There are two primary ways to add a CSP to WordPress.
In .htaccess add the following, customizing as needed:
<IfModule mod_headers.c> Header set Content-Security-Policy-Report-Only "default-src 'self'; script-src 'self'; style-src 'self' 'unsafe-inline'; img-src 'self' data:;"</IfModule>After testing, switch to enforcement:
<IfModule mod_headers.c> Header set Content-Security-Policy-Report-Only "default-src 'self'; script-src 'self'; style-src 'self' 'unsafe-inline'; img-src 'self' data:;"</IfModule>In your server block add the following, customized for your situation:
add_header Content-Security-Policy-Report-Only "default-src 'self'; script-src 'self'; style-src 'self' 'unsafe-inline'; img-src 'self' data:;" always;Then enforce:
add_header Content-Security-Policy "default-src 'self'; script-src 'self'; style-src 'self' 'unsafe-inline'; img-src 'self' data:;" always;The always keyword makes sure headers are sent even on error responses.
If your CSP should apply across multiple origins or you want a single control point:
You may want CSP inside WordPress when your setup requires dynamic behavior. For example:
Example using wp_headers:
<IfModule mod_headers.c> Header set Content-Security-Policy-Report-Only "default-src 'self'; script-src 'self'; style-src 'self' 'unsafe-inline'; img-src 'self' data:;"</IfModule>After testing, change the header key to Content-Security-Policy.
Inline scripts are common in WordPress, as page builders, themes, and plugins may inject them. There are three ways to handle them:
Suppose your theme outputs this inline script:
<script> console.log("hi");</script>You could compute a SHA 256 hash of the script content and add it to script-src:
script-src 'self' 'sha256-BASE64HASHVALUE';Here’s a nonces example with WordPress:
add_action('send_headers', function() { $nonce = base64_encode(random_bytes(16)); $policy = "default-src 'self'; script-src 'self' 'nonce-$nonce'; style-src 'self' 'unsafe-inline';"; header("Content-Security-Policy: $policy"); add_filter('script_loader_tag', function($tag, $handle) use ($nonce) { return str_replace('<script ', '<script nonce="' . esc_attr($nonce) . '" ', $tag); }, 10, 2);});This example adds the nonce to enqueued scripts. You still need to add the same nonce attribute to any inline scripts you output in templates.
Warning: Nonces in a mixed plugin environment take effort. If most of your inline scripts come from third-party plugins, hashes or carefully scoped ‘unsafe-inline’ may be the more practical choice.
Here are a few elements that may cause issues, and how to adjust for each one:
Page builders and themes with inline CSS
Third-party analytics and tag managers:
Payment and checkout scripts:
Embedded media or social posts:
Here’s a quick summary of the steps to put a CSP into place and maintain it over time.
This setup takes time up front. But once it’s running, you’ll block a lot of common attacks and reduce mixed‑content issues. It will give your WordPress site a stronger security baseline.
Along with CSP, consider these security headers for WordPress:
CSP focuses on what resources can be loaded, while these other headers control how browsers treat your site and where it can be embedded.
A Content Security Policy (CSP) is an HTTP header that tells a browser which scripts, styles, images, fonts, and other resources can load on a page.
In WordPress, CSP helps block malicious scripts and unsafe content from loading on your site. It works by listing allowed domains and types of resources, and any resource that does not match the rules is blocked by the browser. This makes it harder for attackers to inject harmful code into your WordPress site.
WordPress sites often use many plugins, themes, and third‑party services, so CSP can help protect forms, logins, payment pages, and admin areas. You can add CSP through plugins, server settings, or PHP code in your WordPress site.
You should add a CSP header to reduce the risk of cross‑site scripting (XSS) attacks, data injection, and mixed‑content issues on your WordPress site. CSP limits which scripts and styles can run, so even if a harmful script is added to your page, the browser may not load it. This helps protect user data, login sessions, payment information, and admin areas.
CSP also helps enforce the use of HTTPS for resources and makes it easier to see which external domains your site depends on. Over time, you can tighten your policy and remove unnecessary domains, which can improve both security and site performance checks.
It can be safe to add a CSP header to a live WordPress site, but only if you test carefully first. If your policy is too strict, it can break forms, payment gateways, analytics, chat widgets, or page builder layouts. The safest approach is to start in report‑only mode, collect errors, and then apply the policy in enforcement mode once you are sure everything works.
For a live WordPress site, it is best to test on a staging copy if possible, or use a small portion of traffic. You should also keep a backup of your server config and .htaccess before making changes. If something breaks, you can quickly remove the header and restore the old settings.
You test a CSP policy in WordPress by using Content-Security-Policy-Report-Only instead of Content-Security-Policy. This lets the browser follow the rules and log violations without blocking content. You can then check the browser’s developer console or a reporting service to see which resources are blocked.
For example, you can add a header like:
Content-Security-Policy-Report-Only: default-src 'self'; script-src 'self';Then visit your site on different pages, including forms, checkout pages, and the admin area. Look for errors in the console and adjust the allowed domains. Once you see few or no violations, you can change the header to Content-Security-Policy and gradually tighten it.
CSP can break Google Analytics, Facebook Pixel, or other scripts because those services load from external domains not included in your policy. For example, if your CSP only allows script-src ‘self’, any script from http://www.google-analytics.com or connect.facebook.net will be blocked. The browser will refuse to load them, and the tracking will stop.
To fix this, you need to add the required domains to your policy. For example:
script-src 'self' www.google-analytics.com connect.facebook.net;You should also avoid using unsafe-inline unless absolutely necessary. If you use inline scripts, you can switch to nonces or hashes for better security.
You should avoid unsafe-inline in your WordPress CSP policy unless you have no other choice. Allowing unsafe-inline means the browser can run inline scripts and styles, which opens the door to certain types of cross‑site scripting attacks. If your site uses page builders, plugins, or themes that rely heavily on inline scripts, CSP may break layouts or functionality.
If you must allow unsafe-inline, you should document why and review it regularly. A better long‑term option is to migrate to nonces or hashes for trusted inline scripts. You can also use a more strict policy for the front‑end and a separate, less strict policy for the admin area.
Nonces and hashes let you allow specific inline scripts without enabling unsafe-inline for your whole site. A nonce is a short, random value that changes with each page load. You add that nonce to your CSP and then include it in the script tag. The browser only runs scripts that have the correct nonce.
Hashes work similarly. You compute a cryptographic hash of the script’s content and add that hash to your CSP. The browser checks if the script matches the hash and only runs it if it does. In WordPress, some plugins and themes can generate nonces or hashes for you, or you can add them manually in your CSP header and in your template files.
You can use a plugin to add CSP to WordPress instead of editing server code. Many security or header plugins let you set a Content-Security-Policy header from the dashboard. This is useful if you are not comfortable editing .htaccess, Nginx config, or PHP files. Plugins often provide a simple interface to add allowed domains and test settings.
However, plugins may not support every directive or advanced CSP feature. They may also add overhead if they generate headers on every request. If you run multiple WordPress sites or need fine‑grained control, server‑level CSP (Apache or Nginx) is usually more efficient and easier to manage for advanced users.
You should review and update your CSP policy on a WordPress site every 3–6 months, or whenever you add new plugins, themes, or third‑party services. Every time you install a new plugin, it may load scripts, styles, or fonts from new domains that are not in your current policy. If those domains are blocked, elements may break or fail to load.
During each review, you should check your browser console or CSP reporting service for new violation reports. You can then decide whether to allow the new domains, tighten existing rules, or remove domains that are no longer in use. Keeping your policy up to date helps maintain both security and functionality.
CSP does not replace other WordPress security measures like firewalls, malware scanning, or backups. It is one layer among many. CSP helps control which resources the browser can load, but it does not stop brute‑force attacks, file changes, plugin vulnerabilities, or data loss. These risks are still handled by firewalls, login protection, malware scanners, and regular backups.
For a complete WordPress security setup, CSP should be combined with HTTPS, strong passwords, two‑factor authentication, security headers, and a security plugin like Jetpack Security. Together, these layers reduce the chance that an attack succeeds and increase the chance that you can recover quickly if something goes wrong.
Jen Swisher
Jen is a Customer Experience Specialist for Jetpack. She has been working with WordPress and Jetpack for over a decade. Before starting at Automattic, Jen helped small businesses, local non-profits, and Fortune 50 companies create engaging web experiences for their customers. She is passionate about teaching others how to create on the web without fear.
We guard your site. You run your business.
Jetpack Security provides easy‑to‑use, comprehensive WordPress site security, including real‑time backups, a web application firewall, malware scanning, and spam protection.
Secure your siteHave a question?
Comments are closed for this article, but we're still here to help! Visit the support forum and we'll be happy to answer any questions.
View support forum