
Using Sensors With Your Raspberry Pi
Keep adding new skills with 10,000+ programs for $239 (usually $399). Save now.
Using Sensors With Your Raspberry Pi
This course is part of Raspberry Pi Projects Specialization
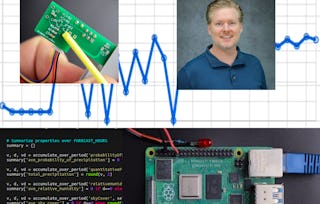
Instructor: Drew Wilson
2,324 already enrolled
Included with
Ask Coursera
Details to know
See how employees at top companies are mastering in-demand skills
Build your subject-matter expertise
- Learn new concepts from industry experts
- Gain a foundational understanding of a subject or tool
- Develop job-relevant skills with hands-on projects
- Earn a shareable career certificate
There are 4 modules in this course
This course on integrating sensors with your Raspberry Pi is course 3 of a Coursera Specialization and can be taken separately or as part of the specialization. Although some material and explanations from the prior two courses are used, this course largely assumes no prior experience with sensors or data processing other than ideas about your own projects and an interest in building projects with sensors.
This course focuses on core concepts and techniques in designing and integrating any sensor, rather than overly specific examples to copy. This method allows you to use these concepts in your projects to build highly customized sensors for your applications. Some of the ideas covered include calibrating sensors and the trade-offs between different mathematical methods of storing and applying calibration curves to your sensors. We also discuss accuracy, precision, and how to understand uncertainty in your measurements. We study methods of interfacing analog sensors with your Raspberry Pi (or other platform) with amplifiers and the theory and technique involved in reducing noise with spectral filters. Lastly, we borrow from the fields of data science, statistics, and digital signal processing, to post-process our data in Python.
This first module gets us all on the same page, no matter how much experience you have with sensors or measurement technology. We'll start by describing a straightforward sensor flow model to help us understand the myriad of sensors available in the world, and which you may later build. Then we'll move into the concepts of accuracy, precision, and uncertainty, which are necessary for understanding the inherent error in any measurement system. This module lays the groundwork for the circuits and examples in later modules.
What's included
8 videos1 assignment
8 videos•Total 113 minutes
- Introduction to Module 1•2 minutes
- Sensor Design Concepts 1 of 3•21 minutes
- Sensor Design Concepts 2 of 2•12 minutes
- Sensor Design Concepts 3 of 2•13 minutes
- Sensor Accuracy•10 minutes
- Sensor Precision•14 minutes
- Sensor Uncertainty•21 minutes
- Sensors and Real-Time Processing•20 minutes
1 assignment•Total 45 minutes
- Module 1 Quiz•45 minutes
In this module, we'll look at examples of three common methods to store calibration data and apply that data to your sensor measurements. These examples range from simple to sophisticated, but none are complicated. We'll use Python and advanced open-source libraries to do the heavy math, just like you can implement in your Raspberry Pi projects.
What's included
10 videos1 assignment
10 videos•Total 89 minutes
- Introduction to Module 2•4 minutes
- Calibration Terminology•10 minutes
- Sensor Transfer Functions•18 minutes
- Analyzing Look-Up Tables in Python•13 minutes
- Piece-Wise Interpolated Calibration Data 1 of 2•10 minutes
- Piece-Wise Interpolated Calibration Data 2 of 2•5 minutes
- Calibration with Polynomial Fit 1 of 3•7 minutes
- Calibration with Polynomial Fit 2 of 3•12 minutes
- Calibration with Polynomial Fit 3 of 3•8 minutes
- Summary of Module 2•1 minute
1 assignment•Total 30 minutes
- Module 2 Quiz•30 minutes
Once you have a sensor, and have a Raspberry Pi, there is often a need for circuitry in the middle to interface the two. In this module, we'll show how simple amplifier and filter circuits can be used to adapt voltage levels and reduce noise from your sensor data.
What's included
9 videos1 assignment
9 videos•Total 118 minutes
- Introduction to Module 3•1 minute
- Integrated Sensors•17 minutes
- Sensor Signal Flow•6 minutes
- Sensor Interface Amplifiers 1 of 3•20 minutes
- Sensor Interface Amplifiers 2 of 3•14 minutes
- Sensor Interface Amplifiers 3 of 3•8 minutes
- Reducing Noise with Filters 1 of 2•24 minutes
- Reducing Noise with Filters 2 of 2•23 minutes
- Summary of Module 3•4 minutes
1 assignment•Total 30 minutes
- Module 3 Quiz•30 minutes
The great thing about using a Raspberry Pi for your sensor projects is that you have access to great open-source software libraries and lots of processing power to manipulate your sensor data. This module looks at a few techniques for using statistical and digital signal processing methods to clean up your sensor data.
What's included
6 videos1 assignment
6 videos•Total 54 minutes
- Introduction to Module 4•3 minutes
- Time-Domain Sliding Window Filter•10 minutes
- Noise Removal with Spectral Filtering•13 minutes
- Noise Reduction by Averaging•17 minutes
- Revisit Time-Domain Sliding Window Filter•9 minutes
- Summary of Module 4•2 minutes
1 assignment•Total 30 minutes
- Module 4 Quiz•30 minutes
Earn a career certificate
Add this credential to your LinkedIn profile, resume, or CV. Share it on social media and in your performance review.
Instructor
Offered by
Explore more from Electrical Engineering
- Status: Free TrialU
University of California, Irvine
Course
- Status: Free TrialJ
Johns Hopkins University
Course
- U
University of California San Diego
Course
Why people choose Coursera for their career
Frequently asked questions
To access the course materials, assignments and to earn a Certificate, you will need to purchase the Certificate experience when you enroll in a course. You can try a Free Trial instead, or apply for Financial Aid. The course may offer 'Full Course, No Certificate' instead. This option lets you see all course materials, submit required assessments, and get a final grade. This also means that you will not be able to purchase a Certificate experience.
When you enroll in the course, you get access to all of the courses in the Specialization, and you earn a certificate when you complete the work. Your electronic Certificate will be added to your Accomplishments page - from there, you can print your Certificate or add it to your LinkedIn profile.
Yes. In select learning programs, you can apply for financial aid or a scholarship if you can’t afford the enrollment fee. If fin aid or scholarship is available for your learning program selection, you’ll find a link to apply on the description page.
More questions
Financial aid available,