 |
VOOZH | about |
|
VOOZH | about |
Google Colab provides a cloud-based environment that grants free access to NVIDIA GPUs. This makes it an ideal platform for developing and testing CUDA (Compute Unified Device Architecture) programs without needing expensive local hardware. By leveraging Colab's infrastructure, one can compile and run C++ code directly on a GPU using the nvcc compiler.
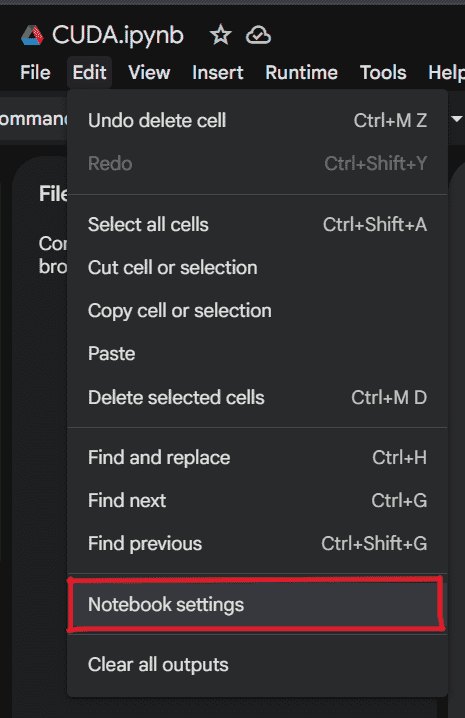
Before running any CUDA code, enable a physical GPU to the Colab virtual machine instead of just a standard CPU.
1. Navigate to the Edit menu and select Notebook settings (or go to Runtime > Change runtime type).
2. Under the Hardware accelerator dropdown, select T4 GPU (or any available GPU) and click Save.
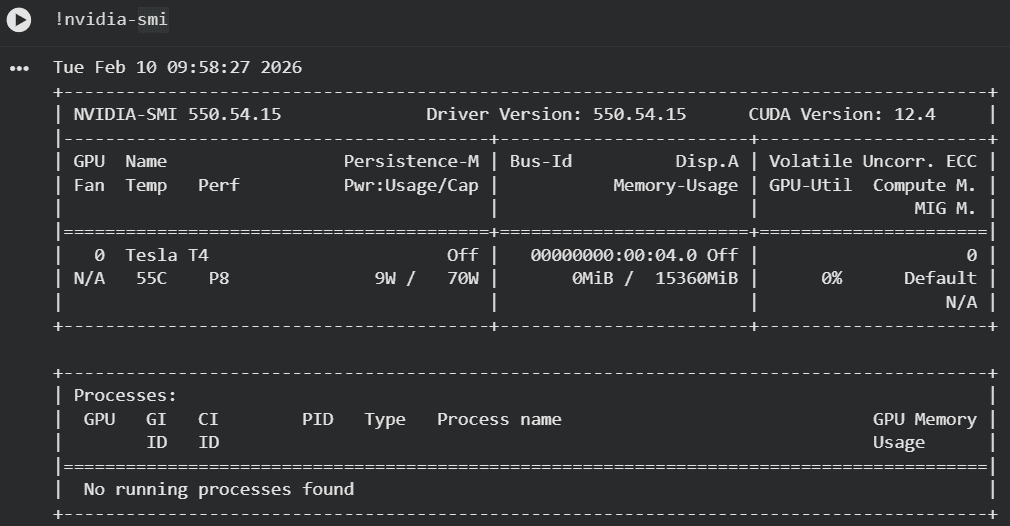
Ensure that a GPU is attached to your Colab runtime. The following command confirms the presence and model of the NVIDIA GPU, along with its driver version.
!nvidia-smi
Explanation:
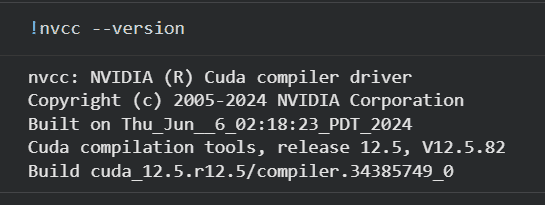
Colab comes with the CUDA Toolkit pre-installed. The following command verifies the version of nvcc, the NVIDIA CUDA Compiler, which is crucial for compiling CUDA C++ code.
!nvcc --version
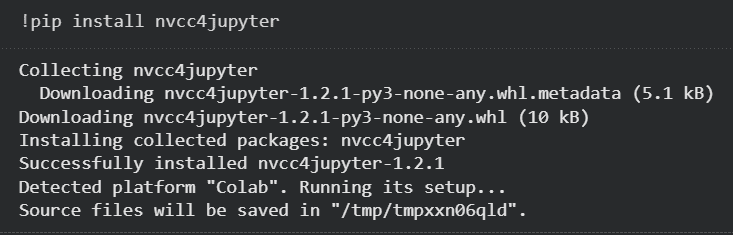
To seamlessly write and execute CUDA C++ code directly within a Colab notebook cell using the %%cu magic command, you need to install the "nvcc4jupyter" package.
!pip install nvcc4jupyter
Explanation: This command installs the nvcc4jupyter Python package from PyPI. This plugin enables Jupyter (and by extension, Colab) to recognize and process CUDA code blocks.
After installing the plugin, one must explicitly load the extension into notebook's kernel. This activates the %%cu command.
%load_ext nvcc4jupyter
Explanation: This command tells the Jupyter kernel to load the nvcc4jupyter extension. Once loaded, you can use %%cu at the beginning of a cell to indicate that its content is CUDA C++ code meant for compilation.
This step involves writing a simple CUDA C++ program directly in a cell. The program includes a kernel function that runs on the GPU and a main function that runs on the CPU.
Output
Hello world
Explanation: