 |
VOOZH | about |
|
VOOZH | about |
PyBrain is an open-source and free-to-use Python-based Machine Learning Library. Its main purpose is to provide machine learning tasks with flexible, easy-to-use, still a very powerful algorithms. It also provides a wide range of predefined environments which is used to test and compare different types of algorithms. It is short for Python-based reinforcement learning, artificial intelligence, and neural network library. In this article, we will see how to install PyBrain on macOS step-by-step.
Method: Using git & setup.py to install PyBrain Package
Follow the below steps to install the PyBrain package in Windows using git & setup.py:
Step 1: Install the current version of Python3 in macOS.
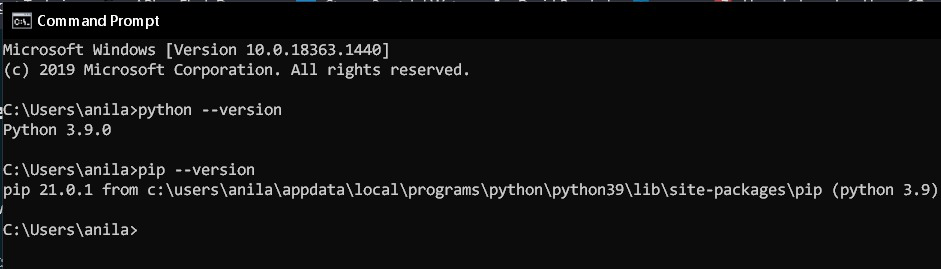
Step 2: Now check if pip3 and python3 are successfully installed in your system to avoid errors during installation.
👁 Checking-python-and-pip-versionpython --version
pip --version
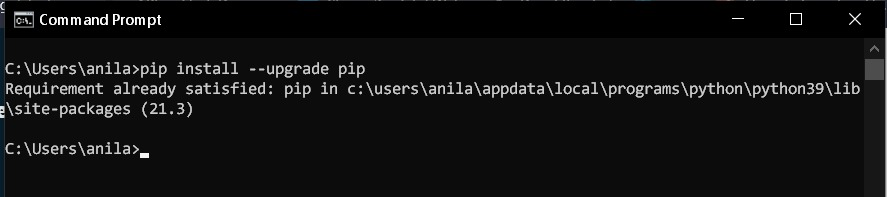
Step 3: Upgrade your pip with the latest version to avoid errors during the installation process.
👁 Upgrading-pippip install --upgrade pip
Step 4: Install Git for Windows.
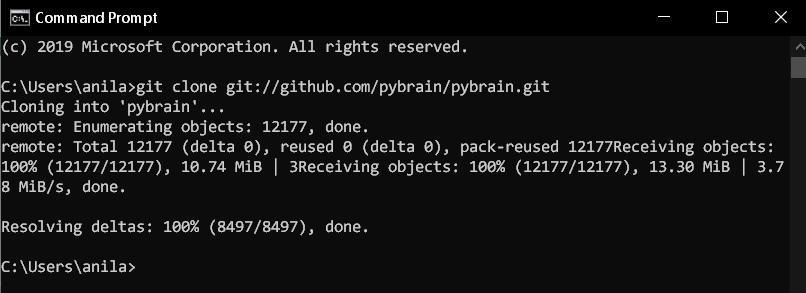
Step 5: Now we download/clone the PyBrain package from GitHub using git. So enter the following command in the command prompt:
👁 Download-pybrain-using-gitgit clone git://github.com/pybrain/pybrain.git
Or you can also download the Pybrain directly using the website.
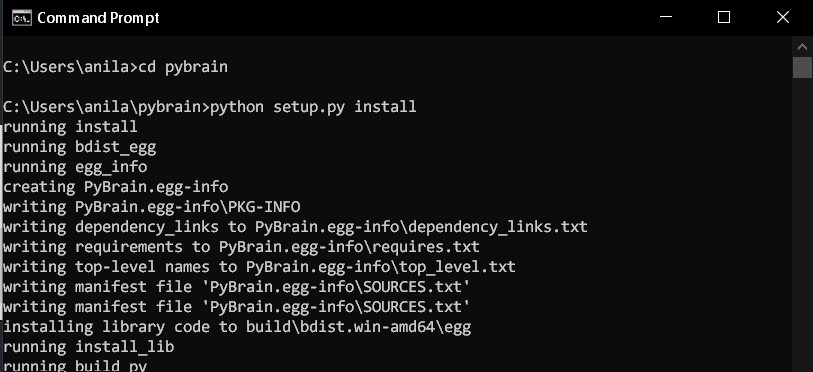
Step 6: Go to the pybrain folder and enter the following command to install the package.
👁 Install-PyBrain-using-setup.pycd pybrain
python setup.py install
Verifying PyBrain installation on Windows
To verify that PyBrain is successfully installed in your system use the following command in your command prompt:
👁 Verifying-PyBrain-installationimport pybrain
If you do not get any error in the output then this means that the PyBrain is successfully installed in your system.