 |
VOOZH | about |
|
VOOZH | about |
Here, we are going to build a to-do list application that will save the data in the blockchain. The blockchain part of this application can also be understood as a database. First, we'll create a smart contract and subsequently the web application itself. We'll use Bloc as the application name but first, let's look at the components.
Components in Bloc Application
To be able to communicate with blockchain we'll need to write a smart contract. A smart contract can also use understood as a backend script that contacts the blockchain. The smart contract will allow us to store our to-do list tasks in the blockchain.
To write and develop the smart contract we will use the REMIX IDE.
Note: Make sure you are using the Http site instead of HTTPS. The HTTP site will allow us to deploy our smart contract in our local blockchain.
Click on the plus icon to create a bloc.sol file.
The smart contract first line must declare the SPDX-License-Identifier and solidity version to compile our smart contract to do that we'll write the following:
// SPDX-License-Identifier: GPL-3.0
pragma solidity >=0.8.0 <0.9.0;
To tell the compiler about our smart contract we'll define a contract block. A contract like a class in OOPs which contains all the fields and methods:
// SPDX-License-Identifier: GPL-3.0
pragma solidity >=0.8.0 <0.9.0;
contract Bloc{
} 1. Create a struct for your task: Struct allows for creating a user-defined datatype. It will have a string as a task and a boolean to tell whether the task is completed or not.
// SPDX-License-Identifier: GPL-3.0
pragma solidity >=0.8.0 <0.9.0;
contract Bloc{
 struct Task{
 string task;
 bool isDone;
 }
}
2. Create a mapping to store our task array with an associated user address: Mapping is like a Hash Table here we are creating an address as a key and the value will be an array of task struct. Set this mapping as private for the access modifier. The address is a data type in solidity which stress the account address.
// SPDX-License-Identifier: GPL-3.0
pragma solidity >=0.8.0 <0.9.0;
 contract Bloc{
 struct Task{
 string task;
 bool isDone;
 }
 mapping (address => Task[]) private Users;
}1. Create Task: This method will create a task.
// SPDX-License-Identifier: GPL-3.0
pragma solidity >=0.8.0 <0.9.0;
/// @title A contract for demonstrate how to build a to-do list application
/// @notice For now, this contract just show how to add the task
contract Bloc{
 struct Task{
 string task;
 bool isDone;
 }

 mapping (address => Task[]) private Users;

 function addTask(string calldata _task) external{
 Users[msg.sender].push(Task({
 task:_task,
 isDone:false
 }));
 }
}
2. Read Task: This method helps to read the value in the task.
// SPDX-License-Identifier: GPL-3.0
pragma solidity >=0.8.0 <0.9.0;
/// @title A contract for demonstrate how to build a to-do list application
/// @notice For now, this contract just show how to get the task
contract Bloc{
 struct Task{
 string task;
 bool isDone;
 }

 mapping (address => Task[]) private Users;

 function addTask(string calldata _task) external{
 Users[msg.sender].push(Task({
 task:_task,
 isDone:false
 }));
 }

 function getTask(uint _taskIndex) external view returns (Task memory){
 Task storage task = Users[msg.sender][_taskIndex];
 return task;
 }
}
3. Update Task: This method will update the values in the Task.
// SPDX-License-Identifier: GPL-3.0
pragma solidity >=0.8.0 <0.9.0;
/// @title A contract for demonstrate how to build a to-do list application
/// @notice For now, this contract just show how to update the task
contract Bloc{
 struct Task{
 string task;
 bool isDone;
 }

 mapping (address => Task[]) private Users;

 function addTask(string calldata _task) external{
 Users[msg.sender].push(Task({
 task:_task,
 isDone:false
 }));
 }

 function getTask(uint _taskIndex) external view returns (Task memory){
 Task storage task = Users[msg.sender][_taskIndex];
 return task;
 }

 function updateStatus(uint256 _taskIndex,bool _status) external{
 Users[msg.sender][_taskIndex].isDone = _status;
 }
}
4. Delete Task: deleteTask method will take the task index and then delete the element from the array just like in C.
// SPDX-License-Identifier: GPL-3.0
pragma solidity >=0.8.0 <0.9.0;
/// @title A contract for demonstrate how to build a to-do list application
/// @notice For now, this contract just show how to delete the task
contract Bloc{
 struct Task{
 string task;
 bool isDone;
 }

 mapping (address => Task[]) private Users;

 function addTask(string calldata _task) external{
 Users[msg.sender].push(Task({
 task:_task,
 isDone:false
 }));
 }

 function getTask(uint _taskIndex) external view returns (Task memory){
 Task storage task = Users[msg.sender][_taskIndex];
 return task;
 }

 function updateStatus(uint256 _taskIndex,bool _status) external{
 Users[msg.sender][_taskIndex].isDone = _status;
 }

 function deleteTask(uint256 _taskIndex) external{
 delete Users[msg.sender][_taskIndex];
 }
}
5. Get Task Count: The count of tasks can be retrieved as the task array length.
And the complete solidity program after adding all the above methods to deal with a task looks like this:
Click on the Compile button under the Solidity left navigation bar option after that Click on Deploy and Run Transaction in their deploy and inside the deployed contract you can find all the methods.
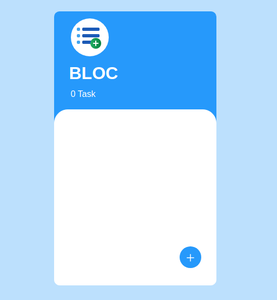
Now building the web application
The webpage will look like this-
let contractABI = COPIED TEXT;
The copied text will be enclosed in [].
let contractAddress = 'COPIED text';
The copied text might look like this 0xF3017acEDd45526aC6153FBBCfcA8096173D245a.
The contractABI helps the web3js with our smart contract
The contractAddress tells the web3js about where on blockchain is our smart contract
Now the application is fully working.