 |
VOOZH | about |
|
VOOZH | about |
Solidity is an Object-oriented Programming Language for implementing Smart Contracts. It's a High-Level Statically Typed Language like C. The solidity file has an extension .sol. The article focuses on discussing the decentralized bank smart contract in Solidity.
In the below example, the aim is to deploy a Smart Contract for Decentralized Bank System by using Solidity. In this contract, the Owner can add money (in the form of ETH, etc.) and he has certain functionalities like checking their Balance And Transferring to another Account. After performing the transaction owner can see the Balance.
Step 1: Open .
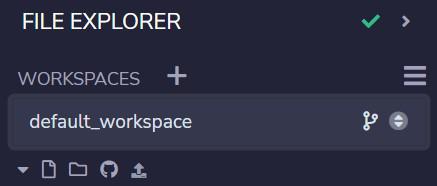
Step 2: Click on File Explorers and Create a new WORKSPACE (by Clicking on the + icon).
Step 3: Click on File Explorers and select Solidity in the environment and create a new file Decetralized_Bank.sol by clicking on New File section.
Step 4: Add the solidity code in the Decentralized_Bank.sol file.
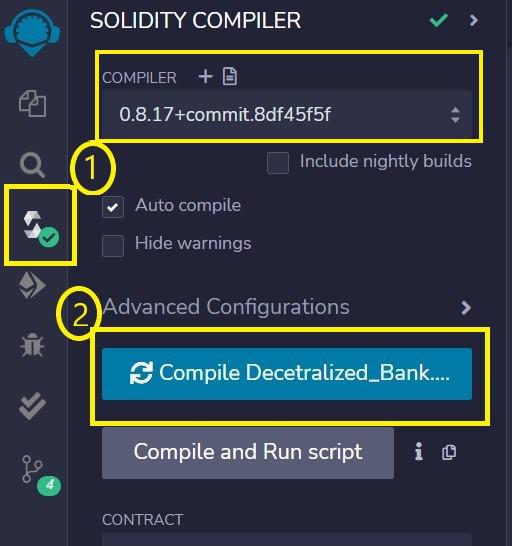
Step 5: Build a smart contract that contains all the details of the Bank with the help of Remix IDE by clicking on the file name. also check the compiler version at the top.
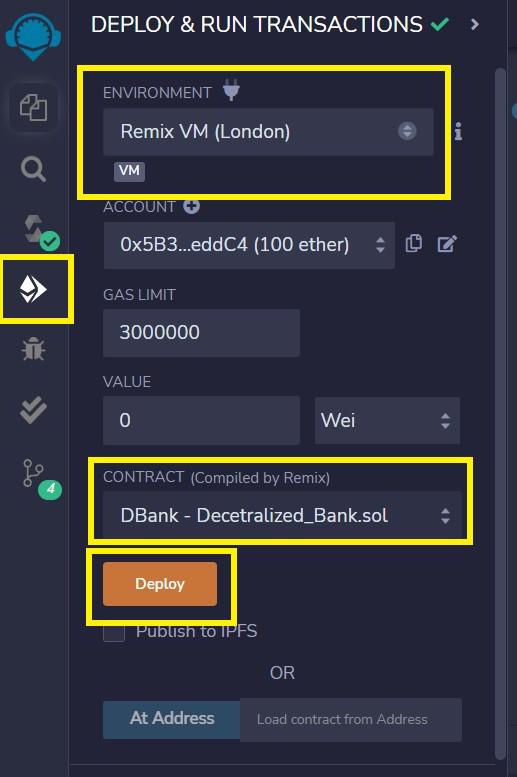
Step 6: After successful compilation, to deploy the contract, select the Environment Remix VM (London) before clicking on the Deploy button. And the Contract Should be selected as Decentralized_Bank.sol
Step 7: If the contract is successfully deployed then the deployed contract is obtained. Open the deployed contract and add the student details and transact it.
Output:
Add the Balance in DBank Press on Transact. it will show in the all transaction tab (bottom size). after adding get the balance as the amount that are we adding
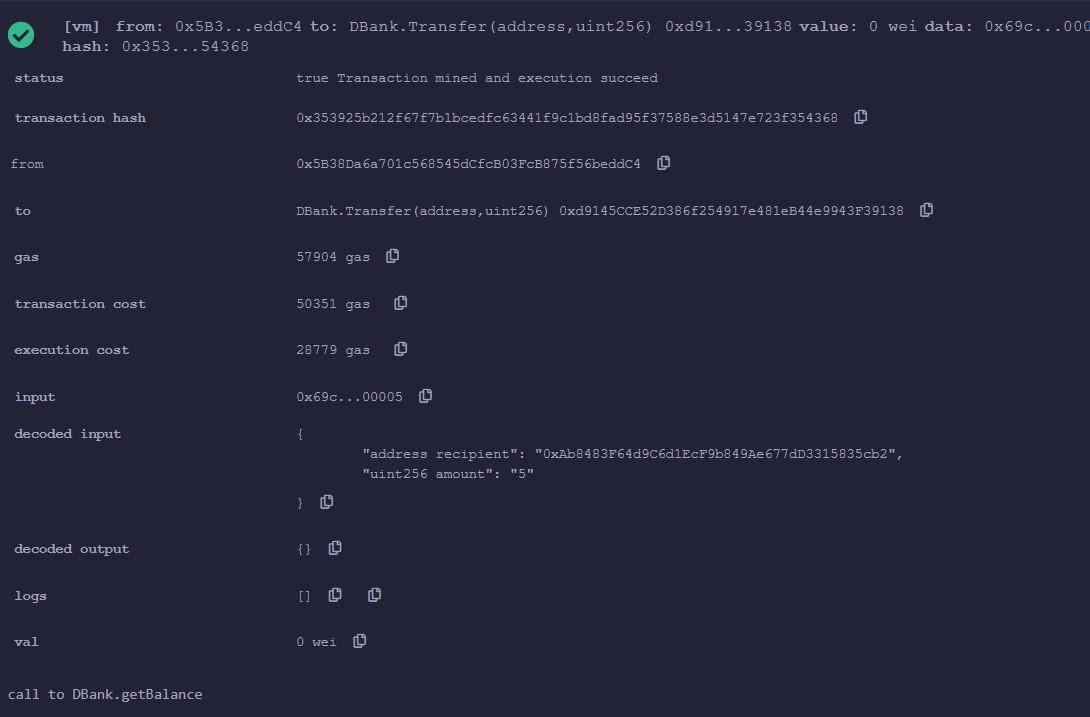
If the owner has to transfer money to another account then he required the address of the account and a sufficient amount of balance so that the transaction should be successful,
.png)
.png)