 |
VOOZH | about |
|
VOOZH | about |
In Google Sheets, inserting multiple rows means adding several new rows to a worksheet at once, either above or below selected rows. This feature helps users efficiently expand datasets, organize information, and manage large spreadsheets without repeatedly inserting rows one by one.
When working with large datasets, the ability to insert multiple rows quickly can be a game-changer. Here’s how you can do it:
Here we will know how to insert multiple rows in Google Sheets with easy and simple steps.
Open your Google Sheet and select the sheets in which you want to add multiple rows at the bottom. Just scroll down to the bottom of the Google Sheets to add the rows.
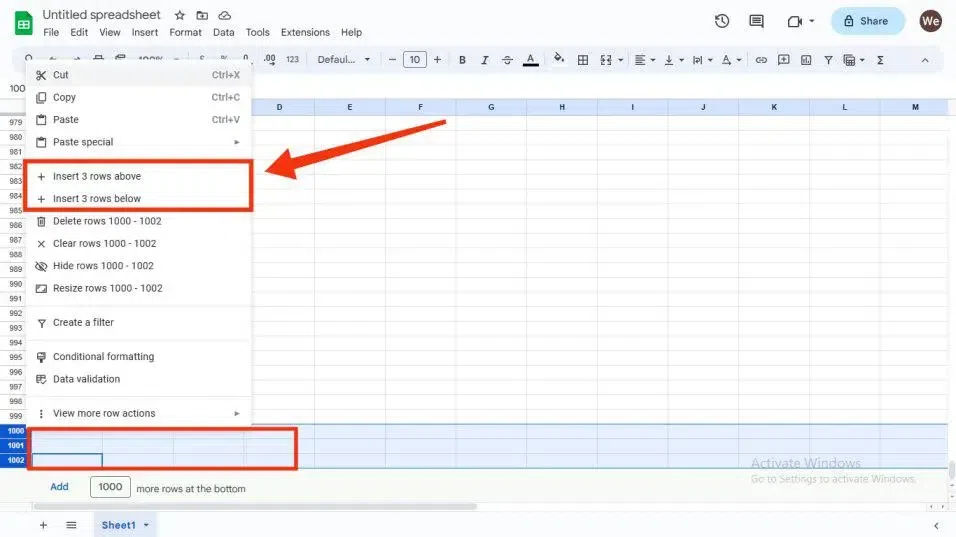
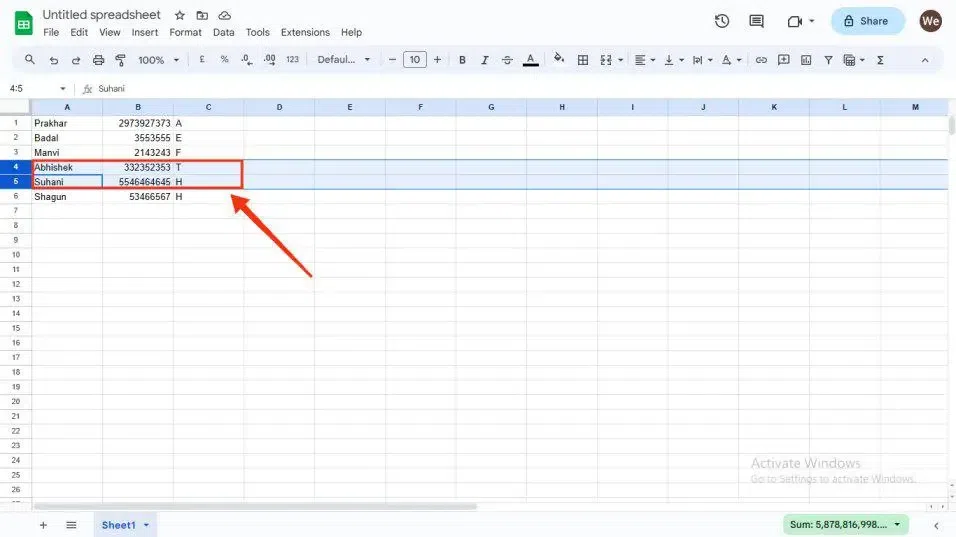
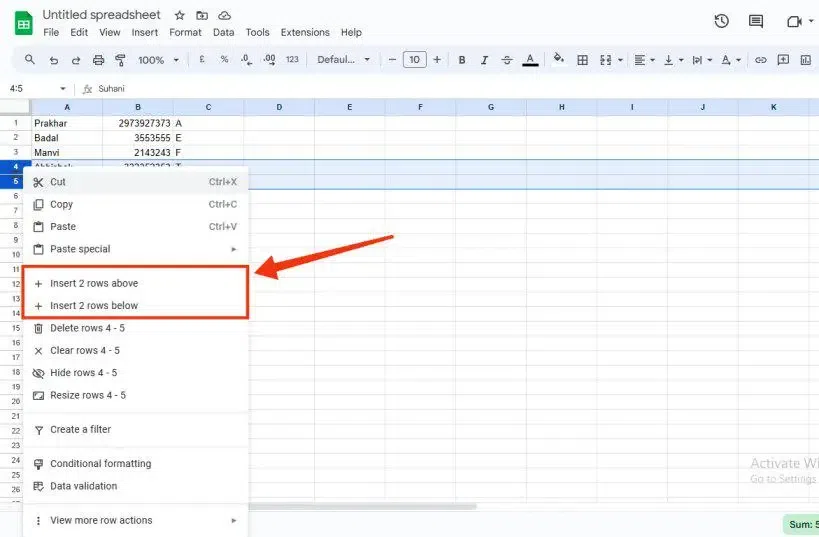
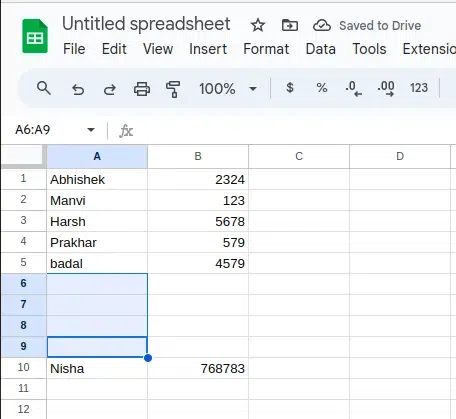
Select the rows by clicking on the serial number of the row or you can select multiple rows if you want to insert multiple rows. After selecting the rows perform right-click on the rows selected to open a drop-down menu and select "Insert rows above" or "Insert rows below".
Now the rows are inserted at the selected place.
You have successfully inserted Multiple Rows at the bottom in Google Sheets.
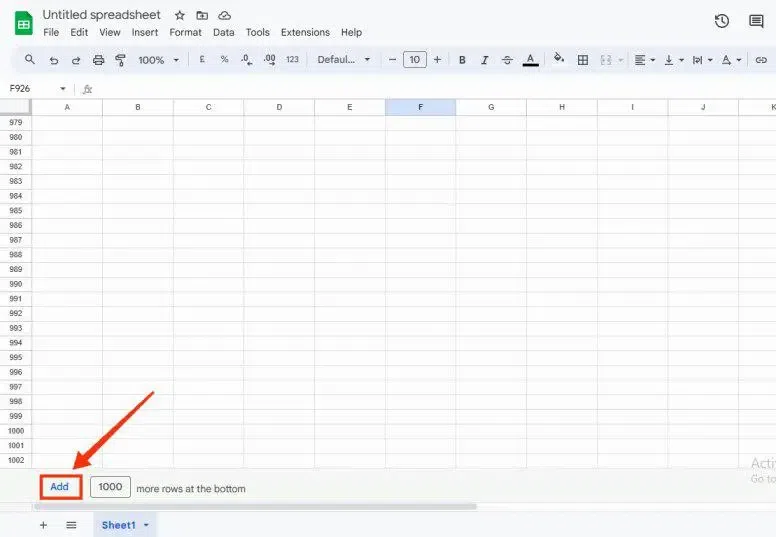
Note: You can also insert a bunch of 1000 rows just by clicking on the "Add" button present at the bottom of the Google sheet.
Follow the below steps to Insert Rows Using the Insert Tab in Excel
First, open your Google Sheet on your desktop in which you want to add rows.
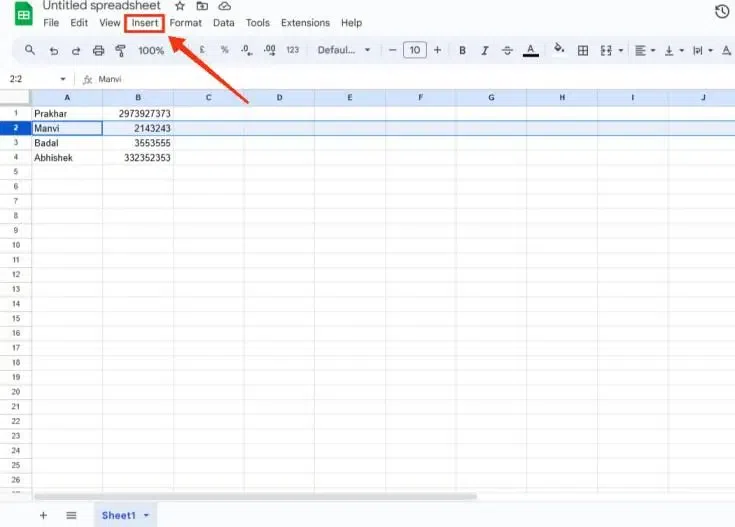
Click on the row number where you want to insert new rows.
Click on the “Insert” tab at the top, then select "Row" and choose to add the row above or below the selected row.
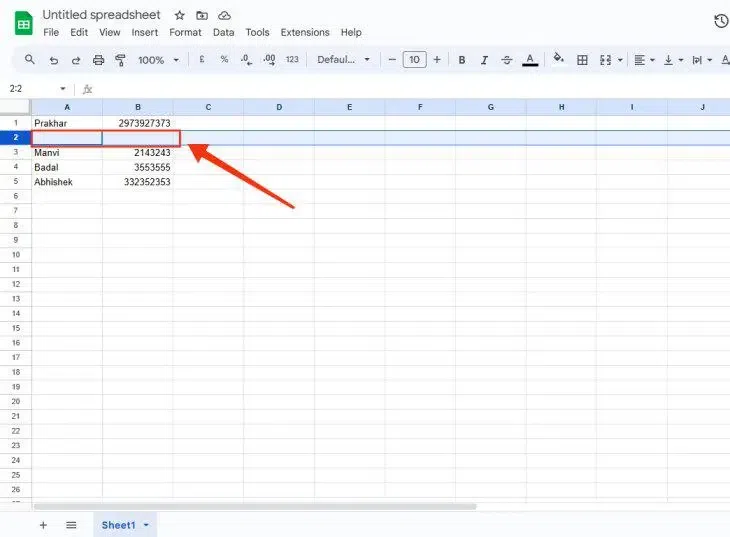
When you click on the insert tab you will observe a drop-down menu in which several operations will be listed among them select the "Rows" option and also select the place where you want to add the new row. As you have selected one row only one row will be added to the sheet.
Now your new row has been added to your Google Sheet and you can fill it with any info you want.
You have successfully inserted Row in Google Sheets Using Insert Tab.
Here is an another easy way to insert Multiple Rows in Excel using the Right-Click. Follow the below steps to Insert Multiple Rows in Excel Using Right Click.
Open your Google Sheet on your desktop in which you want to add a new row.
Highlight the rows you want to add new rows around and right-click to open the dropdown menu.
Select the "Insert X rows above" or "Insert X rows below" option.
Check your sheet to ensure the rows have been added successfully.
You have successfully Inserted Multiple Rows in Google Sheets by Right-Clicking.
Follow the Below steps to learn how to Insert Rows in Google Sheets on Android
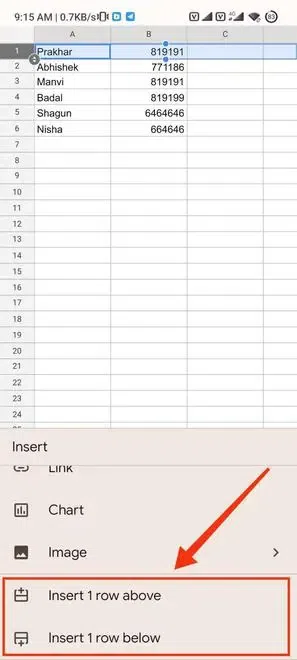
Launch the Google Sheets app and open your document.
Tap and hold the row number where you want to add a row. Click the "+" icon to open the insertion options.
Choose the "Insert Row" option from the dropdown menu.
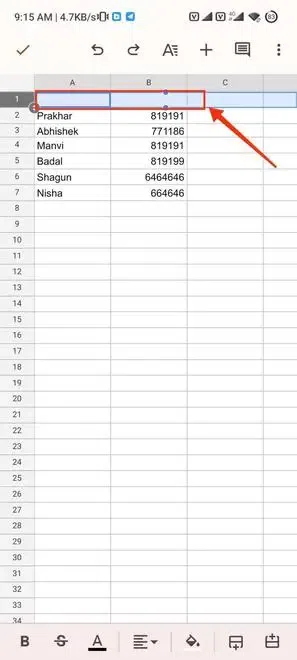
The new row is now added to your sheet.
You have successfully inserted Rows in Google Sheets on Android.
Open your Google Sheet in which you want to add a new row.
Tap your desired row from which you want to add a new row to the sheet and click on the Insert Row Icon present at the bottom of the Google Sheets interface.
A new row has been added to the Google Sheet and you can now fill it with any info you want.
You have successfully inserted Row Using Insert Row Icon in Google Sheet.
First, select the multiple rows in between or anywhere you want to add the rows.
The number of rows you will select the more rows will be inserted in the Google Sheets.
You have successfully inserted Multiple Rows In Google Sheets Using Insert Tab.
Note: The more rows you will select the more rows will be added to the sheets.
Also Read
.webp)
.webp)
.webp)
.webp)