
We continue our series about creating GUI applications under the Linux desktop using PyGObject, This is the second part of the series and today we’ll be talking about creating more functional applications using some advanced widgets.
Requirements
In the previous article we said that there are two ways for creating GUI applications using PyGObject: the code-only-way and the Glade designer way, but from now on, we’ll only be explaining the Glade designer way since it’s much easier for most users, you can learn the code-only-way by yourself using python-gtk3-tutorial.
Creating Advance GUI Applications in Linux
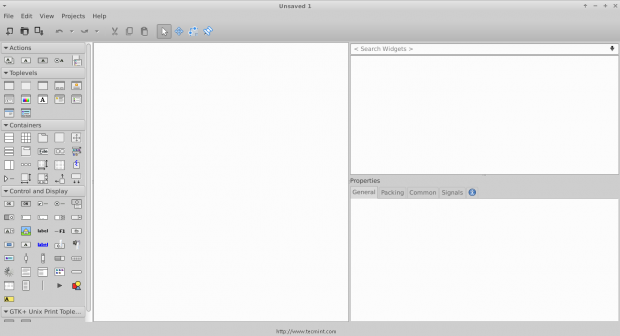
1. Let’s start programming! Open your Glade designer from the applications menu.
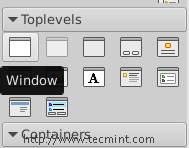
2. Click on the “Window” button on the left sidebar in order to create a new one.
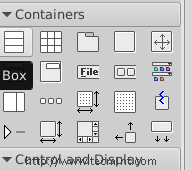
3. Click on the “Box” widget and release it on the empty window.
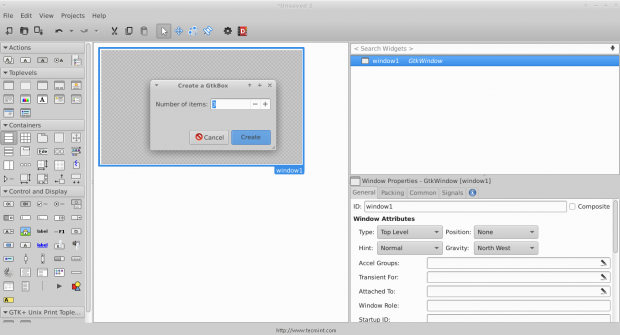
4. You will be prompted to enter the number of boxes you want, make it 3.
And you’ll see that the boxes are created, those boxes are important for us in order to be able to add more than just 1 widget in a window.
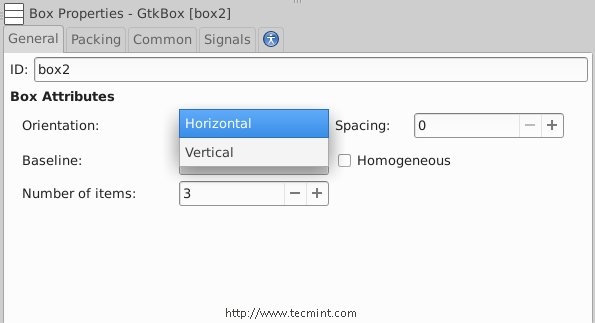
5. Now click on the box widget, and change the orientation type from vertical to horizontal.
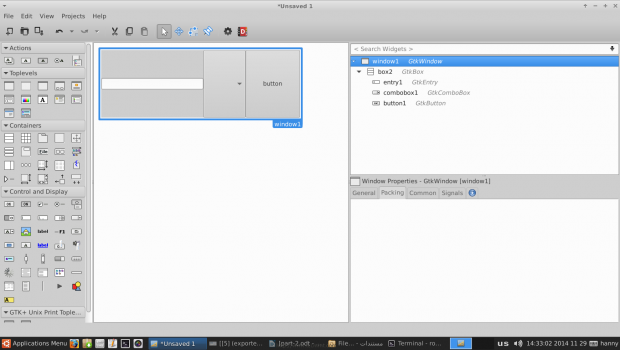
6. In order to create a simple program, add a “Text Entry”, “Combo Box Text” and a “Button” widgets for each one of the boxes, you should have something like this.
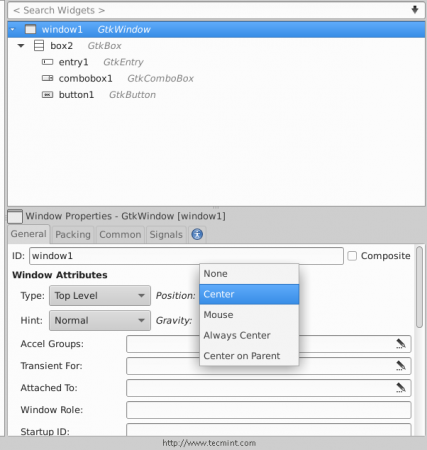
7. Now click on the “window1” widget from the right sidebar, and change its position to “Center“.
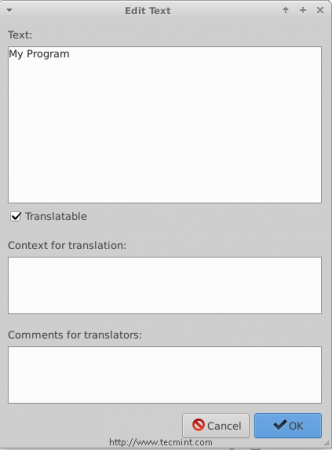
Scroll down to the “Appearance” section.. And add a title for the window “My Program“.
8. You can also choose an icon for the window by clicking on the “Icon Name” box.
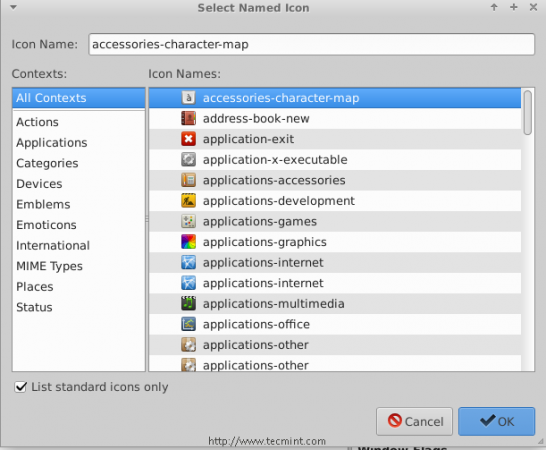
9. You can also change the default height & width for the application.. After all of that, you should have something like this.
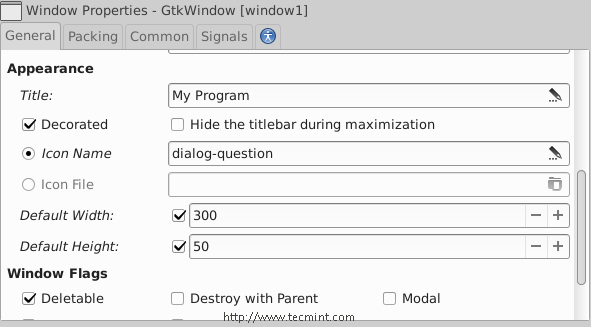
In any program, one of the most important thing is to create a “About” window, to do this, first we’ll have to change the normal button we created before into a stock button, look at the picture.
10. Now, we’ll have to modify some signals in order to run specific actions when any event occur on our widgets. Click on the text entry widget, switch to the “Signals” tab in the right sidebar, search for “activated” and change its handler to “enter_button_clicked”, the “activated” signal is the default signal that is sent when the “Enter” key is hit while focusing on the text entry widget.
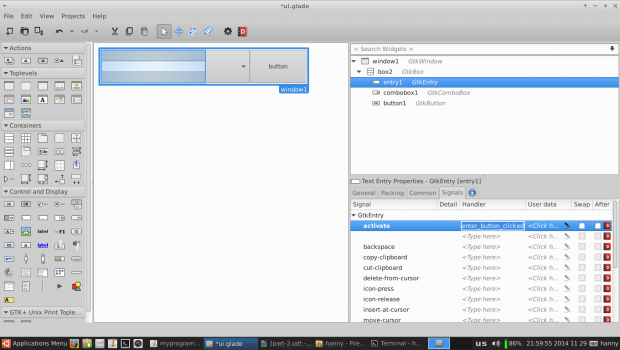
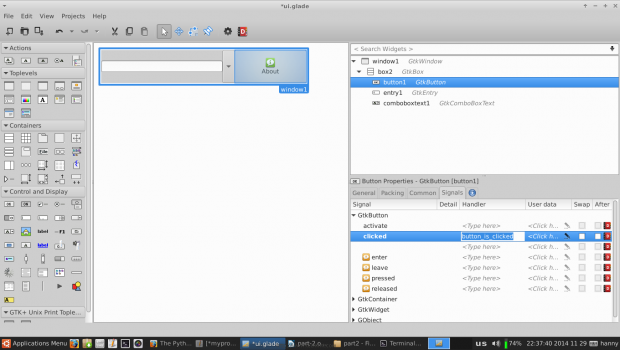
We’ll have to add another handler for the “clicked” signal for our about button widget, click on it and change the “clicked” signal to “button_is_clicked“.
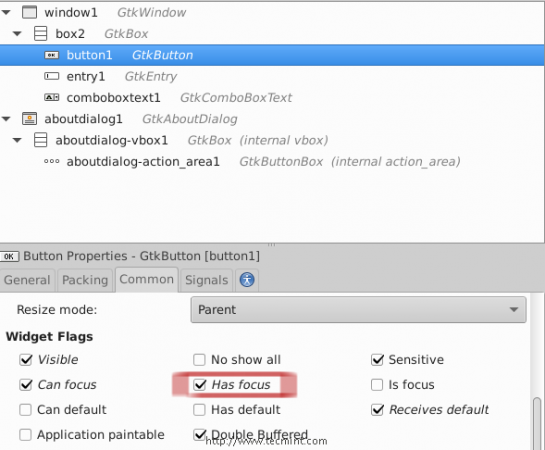
11. Go to the “Common” tab and mark on “Has Focus” as it follows (To give the default focus for the about button instead of the entry).
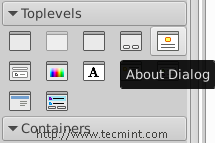
12. Now from the left sidebar, create a new “About Dialog” window.
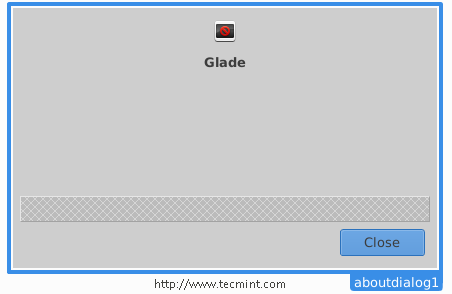
And you will notice that the “About Dialog” window is created.
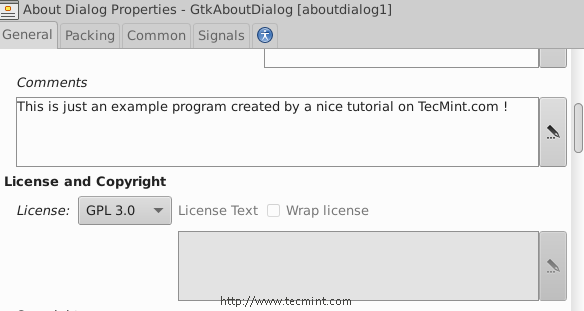
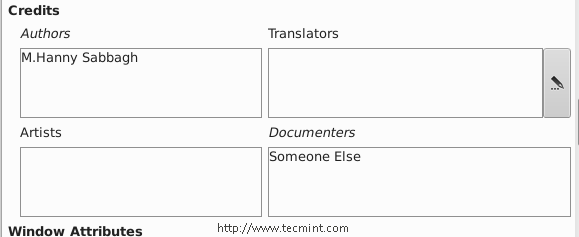
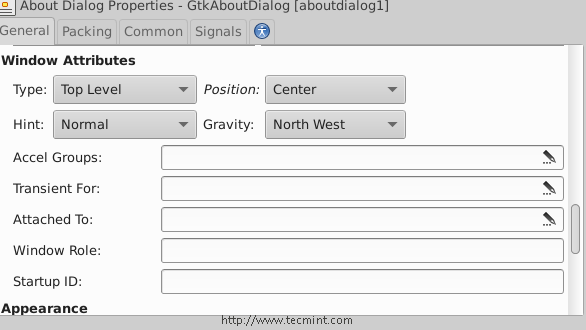
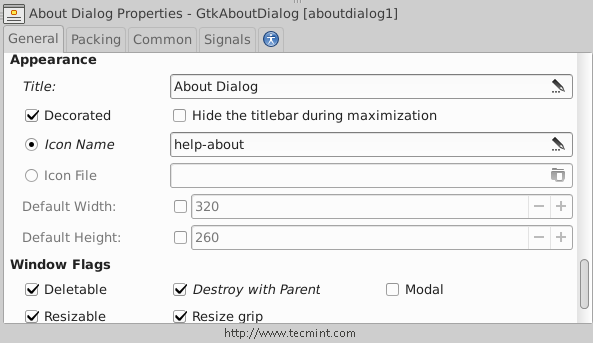
Let’s modify it.. Make sure that you insert the following settings for it from the right sidebar.
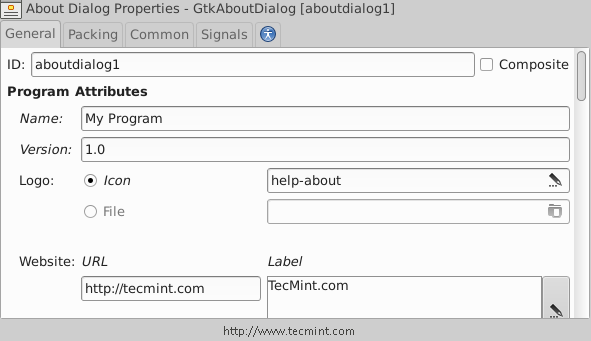
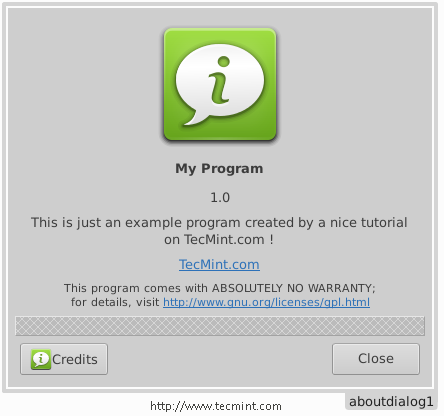
After making above settings, you will get following about Window.
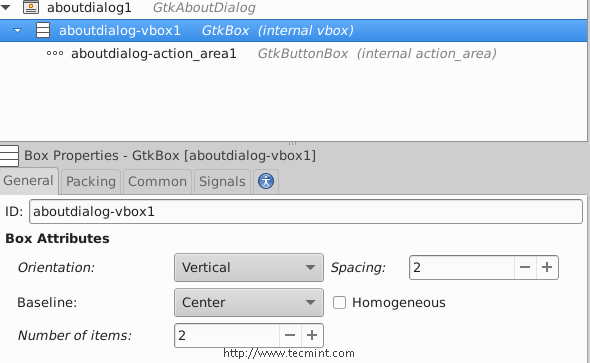
In the above window, you will notice the empty space, but you can remove it by declining the number of boxes from 3 to 2 or you can add any widget to it if you want.
13. Now save the file in your home folder in the name “ui.glade” and open a text editor and enter the following code inside it.
#!/usr/bin/python
# -*- coding: utf-8 -*-

from gi.repository import Gtk
class Handler:

 def button_is_clicked(self, button):
 ## The ".run()" method is used to launch the about window.
 ouraboutwindow.run()
 ## This is just a workaround to enable closing the about window.
 ouraboutwindow.hide()

 def enter_button_clicked(self, button):
 ## The ".get_text()" method is used to grab the text from the entry box. The "get_active_text()" method is used to get the selected item from the Combo Box Text widget, here, we merged both texts together".
 print ourentry.get_text() + ourcomboboxtext.get_active_text()

## Nothing new here.. We just imported the 'ui.glade' file.
builder = Gtk.Builder()
builder.add_from_file("ui.glade")
builder.connect_signals(Handler())

ournewbutton = builder.get_object("button1")

window = builder.get_object("window1")

## Here we imported the Combo Box widget in order to add some change on it.
ourcomboboxtext = builder.get_object("comboboxtext1")

## Here we defined a list called 'default_text' which will contain all the possible items in the Combo Box Text widget.
default_text = [" World ", " Earth ", " All "]

## This is a for loop that adds every single item of the 'default_text' list to the Combo Box Text widget using the '.append_text()' method.
for x in default_text:
 ourcomboboxtext.append_text(x)

## The '.set.active(n)' method is used to set the default item in the Combo Box Text widget, while n = the index of that item.
ourcomboboxtext.set_active(0)
ourentry = builder.get_object("entry1")

## This line doesn't need an explanation :D
ourentry.set_max_length(15)

## Nor this do.
ourentry.set_placeholder_text("Enter A Text Here..")

## We just imported the about window here to the 'ouraboutwindow' global variable.
ouraboutwindow = builder.get_object("aboutdialog1")

## Give that developer a cookie !
window.connect("delete-event", Gtk.main_quit)
window.show_all()
Gtk.main
Save the file in your home directory under that name “myprogram.py”, and give it the execute permission and run it.
$ chmod 755 myprogram.py
$ ./myprogram.py
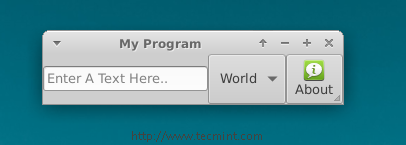
This is what you will get, after running above script.
Enter a text in the entry box, hit the “Enter” key on the keyboard, and you will notice that the sentence is printed at the shell.
That’s all for now, it’s not a complete application, but I just wanted to show you how to link things together using PyGObject, you can view all methods for all GTK widgets at gtkobjects.
Just learn the methods, create the widgets using Glade, and connect the signals using the Python file, That’s it! It’s not hard at all my friend.
We’ll explain more new things about PyGObject in the next parts of the series, till then stay updated and don’t forget to give us your comments about the article.
If this article helped you solve a problem, consider buying a coffee. It helps keep TecMint free, supports the authors, and keeps the project going.
Got Something to Say? Join the Discussion... Cancel reply