
This tutorial will guide you on how to install Fedora 32 Workstation in dual boot with Microsoft Windows 10 Operating System pre-installed on a BIOS firmware machine.
If your computer has no pre-installed operating system and you plan to install Fedora Linux in dual-boot with a Microsoft operating system, you should first install Windows on your machine before installing Fedora Linux.
However, try to disable Fast Boot and Secure Boot options in UEFI firmware based machines if you plan to install Fedora in dual boot with Windows.
Also, if Windows installation was performed in UEFI mode (not in Legacy Mode or CSM – Compatibility Support Module), Fedora installation should also be performed in UEFI mode.
The installation procedure of Fedora Linux alongside a Microsoft Windows 10 OS requires no special configurations to be made in BIOS-based motherboards, except maybe changing the BIOS boot order.
The only requirement is, you must allocate a free space on the disk with at least 20 GB in size in order to use it later as a partition for Fedora installation.
Requirements
Preparing Windows Machine for Dual-Boot for Fedora
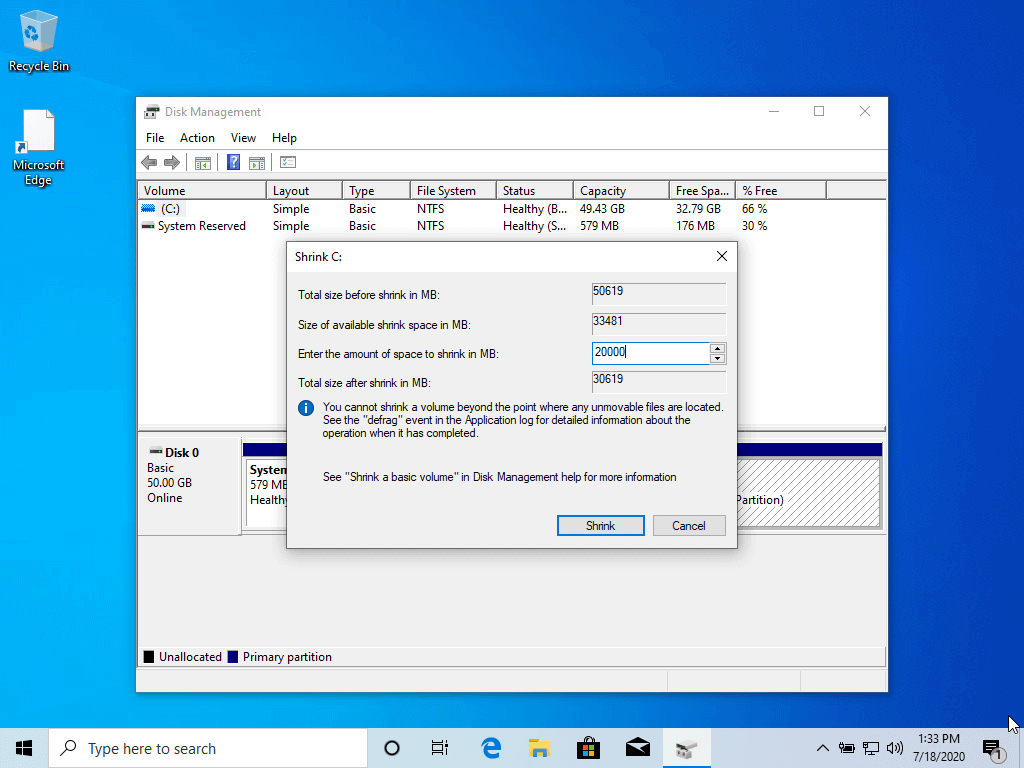
Open your windows Disk Management utility and right-click on C: partition and select Shrink Volume in order to resize the partition for Fedora installation.
Give at least 20000 MB (20GB) depending on the size of C: partition and hit Shrink to start partition resize as shown below.
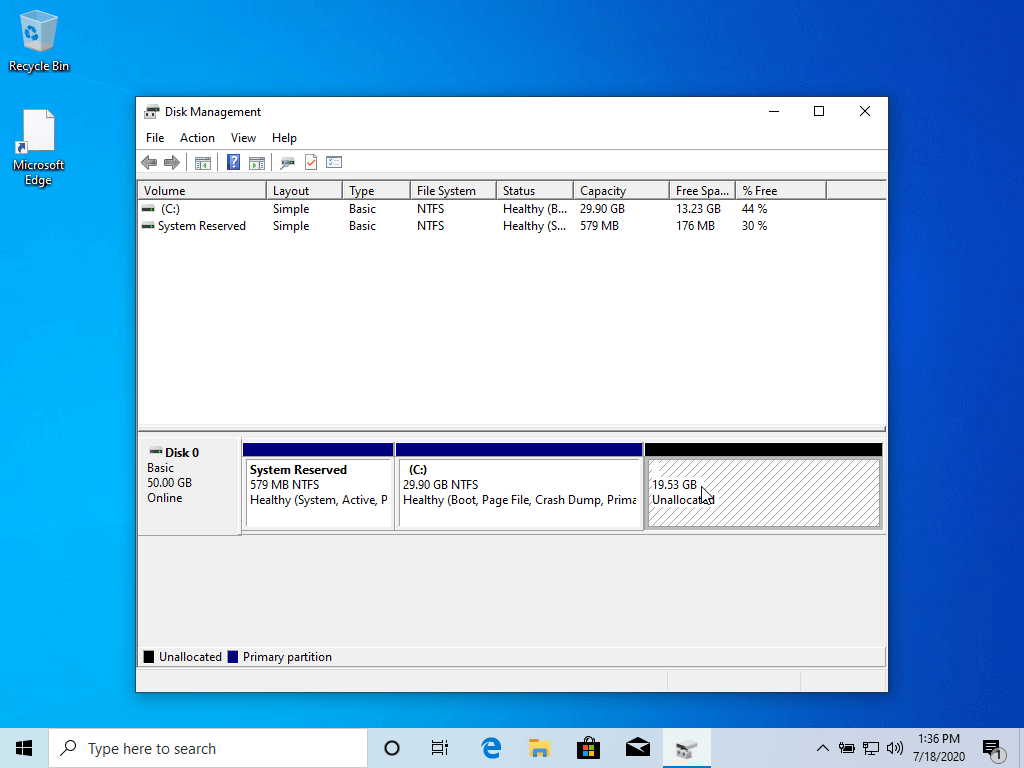
After resizing partition, you will see a new unallocated space on the hard drive. Leave it as default and reboot the system in order to proceed with the Fedora installation.
Install Fedora 32 with Windows Dual-Boot
1. On the first step, download the Fedora DVD ISO image and burn it to a DVD disk or create a bootable USB flash drive using the Fedora Media Writer tool or other utility.
To create a bootable Fedora USB drive compatible with installation performed in UEFI mode, use Rufus utility or Etcher. Also, check out 10 useful tools to make a bootable USB drive from an ISO image.
Place Fedora bootable media into your machine appropriate drive, restart the machine and instruct the BIOS or UEFI firmware to boot from DVD/USB bootable media.
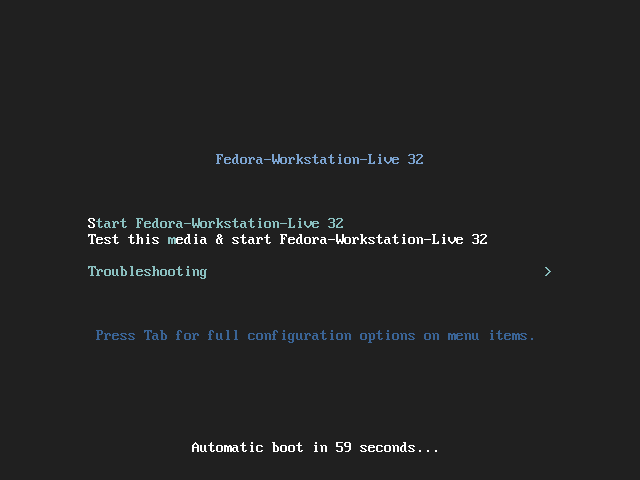
2. On the first installation screen, select Install Fedora Workstation Live 32 and press [enter] key to continue.
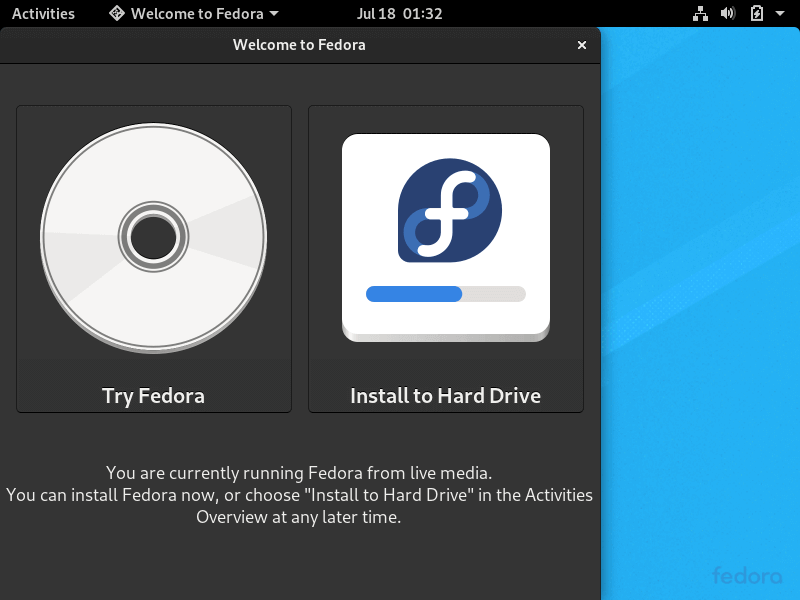
3. After the installer loads the Fedora Live system, click on Install to Hard Drive option in order to start the installation process.
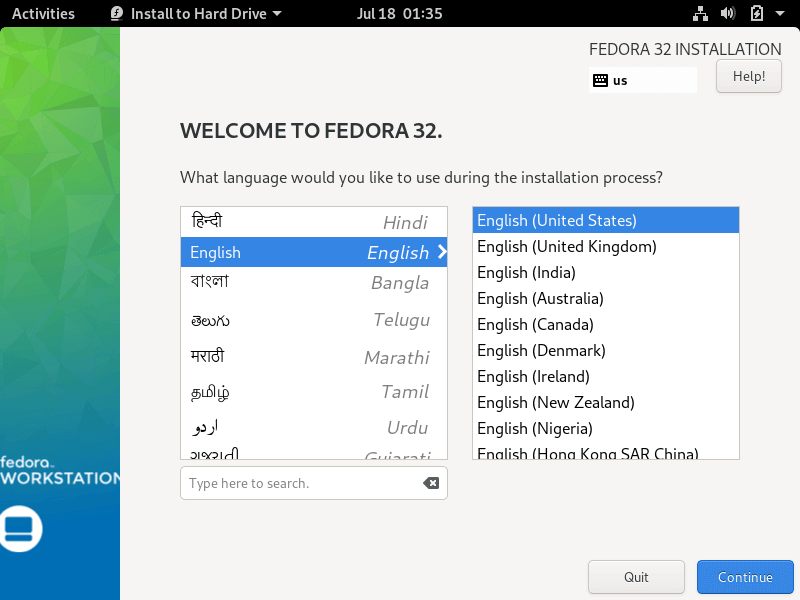
4. On the next screen, select the language that will be used during the installation process and hit on the Continue button.
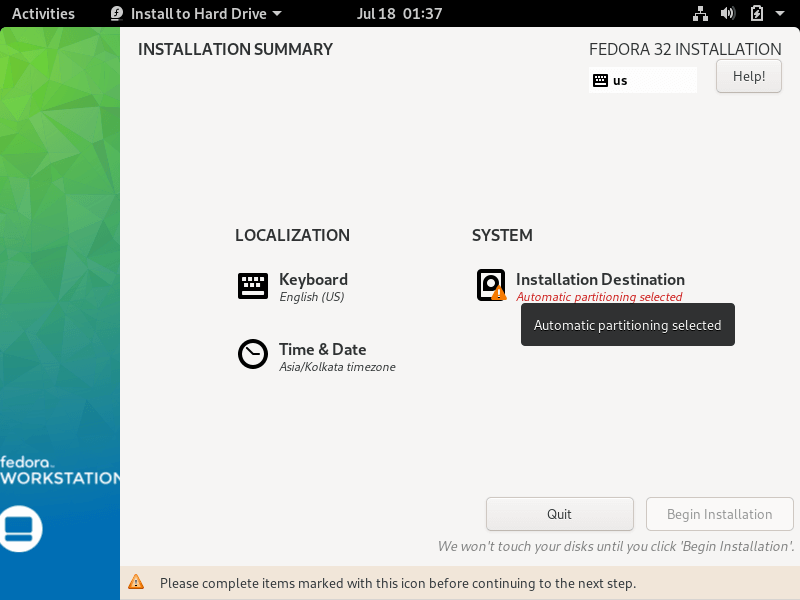
5. The next screen will present you Fedora Installation Summary menu. First, click on the Keyboard menu, choose your system keyboard layout, and hit on the top Done button to complete this step and go back to the main menu, as illustrated in the below images.
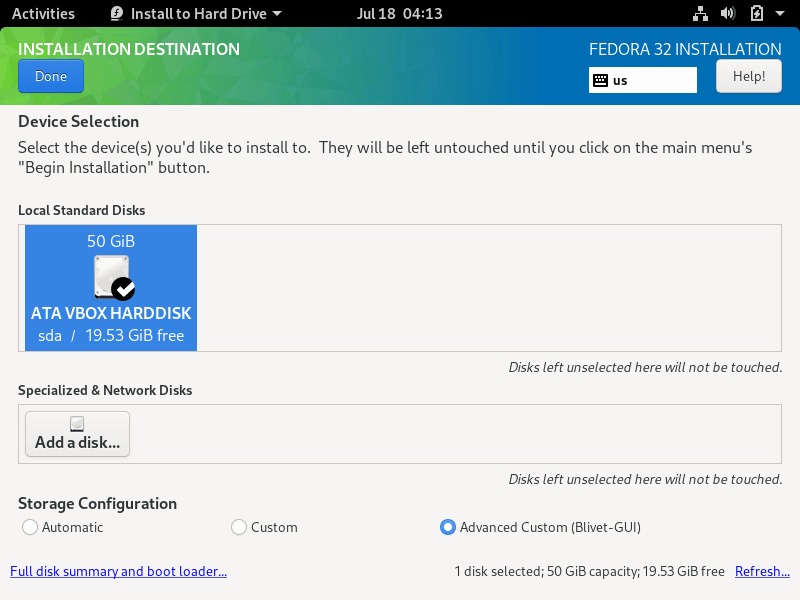
6. Next, click on the Installation Destination menu, check your machine hard disk and select the Advanced Custom (Blivet-GUI) option to configure the storage. Again, hit on the Done button to enter the Blivet GUI Partitioning program.
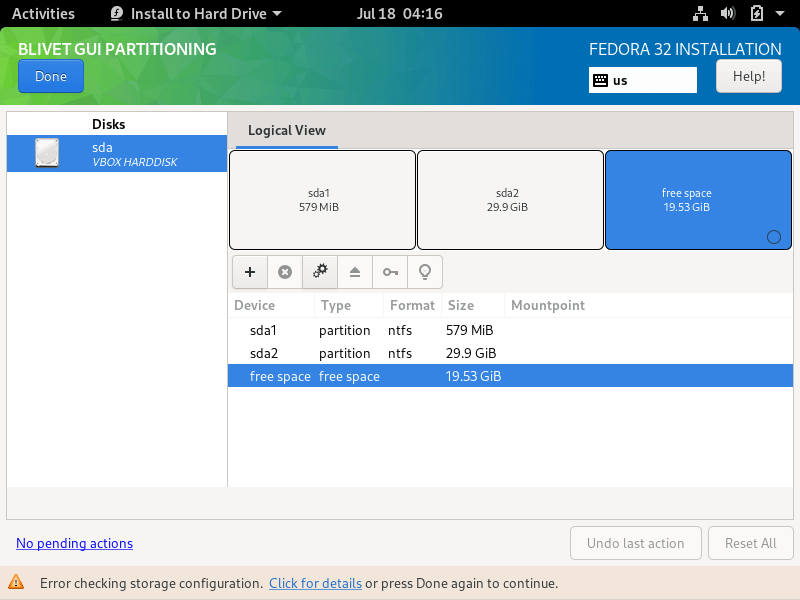
7. In this step, select the free space that resulted after shrinking the Windows partition will be used for installing Fedora Workstation. Select the free space and hit on the + button to create a new partition
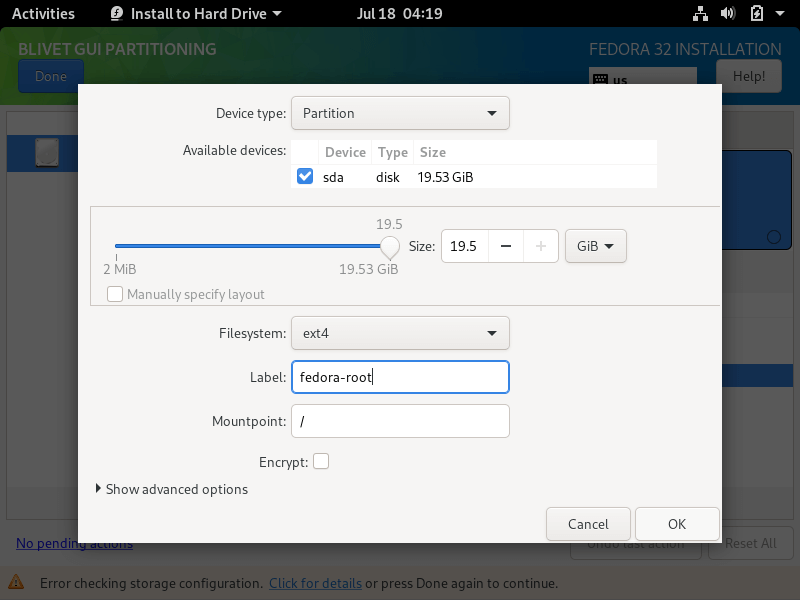
8. On partition settings window, enter the size of the partition, select a file system type, such as the robust ext4 file system to format the partition, add a label for this partition and use /(root) as the mount point of this partition.
When you finish hit the OK button to apply the new configuration. Use the same procedure to create the swap partition or other partitions for your system. In this tutorial, we’ll create and install Fedora on a single partition mounted in /(root) tree and we’ll configure no swap space.
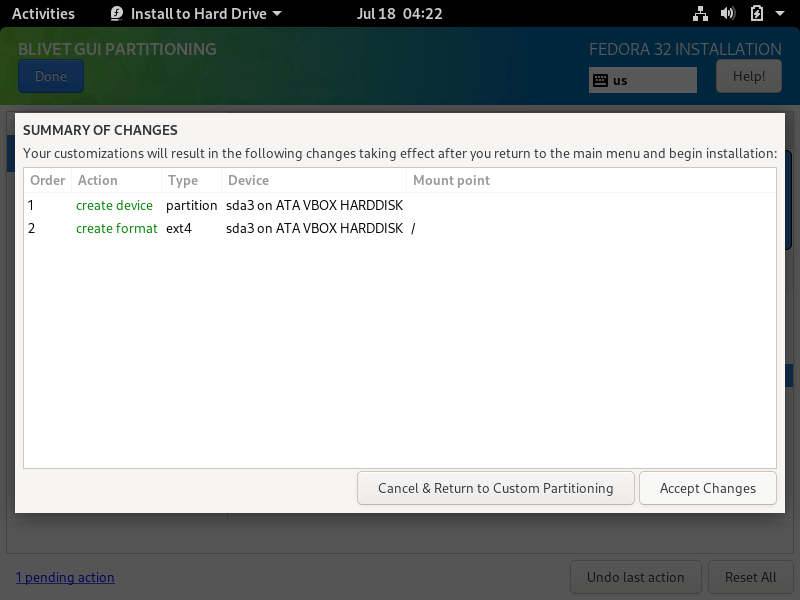
9. After you’ve created the partitions, review the partition table and press the top Done button twice to confirm configuration and hit on Accept Changes button from the pop-up Summary of Changes window to apply storage partition configurations and return to the main menu.
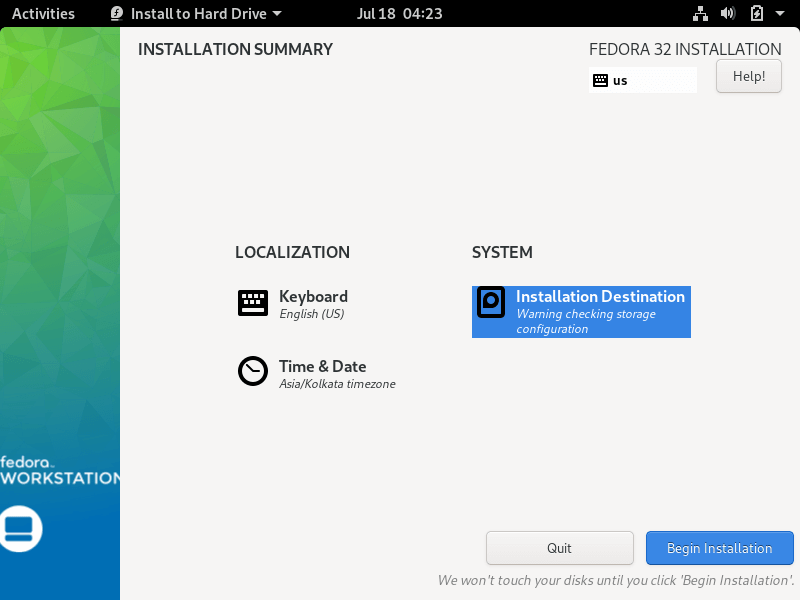
10. To start the installation process, just hit on the Begin Installation button, as illustrated in the following image.
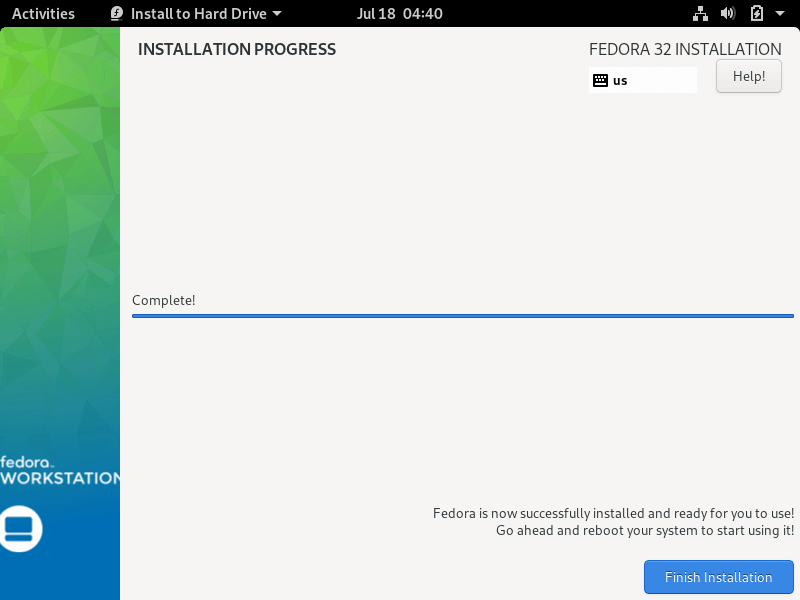
11. After the installation completes, eject Fedora installation media and reboot the machine.
Fedora 32 Post Installation
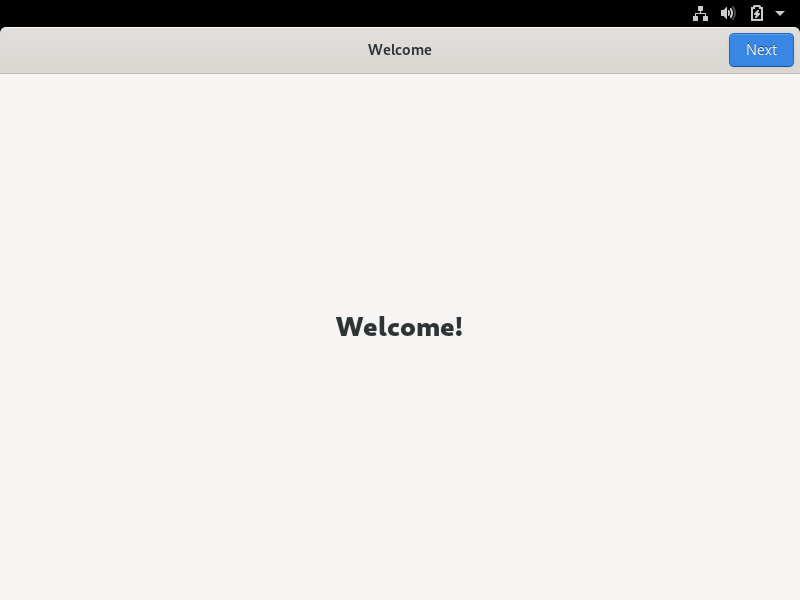
12. After the system boots up, follow the Fedora post-installation instructions as shown.
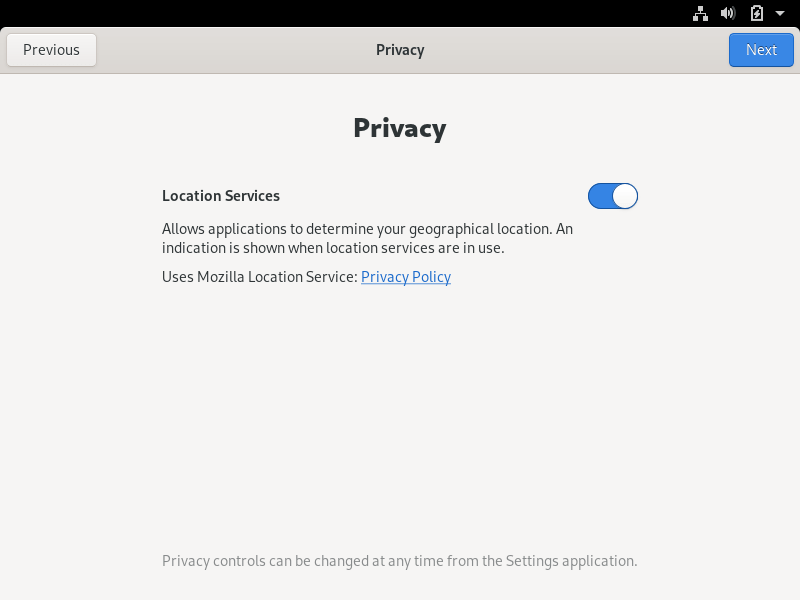
12. Allow applications to determine your location.
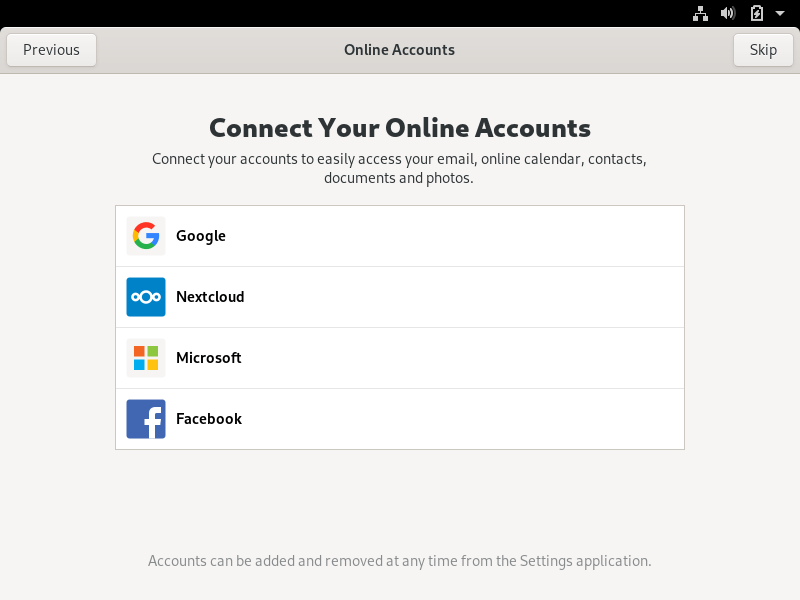
13. Connect online accounts to access your email accounts, contacts, documents, photos and more.
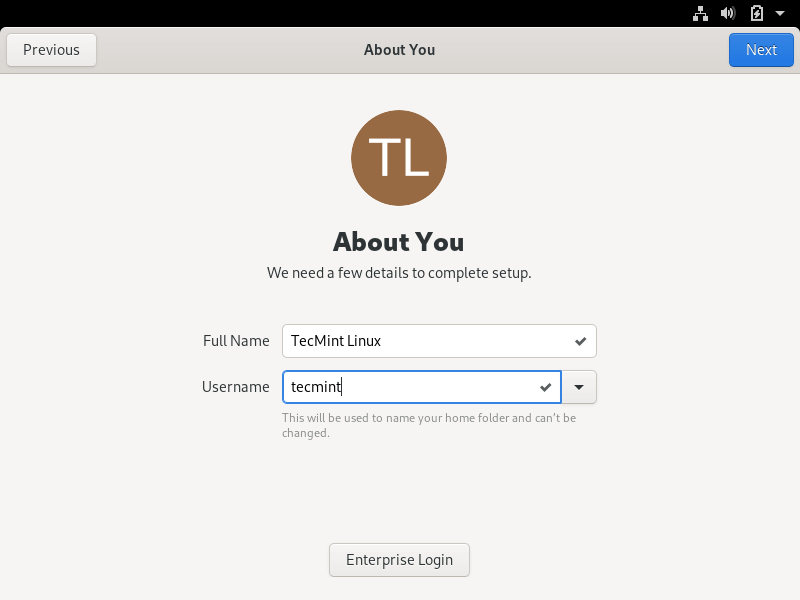
14. Next, add the name of a new user and set up a strong password for the new account.
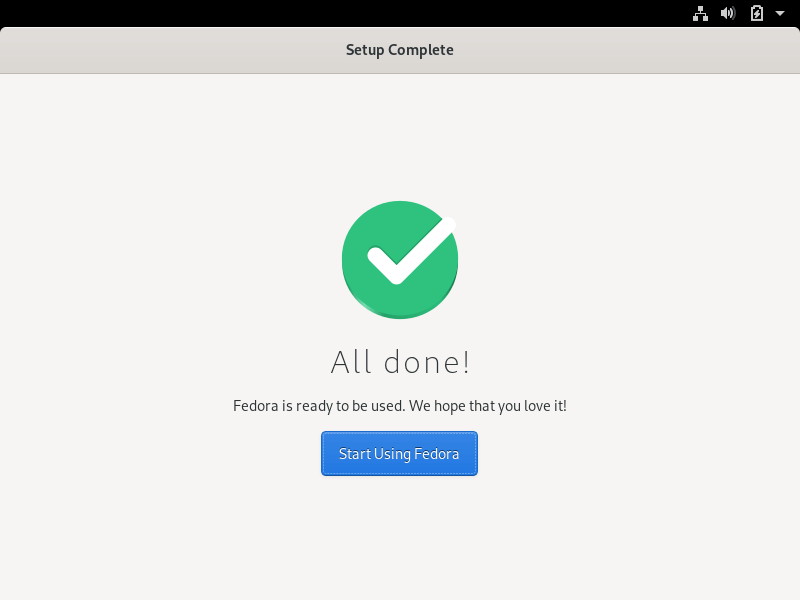
15. Finally, your Fedora system is ready to use.
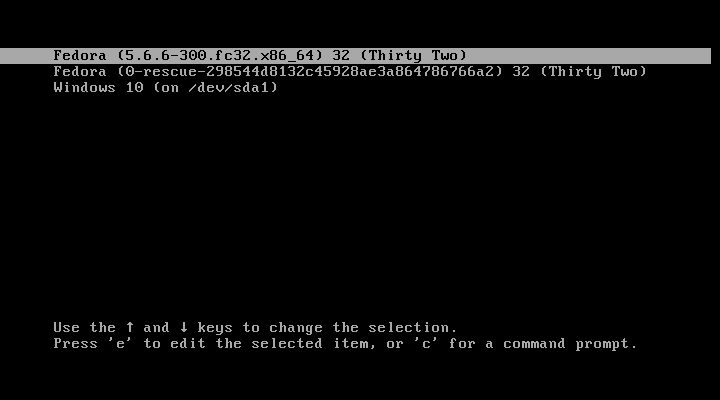
16. After reboot, you will be directed to the GRUB menu, where for 5 seconds you can choose what operating system you want the machine to boot from Fedora or Windows.
Sometimes, in cases of dual-booting Linux-Windows in UEFI firmware machines, the GRUB menu is not always displayed after reboot. If that’s your case, boot the machine in to Windows 10, open a Command prompt with elevated privileges and execute the following command in order to restore the GRUB menu.
bcdedit /set {bootmgr} path \EFI\fedora\shim.efi
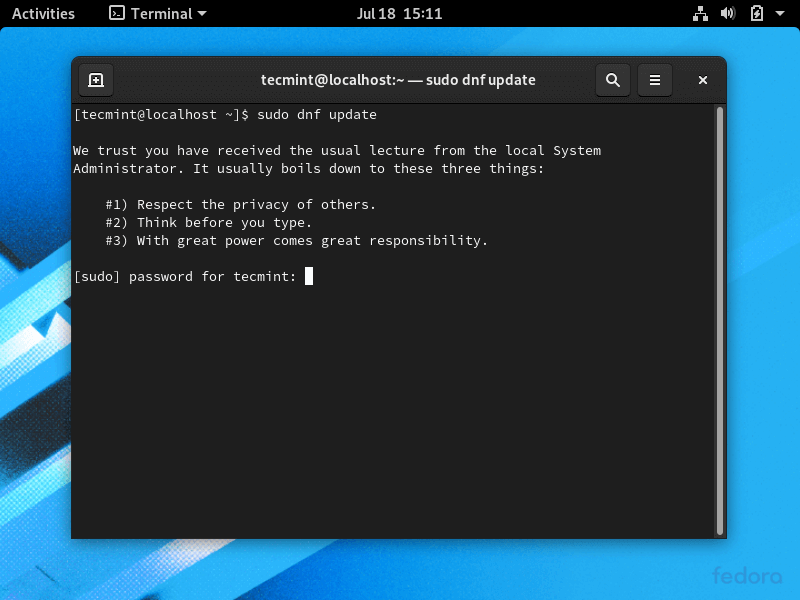
17. Log in to Fedora Desktop with the account and open a Terminal console and update the fedora system by issuing the below command.
$ sudo dnf update
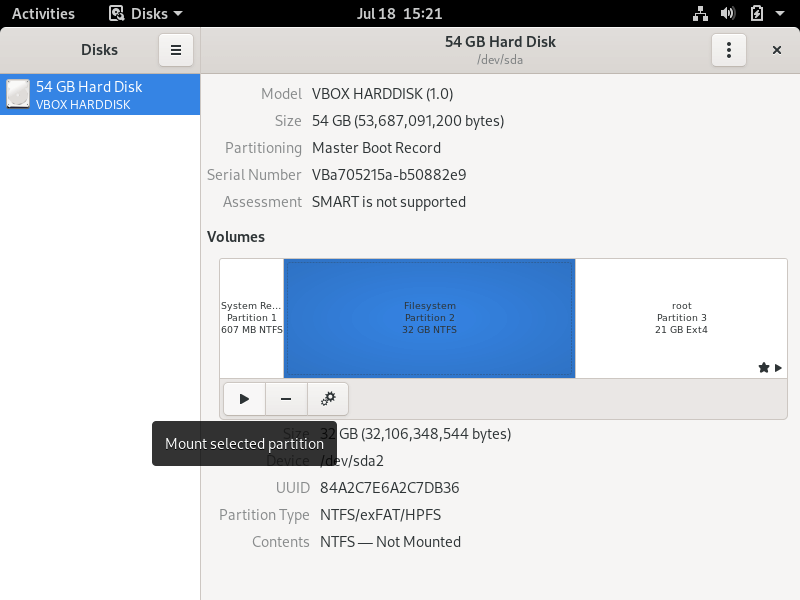
18. In case you want to access a Windows partition under Linux, open Disks utility, select the Windows NTFS partition, and hit on mount button (the button with a triangle sign).
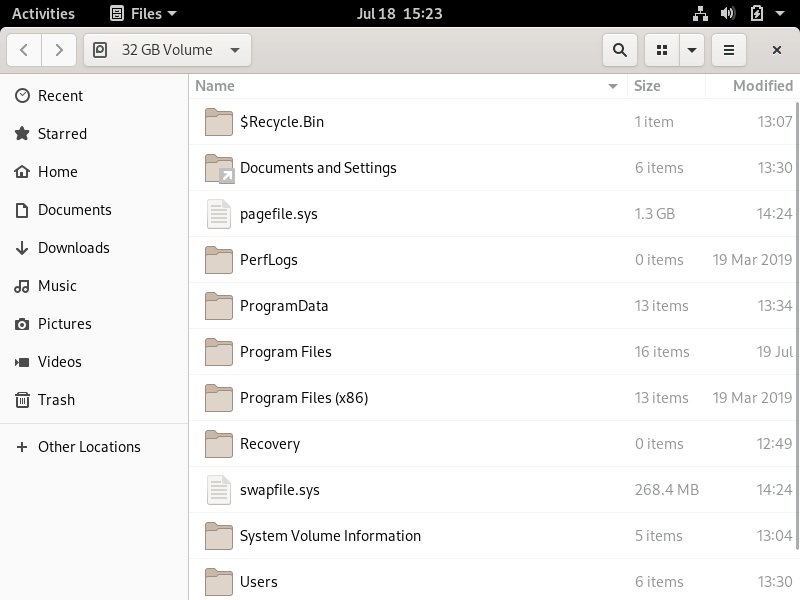
19. To browse the mounted Microsoft Windows partition, open Files -> Other Locations and double-click on NTFS partition Volume to open the NTFS partition.
Congratulations! You’ve successfully installed the latest version of Fedora 32 Workstation in dual-boot with Windows 10. Reboot the machine and select Windows from the GRUB menu in order to switch the operating system back to Windows 10.
If this article helped you solve a problem, consider buying a coffee. It helps keep TecMint free, supports the authors, and keeps the project going.
Got Something to Say? Join the Discussion... Cancel reply