
MySQL is the most widely used open-source database management system used to keep and retrieve data for a broad variety of famous applications. In Debian 10, MariaDB comes with by default as a drop-in replacement for MySQL and in most cases, MariaDB works well.
That’s why, in our two previous articles, we have used the MariaDB database server, where we’ve shown how to install the LAMP and LEMP stack on Debian 10.
If you want features only found in MySQL, then you need to install it from the official MySQL APT repositories as shown in this article.
Step 1: Adding the MySQL Software Repository
To install the latest version of MySQL, you need to download and install the MySQL APT repository comes in .deb the package that manages to configure and install the MySQL software repositories on your Debian system.
$ cd /tmp
$ wget https://dev.mysql.com/get/mysql-apt-config_0.8.13-1_all.deb
$ sudo dpkg -i mysql-apt-config_0.8.13-1_all.deb
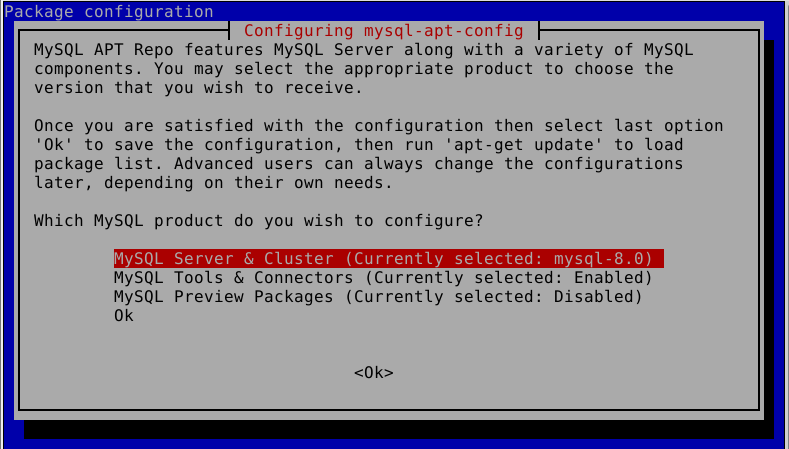
During the package installation, you will be prompted to configure the MySQL APT repository to select the versions of the MySQL server and other components that you want to install. Leave the default option to install the latest version. Once you are done, click Enter or go to OK and hit Enter.
Step 2: Installing MySQL on Debian 10
After adding the MySQL APT repository, update the APT packages cache and install the MySQL server package, which will also install the packages for the client and for the database common files as follows.
$ sudo apt update
$ sudo apt install mysql-server
During the installation of the package, a package configuration dialog window will show up, asking you to set a database root user password for your MySQL. Enter a secure and strong password then confirm it by re-entering it.
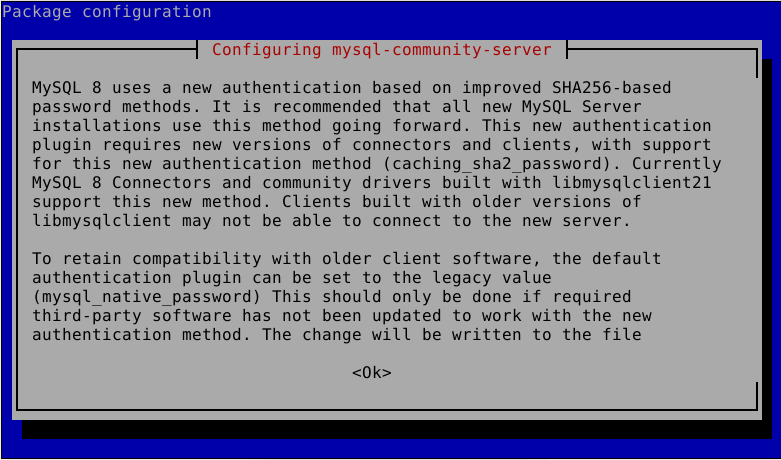
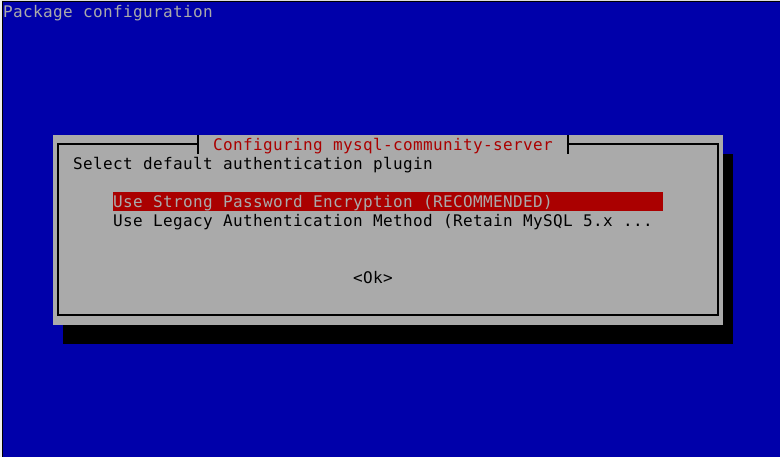
Then read about the new authentication system based on SHA256-based password methods, used by MySQL and click Ok. And choose the default authentication plugin you want to use (leave the default option to use the recommended plugin) and hit the Enter button to complete the installation process.
When the package installation is complete, the installer triggers systemd to automatically start the MySQL service and configures it to start at system boot. To make sure that the MySQL service is up and running, verify its status using the following command.
$ sudo systemctl status mysql
Sample Output
● mysql.service - MySQL Community Server
 Loaded: loaded (/lib/systemd/system/mysql.service; enabled; vendor preset: enabled)
 Active: active (running) since Thu 2019-08-01 06:20:12 UTC; 3s ago
 Docs: man:mysqld(8)
 http://dev.mysql.com/doc/refman/en/using-systemd.html
 Process: 2673 ExecStartPre=/usr/share/mysql-8.0/mysql-systemd-start pre (code=exited, status=0/SUCCESS)
 Main PID: 2709 (mysqld)
 Status: "Server is operational"
 Tasks: 39 (limit: 4915)
 Memory: 378.4M
 CGroup: /system.slice/mysql.service
 └─2709 /usr/sbin/mysqld

Aug 01 06:20:10 tecmint systemd[1]: Starting MySQL Community Server...
Aug 01 06:20:12 tecmint systemd[1]: Started MySQL Community Server.
There are several other systemctl commands that you need to know to manage (start, restart, stop, and reload) the MySQL service where necessary, these are:
$ sudo systemctl start mysql
$ sudo systemctl restart mysql
$ sudo systemctl stop mysql
$ sudo systemctl reload mysql
Step 3: Securing MySQL in Debian 10
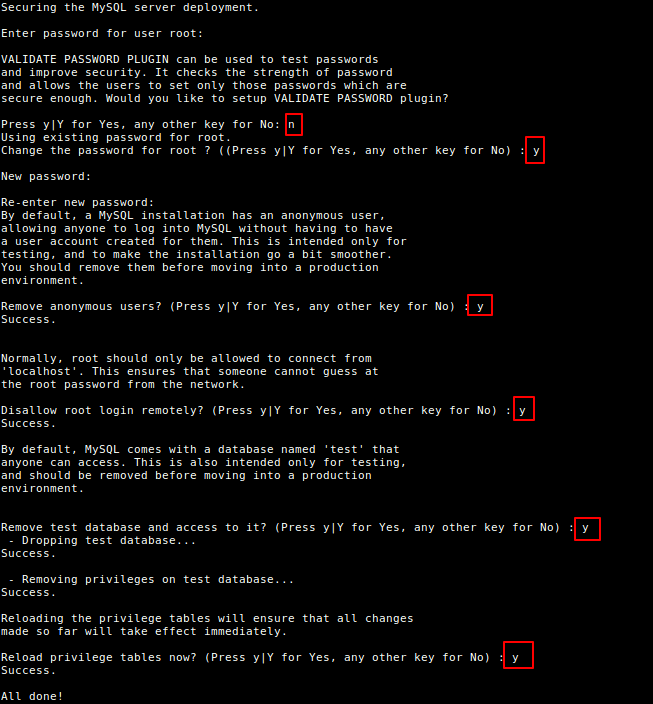
Any fresh MySQL server deployment is insecure by default and to improve the security of your MySQL server instance, you need to run the mysql_secure_installation shell script which prompts you to determine which actions to perform.
$ sudo mysql_secure_installation
Then answer the questions correctly by reading the description of each. First, enter the root user password you set during the package installation. Then you can select y (for YES) or n (for No) to use or not to use the VALIDATE PASSWORD component, respectively.
Also, select no when asked to set a new root user password (which you already set during the package installation). Then carefully follow the other prompts and select y (for YES) to remove anonymous users, disallow remote root login, remove the test database and reload the privileges table.
Step 4: Testing MySQL Installation
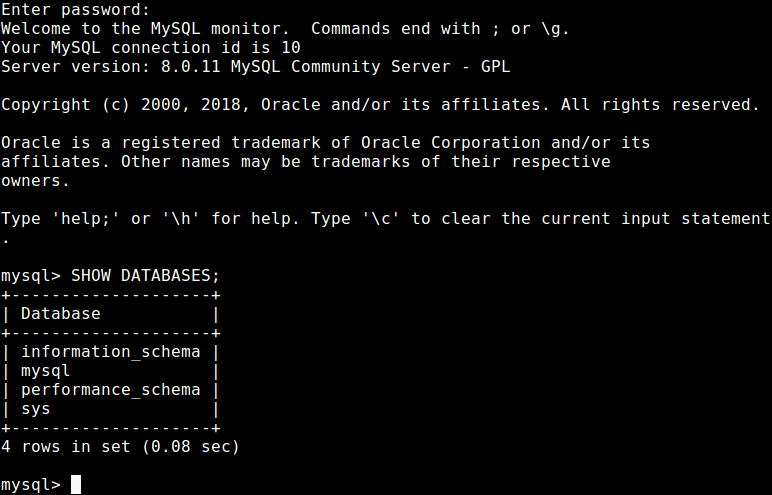
After securing your MySQL server deployment, you can start using it for storing data for your websites or web applications. To access the MySQL shell, run the following command (enter the MySQL root password when prompted as shown in the following screenshot):
$ mysql -u root -p
You will also find these following guides about MySQL useful:
- 12 MySQL/MariaDB Security Best Practices for Linux
- How to Reset Root Password in MySQL 8.0
- Useful Commandline Tools to Monitor MySQL Performance in Linux
Conclusion
In this article, we have explained how to install the latest version of MySQL database server in Debian 10. If you have any queries about this article, do send us via the feedback form below.
If this article helped you solve a problem, consider buying a coffee. It helps keep TecMint free, supports the authors, and keeps the project going.
Got Something to Say? Join the Discussion... Cancel reply