
In this Part 6 of Ansible Series, we have covered a few Ansible modules in the past topics, we will now go deeper and discover additional modules that are helpful in performing a number of system administration tasks.
You will get a basic idea of each module and look at the options available for accomplishing certain tasks.
On this page:
- Managing Software Packages and Repositories in Ansible
- Managing Services Using Ansible
- Managing Firewall with Ansible
- Archiving Files or Folders with Ansible
- Schedule Tasks with Ansible
- Manage Users and Groups with Ansible
- Create Files and Directories with Ansible
- Managing Storage with Ansible
- Managing File Systems with Ansible
1. Managing Software Packages and Repositories in Ansible
When installing packages on Linux systems, different distributions come with different package managers. For RedHat distributions, we have yum & dnf while for Debian flavors, there’s apt.
Ansible comes with a module called package, which eliminates the need for using different package managers for different systems. It automatically uses the corresponding package manager of the host system, thereby making work easier.
Install Software Packages
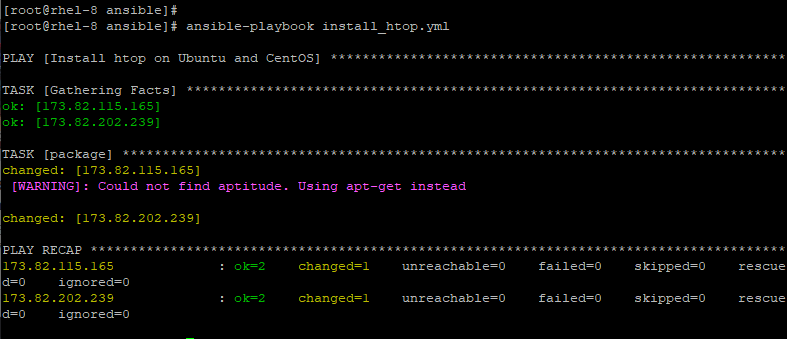
For example, to install htop in a group of hosts comprising both Debian & RedHat distros use the package module as shown in the install_htop.yml playbook below.
---
- name: Install htop on Ubuntu and CentOS
 hosts: all
 tasks:

- package:
 name: htop
 state: installed
NOTE: Package names may differ from one operating system to another. For example, we have httpd in Redhat distributions and Apache2 for Debian/Ubuntu systems all of which denote the Apache webserver. Therefore, extra caution should be taken when passing these packages. Usually, it’s best to use variables or conditional statements.
2. Managing Services Using Ansible
Next, we have a service module, which is used for managing services on Linux systems. It’s used to start, stop or restart a service. You can also use it to enable a service so that when a system boots, it automatically starts the service.
Start and Enable a Service
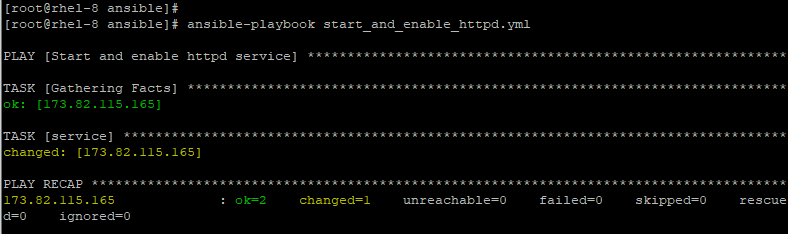
For example, to start & enable Apache webserver on RHEL 8, use the service as shown.
---
- name: Start and enable httpd service
 hosts: webservers
 tasks:

- service:
 name: httpd
 state: started
	 enabled: yes
Stop a Service
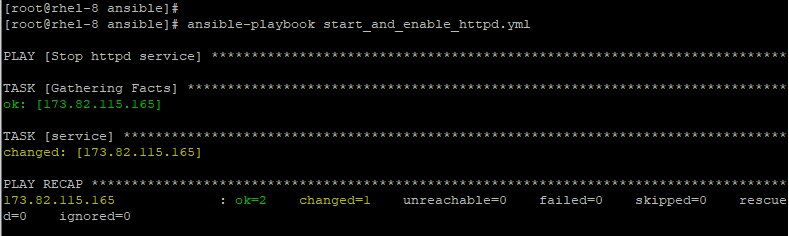
To stop httpd service, pass the stopped attribute.
---
- name: Stop httpd service
 hosts: webservers
 tasks:

- service:
 name: httpd
 state: stopped
Restart a Service
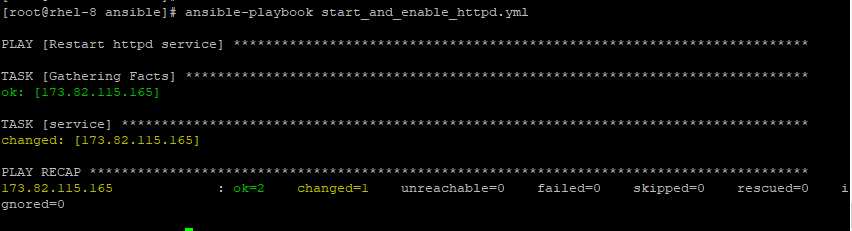
To restart httpd service, pass the restarted attribute.
---
- name: Restart httpd service
 hosts: webservers
 tasks:

- service:
 name: httpd
 state: restarted
3. Managing Firewall with Ansible
Another important task system administrators undertake is the management of the firewall. In Ansible playbooks, this has been made much easier with firewalld and ufw modules. You can configure the firewall to allow or block a port or service or even a source address.
Let’s jump in and have a look at a few examples:
Open/block Port 80 in firewalld
---
- name: Allow port 80
 hosts: webservers
 tasks:

 -firewalld:
	port: 80/tcp
 permanent: yes
 state: enabled
In the playbook above, port 80 is allowed across the firewall.
The option permanent: yes enforces the firewall rule and makes it persistent across reboots. However, this rule does not apply immediately. It only comes into effect after a reboot. To enforce the rule immediately, use the option immediate: yes.
To specify the addresses allowed, use the source:0.0.0.0/0 statement.
- firewalld:
 source: 192.168.0.0/24
 zone: public
 state: enabled
To specify a range of ports to be allowed to use the port option as follows:
- firewalld:
 port: 213-567/udp
 permanent: yes
 state: enabled
To block the port change the state option to disabled as shown:
-firewalld:
	port: 80/tcp
 permanent: yes
 state: disabled
Add/Block a Service in firewalld
Apart from adding/blocking a port, you can also apply the same rules to a service. And it’s quite simple. Just use the service module and append the service to be added and ensure that the state option is set to enabled.
- firewalld:
 service: https
 permanent: true
 state: enabled
To block the service set the state option to disabled.
- firewalld:
 service: https
 permanent: true
 state: disabled
4. Archiving Files or Folders with Ansible
Archiving refers to the compression of a file or folder to a format that is easily portable and smaller in size. Ansible ships with a module called archive. Compressing a file is about as easy as it gets. All that is required is to specify the source path of the file and the destination of the compressed file.
Compress a Directory
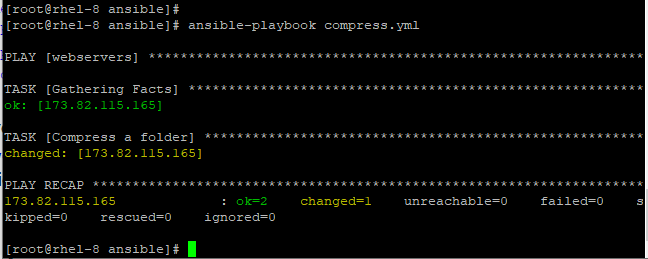
Consider a playbook compress.yml below.
---
- hosts: webservers
 tasks:

 • name: Compress a folder
archive:
 path: /opt/data/web
 dest: /tmp/web.gz
The above playbook compresses the /opt/data/web directory and saves it to /tmp/web.gz.
Compress a Directory with Format
The default compression format is .gz, however, this can be specified using the format attribute. Sample the next Playbook.
---
- hosts: webservers
 Tasks:

 - name: Create a zip archive
 archive:
 path: /opt/data/web
 dest: /tmp/web
 format: zip
The playbook above compresses /opt/data/web directory to /tmp/web.zip.
Uncompress a File
You can also uncompress a compressed file using the unarchive attribute. Consider the playbook below.
---
- hosts: webservers
 tasks:

 - name:Uncompress /tmp/web.gz to/opt directory on Ansible controller
 unarchive:
 src: /tmp/web.bz2
 dest: /opt/
The playbook above uncompresses the file /opt/data/web.gz to /opt on the Ansible controller.
Uncompress a File on Remote Node
To specify the remote source system use the remote_src=yes option.
---
- hosts: webservers
 tasks:

 - name:Uncompress /tmp/web.bz2 to/opt on remote host
 unarchive:
 src: /tmp/web.bz2
 dest: /opt/
 remote_src=yes
The playbook above uncompresses the file /tmp/web.bz2 on the remote node to the /opt/ directory.
5. Schedule Tasks with Ansible
The cron module helps in scheduling jobs in Ansible Playbooks.
Create a Scheduled Task
Consider the playbook below.
---
- hosts: webservers
 tasks:

 - name: Create a scheduled task
 cron:
 name: Run employee attendance
 job: sh /opt/scripts/attendace.sh

 month: 4
 day: 5
 hour: 17
 minute: 00
The playbook runs the attendance script on April 5th at 5:00 pm.
Schedule a Script on Specific Date
If you want to schedule this script to run only if the 5th day of April is a Monday, then use the weekday: 1 attribute. 0 denotes Sunday and 6 denotes Saturday according to cron notation.
month: 4
day: 5
hour: 17
minute: 00
weekday: 1
An asterisk (*) in any of these fields indicates any value.
Run a Job on a Date
To run the job on April 5th at 5:00 pm no matter what the weekday is, use the time parameters as shown.
month: 4
day: 5
hour: 17
minute: 00
weekday: *
Execute a Job on Specific Day on Every Month
To execute the cron job on the 5th day of every month at 5:00 pm use the settings below.
month: *
day: 5
hour: 17
minute: 00
weekday: *
Execute a Job on Daily
To execute the cron job daily at 5:00 pm set the time settings as shown:
month: *
day: *
hour: 17
minute: 00
weekday: *
Execute a Job on Every 5 Hours
To execute the cron job every 5 hours, use the step value */5 as shown.
month: *
day: *
hour: */5
minute: *
weekday: *
6. Manage Users and Groups with Ansible
You can also manage users and groups inside Ansible playbooks quite effortlessly.
Create a New User
To create a new user, use the user module as shown.
---
- hosts: webservers
 tasks:

 - name: Create a new user
 user:
 name: Jack
You can also add additional options such as UID, groups.
- name: Create a new user
 user:
 name: Jack
 comment: Jack Peters
 uid: 1002
 group: administrators
 shell: /bin/bash
Remove a User
To remove the user, use the remove: yes statement.
- name: Remove the user 'Jack'
 user:
 name: Jack
 state: absent
 remove: yes
Create a New Group
To create a new group, use the group module.
- name: Create a group
 group:
 name: developers
7. Create Files and Directories with Ansible
To create files of directories, use the file module.
Create a New Directory
For example, to create a new directory.
---
- hosts: webservers
 tasks:

 - name: Create a new directory
 file:
 path: /opt/app
 state: directory
You can add other attributes such as owner, group and file permissions.
- hosts: webservers
 tasks:

 - name: Create a new directory
 file:
 path: /opt/web
 state: directory
 owner: www-data
 group: www-data
 mode: 0644
Additionally, you can create directories recursively using the recurse: yes statement.
---
- hosts: webservers
 tasks:

 - name: Create directories recursively
 file:
 path: /opt/web/app
 state: directory
 owner: www-data
 group: www-data
 mode: 0644
recurse: yes
Create a File
To create a file, use the state: touch option.
---
- hosts: webservers
 tasks:

 - name: Create a new file
 file:
 path: /opt/web/index.html
 state: touch
owner: www-data
 group: www-data
 mode: 0644
8. Managing Storage with Ansible
The lvg module is used to configure LVM volumes and groups.
Create an LVM Volume Group
Consider the playbook below:
---
- hosts: webservers
 tasks:
 • name: Create lVM volume group
lvg:
 vg: vg1
 pvs: /dev/sda1
 pesize: 32
This creates a volume group on top of /dev/sda1 partition with a physical extent size of 32 MB.
Once created, use the lvol module to create a logical volume as shown
Create a Logical Volume
---
 - hosts: webservers
 tasks:

 - name: Create lVM volume
 lvol:
 vg: vg1
 lv: lvol1
 pvs: /dev/sda1
9. Managing File Systems with Ansible
To create a file system on a block device, use the filesystem module.
Create a Filesystem
The playbook below creates the filesystem type of xfs on the block volume.
---
 - hosts: webservers
 tasks:

 - name: Create a filesystem
 filesystem:

 fstype: xfs
 dev: /dev/vg1/lvol1
Mount a Filesystem
You can next proceed to mount the block volume using the mount module as shown in the playbook below:
---
 - hosts: webservers
 tasks:

 - name: Mount a filesystem
 mount:

 fstype: xfs
 src: /dev/vg1/lvol1
 path: /opt/web
 state: mounted
Conclusion
This concludes the topic. We have covered various system administration tasks that can be accomplished by specific built-in modules in Ansible Playbooks.
If this article helped you solve a problem, consider buying a coffee. It helps keep TecMint free, supports the authors, and keeps the project going.
Got Something to Say? Join the Discussion... Cancel reply