
Modern PC hardware is designed to be pretty efficient when not being pushed hard, which is fantastic for both hardware longevity and your power bill. That's even true for the default settings, but we all know that defaults can be improved with some tinkering. Windows 11 has plenty of power-saving features, but we're going to dive into some low-level settings to change in your computer's BIOS. Instead of aiming for peak performance, we'll set our sights on peak efficiency, so your PC will use less energy overall while still maintaining solid performance.
4 things you should change in your PC's power plan
Windows gives you the ability to modify power plans, and there are a few changes you should make when you first set up your WIndows install.
5 Disable unused peripherals
Everything uses some power, even when not in use
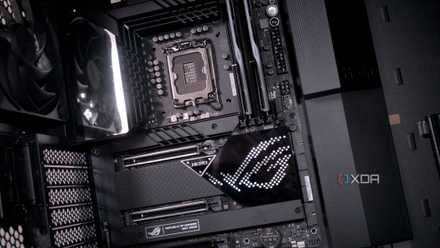
Your motherboard has a ton of ports, slots, input and output devices, and more, waiting for them to be plugged into peripherals or other devices. Even when things are not plugged in and the ports sit idle, the computer sends a small electrical current to all these devices, which you should turn off if efficiency is your aim. They also take up address space that could be used for other things.
Once in your BIOS, look for a page named Integrated Peripherals or similar. You'll know when you're on the right page as it will have options for Ethernet, Onboard Audio Controller, and other things. See which items on that page you aren't going to use, and set them to disabled. For example, I always use USB audio devices, so I turn off the onboard audio controller. That way, I don't have to worry about Windows switching audio devices on me, or about maintaining device drivers for things I'm not planning on using. You can also turn off the Ethernet ports if you don't use wired internet, or conversely, the Wi-Fi and Bluetooth adapters if you don't use wireless connectivity.
5 things to keep in mind when choosing the right motherboard for your gaming PC
If you are planning your next gaming PC build, consider these 5 things before you buy your next motherboard
4 Set your C-States and P-States correctly
Letting your cores sleep is more efficient
On modern CPUs, you no longer have to worry about setting P-states correctly for optimized power consumption while code is being executed. That's been the case since Intel released Skylake, so as long as Speed Shift Technology is enabled in your BIOS, you're already using the most optimal settings. For AMD users, look for Cool'n'Quiet, as that's Team Red's version of the same technology.
You'll also want to find the advanced CPU configuration menus and the C-states. These optimize or reduce power consumption when idle, allowing the CPU to turn off sections of itself when not needed by the operating system. The menu option will be something like Package C-State Limit, which tells the operating system the lowest C-state it can set (with higher numbers for lower power states). The C-state for a CPU in operation is C0, so if you put this as the limit, you won't benefit from any of the lower-power C-states. C4 or C6 are the usual sleep modes, with the larger number reducing the voltage to the CPU to 0V. Most modern motherboards can go down to C10, but you might notice stuttering or performance degradation if you enable that. Experiment with which C-state makes the best power saving and performance balance for your PC.
3 Undervolt and underclock your CPU
Efficiency and better thermals in one go
Your motherboard BIOS ships with defaults for your CPU, usually set to the manufacturer's guidelines for that processor. These will include standard clock speeds for idling, in-use, and boost clocks, as well as behavior for when the processor is under load. That's fine for general use, but your particular piece of silicon might be able to run with less voltage and lower clocks and still get similar performance.
The first thing to start with is undervolting, because it provides the best reduction in overall power usage. It also often doesn't come with an associated hit to performance, as many CPUs will use the lower heat generated to boost further when necessary. This still reduces your power usage and means your cooling system won't be working so hard, so your fans won't need to spin as fast. If you want to reduce power usage further, manually underclocking the CPU frequencies will help. The quickest way to do this is to turn off any boost clocks. You can also lower the core frequencies, if you prefer, for a more predictable level of performance.
How to undervolt your CPU in BIOS
Discover the secrets of optimizing your CPU performance with our comprehensive guide on how to undervolt your CPU in the BIOS
2 Enable ErP mode
European legislation is your power savings
ErP (Energy-related Products) mode in BIOS is a comprehensive power management feature that reduces power usage and increases energy efficiency, both while the computer is inactive and when shut down. Every motherboard sold since 2009, when the associated EU directive came out, will have this feature in the BIOS settings, often in a menu about Power Management. If you don't live in the EU, this feature is turned off by default, but you might want to enable it, especially if power conservation is your goal.
Enabling the ErP setting in your BIOS initiates various power-saving methods, including optimizing power sent to idle or unused devices. It also enables low-power states like some of the C-states we discussed earlier and reduces standby power consumption. Also, the menu for enabling it should have an entry that talks about USB standby power, which you might want to enable. This turns off the power going to the USB ports when the PC is in sleep mode, reducing power usage. However, if you're a fan of using your keyboard or mouse to wake your PC from sleep, don't turn this one on, as you won't be able to wake up your PC.
1 Set CPU load-line calibration
Usually this helps with stability, but it can also save power
When your CPU gets a workload during everyday operation, the voltage to the cores drops slightly. This is known as Vdroop, and it's generally acknowledged as a bad thing, especially for system stability. To combat this effect, a feature known as load-line calibration was introduced. It watches for Vdroop and feeds more voltage to the cores to compensate. It's a pretty cool thing, especially if you're overclocking your CPU, as it can keep it stable on higher clocks.
If you're not overclocking, load-line calibration (LLC) can also help you save energy. It's usually set to Auto, so using a setting that feeds lower amounts of voltage when under load saves power overall. Use the search function in your BIOS to find CPU load-line calibration and see what options appear. You'll want to check for your specific motherboard because different manufacturers count differently. MSI sets Mode 1 as the highest setting and Mode 8 as the lowest. Asus does the opposite, with Level 1 being the lowest compensation for Vdroop. Gigabyte has different options depending on the motherboard, with some only having a simple on/off, while others use turbo or other words to denote strength. And ASRock uses the same numbering scheme as MSI.
How to overclock your CPU in BIOS
Unlock your GPU's full potential with these comprehensive steps on overclocking using BIOS settings
Modern PCs are pretty efficient already, but a few BIOS tweaks will make them even more so
If your PC was built in the last few years, it already has plenty of power-saving features. Some of these are in the operating system you're using, while others are built into the components that make up the build. With the right combination of settings, a computer can both be power-efficient and perform well at tasks.