
Since last year, I’ve been building my smart home using Home Assistant. The journey has been rewarding, and Thread was the last hurdle. So far, my Apple TV 4K has served as the accidental Thread Border Router. To move away from Apple’s HomeKit, I turned a Raspberry Pi 4 into an OpenThread Border Router.
That turned out to be total overkill for my needs, and spending money on a Google Nest Hub made little sense to me. That’s when I realized a $5 ESP32-C6 sitting in the drawer could help me push Apple and Google out of my smart home.
I can turn it into a USB Radio Co-Processor dongle, plugged directly into the Home Assistant machine, or into a standalone Thread Border Router. For that, I used:
- ESP32-C6 board
- USB-C data cable
- ESP-IDF toolchain
- Home Assistant instance with OpenThread Border Router add-on
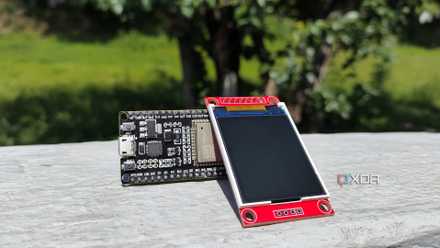
I built a Google Nest Hub replacement with this $50 ESP32-powered display
If you want to build your own smart home tech, then this display from Elecrow is a fantastic way to get started.
Addressing the Thread Router dependency directly
Turning the smart home local entirely
While most of the smart home devices in my home operate on Wi-Fi, I wanted to try out Thread-certified devices from IKEA, Nanoleaf, Eve, and others. To leverage Thread, a low-power mesh networking protocol, I needed hardware that worked locally without spending too much.
A Thread Radio Co-Processor or a standalone Thread Border Router can bridge the Thread device mesh to the IP network and to Home Assistant. Home Assistant has already picked up Apple TV 4K as a Thread Border Router. But I didn’t want to rely on any hardware that depended on the cloud.
I stopped using the Pi 4 as an OpenThread Border Router and repurposed it for network monitoring in my home lab. When I came across ESP-IDF’s Thread Border Router examples, I wanted to use ESP32 boards with Thread radios.
The $5 ESP32-C6 board is all I needed
With an optional antenna
The ESP32-C6 board is the best contender for the project since it supports Wi-Fi 6 and Thread (802.15.4) radios. Thankfully, no soldering or tinkering with GPIO pins is required. I did use an external U.FL antenna to help the ESP32 pick up stronger signals through thick concrete walls.
The external antenna wasn’t exactly plug-and-play. If you plan to use one, you’ll need to define it in your code.
One mistake I made was using a charging-only USB Type-C cable, which struggled to flash firmware on the ESP32-C6. I recommend using a USB Type-C cable with data transfer capabilities to ensure everything gets flashed properly.
Making the ESP32-C6 into a standalone Thread Border Router may not deliver the best performance since the chip uses the Wi-Fi and Thread radios simultaneously. Meanwhile, using the board as a USB-based Radio Co-Processor dongle with Home Assistant means the Wi-Fi radio must be turned off entirely.
Flashing firmware on the ESP32-C6 took a few minutes
Mind the range limitation
To turn the ESP32-C6 into a USB-based OpenThread Radio Co-Processor dongle, I had to download and set up the ESP-IDF toolchain on my Mac. I used the ot_rcp example framework to build and flash it on the ESP32-C6 boards. This firmware disables the Wi-Fi component.
Next, I configured the USB dongle with the OpenThread Border Router add-on in Home Assistant and disabled Hardware Flow Control since the board lacks physical pins. The entire process took less than 10 minutes, and I plugged it into my mini PC running a Home Assistant instance.
Since this ESP32 dongle’s range is limited, I built a standalone Thread Border Router to extend the range to bridge more Thread devices in the distant corners. For that, I used ESP-IDF v6.0.1, the latest stable release, to compile and flash the firmware using Terminal on my Mac.
Use the ot_br example framework to build the standalone Thread Border Router.
Before compiling the build, I used the idf.py menuconfig command to access the configuration menu, ensuring that the ESP32 automatically starts in Thread Border router mode and Thread Network at boot. I needed to disable the CLI extension since it kept failing the build. Finally, entering my Wi-Fi credentials directly into the configuration made things easier.
It took me less than five minutes to compile and flash the firmware to build a standalone border router. Home Assistant’s device discovery detected the ESP32-based Thread Border Router during Thread integration configuration.
Building my own Thread devices is the next step
Need to extend the mesh
Once the Thread Border Router was running, I learned that ESPHome made it very easy to build Thread-connected sensors with ESP32-C6 or ESP32-H2 boards. The ESPHome configuration for that is very minimal, and it requires adding Thread’s network credentials exported from Home Assistant (in TLV format). Next, define the sensors, compile the firmware, and flash it.
Every ESPHome-configured Thread device can also act as a router in the mesh. I just need to define the Full Thread Device (FTD) mode in the YAML. So the ESP32 board isn’t just a sensor hub; it also works as a Thread mesh range extender.
I added an open‑source ESP32 dashboard to my Home Assistant setup, and I'm glad I did
It's a customizable display that can fit practically anywhere in my smart home
Building a local-first smart home
Thread is the last piece of my smart home puzzle, and I am no longer allowing external dependencies. That’s why it became necessary to quietly take Apple and Google out of the equation to build a responsive, local-first smart home system.
Initially, I put this off for months, thinking it was complicated. Yet it took only an afternoon with $5 ESP32 boards to add yet another feather to my smart home’s cap.
- Brand
- AITRIP
- Connectivity Features
- UART, USB