
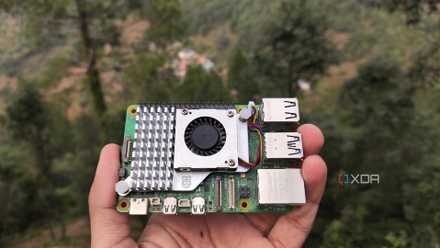
Over the years, I’ve built (and disassembled) dozens of projects with my Raspberry Pi, but a retro gaming machine has got to be one of my favorites. Sure, this tiny single-board computer may not have enough processing capabilities to emulate PlayStation 2 and newer consoles, but it’s great at handling games designed for ancient gaming machines and slightly modern-ish systems.
Better yet, there are a handful of emulation-centric distros available for the Raspberry Pi family, with each platform bringing its own unique UI elements and emulation cores. Toss in a hardwired Ethernet connection, and my Raspberry Pi + Batocera combo becomes a full-on arcade machine capable of emulating the ROM files kept on my network-attached storage server.
I tried emulating PS2 games on my Raspberry Pi - here's how it went
Installing the PlayStation 2 emulator is no walk in the park, but the Raspberry Pi 5 can run certain PS2 titles at playable frame rates
Batocera powers my Raspberry Pi-flavored emulation setup
I love this distro's neat UI and extra media playback features
Before I go over the SMB share powering my retro gaming machine, let me talk about the distro powering this whole setup. While I really like the PlayStation-esque UI on Lakka, I’ve always adored Batocera’s interface more. It's a lot more colorful than Lakka, and only displays the emulation cores for consoles whose games are available on my SMB share. That way, I don’t have to cycle through waves of emulators with empty ROM lists just to play my favorite PlayStation 1 titles.
Its collection of emulation cores is pretty stacked, and although some (namely the Dolphin emulator) require extra tweaks for the best results, most retro consoles work well right out of the box. Batocera also has a built-in Kodi player, essentially turning my Raspberry Pi into a light media streaming machine when I’m not emulating old gems. Heck, Batocera even supports Moonlight, so I can connect it to the Sunshine server on my main gaming PC and stream games to my Raspberry Pi-flavored retro machine.
I’ve stored my ROM files on an SMB share
I'd rather not store hundreds of GBs on a mere microSD card
Although NFS shares would provide better performance on a Linux system such as Batocera, I’ve used SMB shares due to their simpler permissions. If you’re wondering why I'd deal with NAS shares, it’s because I don’t want to copy several gigabytes of ROM files onto a small microSD card/external drive when I’ve already got my ripped games stored on my central NAS server. Pulling off this wacky stunt requires some tweaks, as Batocera defaults to a local storage directory for the ROM files.
The simplest method involves removing the microSD card from the RPi after the initial boot, plugging it into a PC, and modifying certain variables in the batocera-boot.conf file. But since I’m using Elecrow’s tower case for my Raspberry Pi, removing the microSD card is kind of a pain, as I have to disassemble everything. So, I connected my Raspberry Pi to my router via Ethernet (and I’ll talk about why in a second), fed the IP address displayed in the Network Settings into the PuTTY app on my PC, and entered root as the username and linux as the password to SSH into my Batocera instance.
I tried running the best NAS distro on my Raspberry Pi, and it went better than I thought
TrueNAS may not be officially supported on Arm devices, but you can install it on a Raspberry Pi
Then, I ran the mount -o remount,rw /boot command to make the contents of the /boot directory writable until the next boot. Then, I used cd /boot to navigate to this directory, before running nano batocera-boot.conf to open the configuration file. Inside, I changed the sharedevice=INTERNAL variable to sharedevice=NETWORK, and added an extra line for the SMB share details underneath:
sharenetwork_smb1=ROMS@IP-address:directory:username=xyz,password=abc
For reference, the IP-address variable points to the URL of my TrueNAS instance, while the directory variable includes the folders on the SMB share housing my ROM files. Likewise, the username and password are the login credentials for accessing my SMB share, not the TrueNAS admin user. I’ve since added folders for the save files and BIOS on their own SMB share, which I linked with my Batocera instance by adding sharenetwork_smb2 and sharenetwork_smb3 variables and modifying the directory variables accordingly.
Following a reboot, my Batocera retro gaming box was able to detect the ROM files on my NAS, and I had no issues running my favorite titles – provided I remained on an Ethernet-only setup…
With an Ethernet connection, I don't have to worry about performance hits
Wi-Fi, on the other hand, adds some latency
Although my NAS is hooked up to a 10GbE port on my network switch, the Raspberry Pi can only access the ROMs at 1G speeds due to its slower Ethernet port. Nevertheless, 1 gigabit is more than enough for running everything from SNES and N64 titles to PlayStation 1 and PSP games – to the point where I can't tell the difference between storing them on a microSD card and a NAS HDD. Unfortunately, my experience with a Wi-Fi-only connection was less than ideal, as I’d run into latency problems and noticeably longer boot times even on 2D titles.
The only caveat of this setup is that I’ve got an Ethernet cable running all the way from my TV to the Raspberry Pi. But that’s a small price to pay for avoiding performance issues when running games off my NAS.
Raspberry Pi 5
- CPU
- Arm Cortex-A76 (quad-core, 2.4GHz)
- Memory
- Up to 8GB LPDDR4X SDRAM
- Operating System
- Raspberry Pi OS (official)
- Ports
- 2× USB 3.0, 2× USB 2.0, Ethernet, 2x micro HDMI, 2× 4-lane MIPI transceivers, PCIe Gen 2.0 interface, USB-C, 40-pin GPIO header
- GPU
- VideoCore VII
- Starting Price
- $60