
Unlike ESXi and its paywalled services, Proxmox lets me use every facility on the virtualization platform without forcing me to drop a fortune on a license. Take Proxmox’s clustering support, for example. Since I have some spare devices, I can group them together in a cluster and manage their virtual guests from a centralized interface. But the biggest advantage of clusters is the ability to deploy high-availability setups capable of migrating my virtual guests automatically if (or rather, when) my experiments bring one of the nodes down.
Better yet, there are a couple of ways to create HA configurations on Proxmox. You've got the ever-popular Ceph distributed storage method, which is perfect for high-end home labs. Then there's ZFS replication that combines a simple process with minimal monetary investment – making it perfect when creating budget-friendly clusters.
4 Proxmox changes I made that delivered 90% of my reliability gains
These Proxmox tricks made my self-hosting and experimentation server more reliable
ZFS replication is a solid alternative to Ceph-based HA clusters
And it uses snapshots to sync virtual guests between nodes
If you’ve never heard of ZFS replication, it’s a data synchronization method that relies on virtual guest snapshots to provide redundancy when a system goes down. Rather than using a shared storage pool, ZFS replication syncs snapshots between your nodes at regular intervals. Should anything happen to the machine hosting your LXCs or VMs, Proxmox’s HA mechanisms kick in and spin up a new instance on another node using these snapshots.
It’s akin to the backup-and-restore method many home labbers use to migrate virtual guests between nodes. Well, except ZFS replication automatically transfers these snapshots every once in a while, and as the name suggests, it works with virtual guests stored on ZFS pools.
It pairs well with 2-node clusters
Aside from the ease of setup, the biggest advantage of ZFS replication is that it works well for small home labs with limited devices. To put that into perspective, a shared storage configuration often requires an intermediary device (often a NAS) to provide NFS/SMB shares, while Ceph requires three or more nodes, and it’s not a good idea to use an even number of PVE systems.
Meanwhile, ZFS replication can be configured on two nodes in a cluster. Of course, you will need a third system (or even a QDevice) to maintain a quorum, but it doesn’t necessarily have to be a part of the high-availability setup. Plus, it works with snapshots and not full-blown backups, meaning it only sends the changes made since the last replication task between nodes to save bandwidth. But considering that ZFS replication tasks occur at fixed intervals, there’s the obvious drawback of losing work if your node crashes before the synchronization task is complete. That said, if you’ve only got a handful of mission-critical services, you can mitigate this risk by setting shorter intervals for the replication tasks.
Setting up ZFS replication is pretty easy on Proxmox
But I had to add a third node to maintain the quorum
With the theory part out of the way, it’s time to go over my experience with deploying a high-availability cluster with ZFS replication. For the HA nodes, I used my old PC with an AM4 mobo and a first-gen Ryzen processor, alongside the i3-N305-powered TerraMaster F8 SSD Plus, which has been gathering dust ever since I replaced it with a Raspberry Pi MicroCloud server. Besides their boot NVMe drives, I armed both systems with 500GB SSDs to house the ZFS pools for the replication tasks.
I also needed a third node to maintain quorum for the cluster. I wanted to avoid random hiccups and compatibility issues, so I decided to go with my Radxa X4 SBC, though I could’ve just as easily used a Raspberry Pi – or even a nested Proxmox virtual machine running on the main home server. Since I wanted to test this setup’s efficiency with just two nodes, I didn’t add any extra storage pools to the third node besides the ext4-based boot drive.
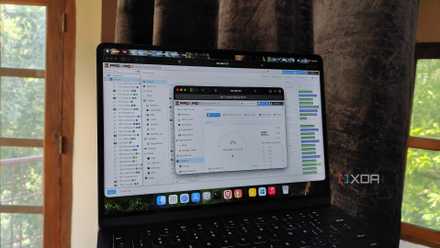
Once I’d assembled the devices, slotted the SSDs, and connected them to a network switch, I began installing Proxmox on each node. I used my secondary PC as the main cluster node, and used the Join information generated by Proxmox to add the other two systems to the freshly-created cluster. Then, I wiped the existing data on the SSDs I’d slotted into my secondary PC and the i3 NAS from the Disks tab, before using them to initialize ZFS pools. To avoid complications when syncing snapshots, I assigned the same name to both ZFS pools – and that’s half the work done!
Next, I had to deploy some virtual guests, so I could configure replication tasks and HA rules for them. I transferred an EndeavourOS ISO to the local pool on my i3 NAS node and used it to spin up a VM. But instead of selecting the local-lvm storage drive for the virtual machine’s data, I picked the newly-created ZFS pool. Then, I started the VM and installed EndeavourOS onto the virtual disk. But since my secondary PC node doesn’t include the EndeavourOS ISO, I turned off the VM and unmounted the bootable image, leaving the virtual disk on my ZFS pool as the only storage device in its Hardware tab.
Then, I headed to its Replication tab and added a new Job that sends a snapshot to my secondary node every 15 minutes. However, I still had to configure high-availability rules to force Proxmox to migrate my VM if my i3 NAS were to go down. To do that, I added the virtual machine as a Resource within the HA tab inside Datacenter. I also had to create an Affinity Rule for the VM to ensure only the secondary PC and i3 node were chosen for HA tasks, not the quorum device.
Just to test things out, I turned off my i3 NAS from Proxmox’s web UI. After a minute or two, the HA mechanisms kicked in, and the EndeavourOS virtual machine was back online inside my secondary PC!
ZFS replication might just become my go-to method for creating HA clusters
Truth be told, the migration time with ZFS replication felt slightly longer than Ceph’s. And as someone who has been a part of the Proxmox community for years, I’ve heard my fair share of horror stories about Ceph clusters breaking down. Heck, I’d been using a Ceph cluster until recently, but since I had too many bare-metal experiments planned for Christmas, I had to dismantle it. So far, ZFS replication seems like a decent alternative to Ceph. Sure, it may not rival the true shared storage provisions that Ceph offers, but it’s not like I plan to run a production environment, anyway. Considering its simple nature and the fact that I can use any random SBC as a QDevice, I might actually create a 2-node ZFS replication cluster with some cheap mini-PCs.
5 advanced features you should enable in Proxmox
Make the most of your Proxmox server with these useful settings