
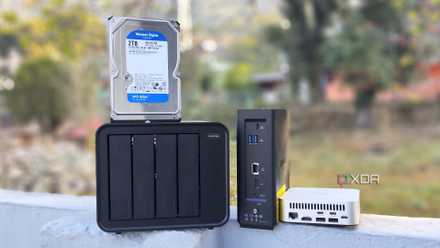
When it comes to a custom NAS setup, you’ve got plenty of choices for the operating system. There’s OpenMediaVault for underpowered devices, Unraid for premium users, and even good ol’ Proxmox, once you arm it with the right packages. However, TrueNAS Scale is my favorite NAS-centric distribution by a long shot, thanks to its top-notch performance, free nature, data protection services, and ZFS support.
It also offers several network sharing protocols to help me access my precious ZFS-powered datasets from every device in my arsenal. Unfortunately, TrueNAS Scale isn’t the simplest OS to use – especially if you’re a beginner. So, here’s a quick guide on how you can share your TrueNAS Scale server with other devices over your home network.
5 household gadgets I've retired after getting a decent NAS
There's a lot more you can do with a NAS besides using it as a file-sharing and backup server
What types of network shares does TrueNAS Scale offer?
One block-sharing and two file-sharing protocols
Before I cover the setup processes for each type of network share, I wanted to go over their basics and why you’d want to use certain protocols over others. First, you’ve got file-sharing protocols like SMB (Server Message Block) and NFS (Network File System), where the NAS manages the file system instead of your PC, and you have the option of using multiple hosts to access the files at the same time.
Technically, SMB is more secure than NFS, though the latter has lower performance overhead. But for the average user (including yours truly), the biggest difference is that you’ll typically use SMB on Windows and NFS on Linux.
Then there’s iSCSI (Internet Small Computer System Interface), which offers block-level access to the datasets. In simpler terms, an iSCSI share lets you access datasets as though they were physical disks connected to your PC – making it fairly useful when a conventional network-mounted drive just won’t cut it. But unlike NFS or SMB, you’ll have to relegate the iSCSI share to a single machine and won’t be able to share its contents with other systems without running into data corruption issues.
Deploying an SMB share
Remember to create a new user beforehand
With the theory part out of the way, it’s time to put on your tinkering hat and get started with the actual setup process. I’ll go with SMB shares first, since I use them quite often with my Windows 11 machine. To start things off, you’ll want to head to the Credentials tab and create a new User. That's because the root account or TrueNAS Scale’s default users don’t have access to Samba authentication, which is required when setting up SMB shares. Once you’ve added the Username and Password, you’ll also want to check the SMB user checkbox before hitting Save.
Afterward, you can navigate to the Shares tab and press the Add button adjacent to the Windows (SMB) Shares option. Inside the wizard, you’ll want to select the dataset you plan to access from your Windows machine, give the SMB share a Name, and hit the Save button while leaving the other options at their default values.
Since SMB shares on TrueNAS Scale require proper Access Control Lists, you’ll want to click on the Edit ACL option. Once you’ve arrived at the ACL Editor, you’ll find several ways to tweak user permissions for the SMB share. To keep things simple, I recommend setting the User you created earlier as the Owner and checking the Apply Owner box before tapping the Save Access Control List button.
Now that the SMB share is fully configured, it’s time to switch to your PC’s File Manager and enter // followed by the IP address of your TrueNAS Scale server in the Search Bar. Assuming you had added a dedicated Password for the SMB share’s User (which you should), you’ll have to enter it alongside the Username to gain access to the files and folders within the network share.
Deploying an NFS share
A little bit of Linux finesse is needed
Unlike the somewhat convoluted steps for enabling SMB shares, their NFS counterparts are fairly easy to get up and running… at least on the TrueNAS Scale end. Once you’re on the Shares tab, pressing the Add button next to the UNIX (NFS) Shares section will bring up a couple of options for you to configure. The Path variable points to the dataset you wish to share, and I recommend adding the IP address of your Linux machine under the Hosts section to prevent unauthorized systems from gaining access to your NFS share’s data.
Once you’ve started the NFS share, feel free to launch the terminal app bundled with the Linux machine that needs to connect to this share. First, you’ll want to install the nfs-common package by running the sudo apt install nfs-commons -y command. You’ll also need a new folder that will act as the mount path for the NFS share, and you can do so using the mkdir command or by using the file manager (provided you’ve armed the distro with a desktop environment). Thn you can run the following command (with modified parameters) to access the NFS share:
sudo mount -t nfs ip_address_of_NAS:dataset_path mount_path
In my setup, the command looks something like this:
sudo mount -t nfs 192.168.0.183:/mnt/new1/nfsshare /home/ayush/share
Deploying an iSCSI share
For block-level access to your drives
At last, we’ve arrived at the big, bad iSCSI protocol. However, it’s not all that difficult to set up. Once again, you’ll want to head to the Shares tab on the TrueNAS Scale UI and choose the Wizard option inside the Block (iSCSI) Shares Targets section. Inside this Wizard, you’ll have to enter the Name, Extent Type (which should be left to Device), Dataset path, and Size of the share, all of which are pretty self-explanatory. Then, you’ll have to select the Portal, and if you haven’t used iSCSI shares before, you’ll need to create a new one. I suggest leaving all settings at their default values and leaving the Initiator tab empty.
An iSCSI share over my LAN means I don't have to upgrade my PC's storage anytime soon
Despite its extensive use in servers, iSCSI is an underrated storage protocol in the consumer market
With the share online, you can open the iSCSI Initiator wizard on your Windows 11 PC by typing iscsicpl into the Run utility. The Discovery tab includes the Discover Portal option, where you’ll want to enter the IP address of the TrueNAS Scale server. After that, you can navigate to the Target tab and use the Connect button to pair the (currently) inactive iSCSI share with your PC.
Just like a typical HDD/SSD connected to your PC, you’ll have to initialize the iSCSI drive using the Disk Management utility. Then, you can select the GPT (GUID Partition Table) for the drive and choose Create Simple Volume after right-clicking on it. Finally, you’ll want to assign the iSCSI volume a Drive Letter and Format it with your preferred File System to make it accessible on your system.
What's your preferred way to share NAS storage?
Those were all the ways TrueNAS Scale lets you access the NAS storage from other devices… at least, on paper. If you’re into self-hosting, you can deploy a Nextcloud container to technically share files between multiple systems without resorting to network shares. Likewise, Syncthing lets you set up multi-directional file synchronization between different devices, though it’s arguably more complex (and nuanced) than simple SMB shares.
Me? I tend to use all three of them (alongside Nextcloud and Syncthing) in my home lab. SMB serves my file-sharing needs pretty well for Windows devices, while my Linux virtual machines rely on NFS shares. Speaking of VMs, I also use NFS shares to back up Proxmox-powered virtual guests to my TrueNAS Scale storage server. And while it may sound preposterous, iSCSI is great for storing Steam games on my NAS, especially once I pair this block-sharing protocol with a 10GbE connection and datasets running on NVMe SSDs.