
Summary
- Proper bed leveling is essential for adhesion
- Prevent nozzle blockages for consistent extrusion
- Adjust temperature settings to avoid warping
It’s frustrating to invest time, effort, and resources in 3D printing only to get warped, uneven, or incomplete results. Understanding common mistakes can help you avoid them. Refining techniques and staying mindful of printer settings increase the likelihood of high-quality prints. With knowledge and patience, you can transform failed attempts into consistent success.
7 practical problems I solved with a 3D printer
My 3D printer has proven itself not just fun, but also a household problem-solver. Here's how
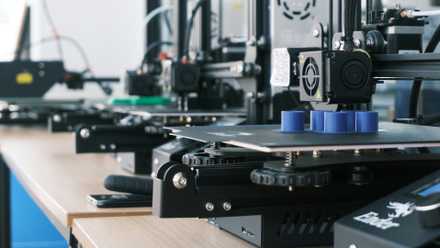
5 A misaligned bed can ruin your prints
Achieve proper leveling to prevent early printing problems
A properly leveled bed is vital for a successful first layer that sticks to the build surface. When the bed is even slightly misaligned, the filament might not adhere correctly, causing curling edges or detachment mid-print. Regularly checking and adjusting the bed height helps ensure that your nozzle is at the correct distance from the surface, promoting consistent layer deposition. Taking a little extra time before each session to verify bed alignment can save you from wasted materials and frustration.
How to keep your 3D printer in perfect shape for consistently flawless prints
Having your 3D printer in perfect shape involves a series of activities that you need to undertake. Below, we highlight the main ones.
Once you’ve ensured the bed is level, you may also want to verify it remains stable throughout the printing process. Temperature fluctuations, printer vibrations, or build plate shifts can gradually affect the bed’s alignment. Keeping a close eye on your prints during the initial layers is helpful, as you can adjust if you notice any wobbling or uneven deposition. Minor tweaks in real-time can make a significant difference by preventing large-scale failures later.
If you are regularly experiencing bed alignment issues, consider investing in an auto-leveling sensor or a sturdier build plate. These upgrades help minimize user error and provide more consistent results. A manually leveled bed is still perfectly viable if done carefully, but adding a sensor or higher-quality parts takes some guesswork out of this critical step. With a consistent, level surface, the foundation of your print remains strong and stable.
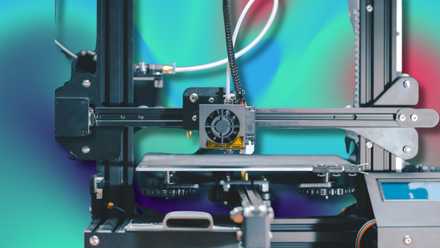
4 Blocked nozzle disrupts smooth filament flow
Prevent clogs and maintain consistent material extrusion
A clogged nozzle often causes under-extrusion, stringing, or a halted print. Debris, charred filament, or low-quality materials can block the narrow nozzle aperture. Regular maintenance, including cleaning and checking for blockages, ensures reliable filament flow. Uneven or thin layers may indicate a partial clog, prompting immediate action to preserve the print.
To address blockages, heat the printer and carefully remove filament jams. A “cold pull” can clear stubborn residue, especially if dark specks appear in prints. For long-term prevention, store filament correctly and inspect its quality before use. Small precautions prevent nozzle disruptions.
Switching to a higher-quality filament or compatible filaments reduces clog risk. Manufacturers provide recommended temperature ranges to optimize flow and minimize burnt material. Sticking to reputable brands and guidelines improves extrusion and reduces issues. Paying attention to nozzle cleanliness and filament choice ensures smooth and successful prints.
3 Overheating parts leads to distorted shapes
Adjust printer temperature to reduce warping and deformation
Excessive heat can cause the filament to become overly soft, resulting in droopy or warped areas on your models. This is especially common with certain plastics, like PLA or ABS, which have specific temperature needs. Monitoring your printer’s temperature settings is crucial to avoid melting or deforming the newly laid layers. Slightly lowering the temperature or improving airflow with fans can help the filament cool at a pace that promotes stability and accurate detail.
Environmental factors can also play a role, as high ambient temperatures or poorly ventilated rooms may intensify heating issues. Placing your printer in a cooler, more controlled environment helps maintain the ideal conditions for 3D printing. Keep an eye on print settings such as speed and layer height, as they can influence how quickly each layer cools. Fine-tuning these variables ensures your 3D prints maintain their intended shape.
If you work with multiple filament types, consider setting up distinct temperature profiles in your slicing software to match each material’s requirements. This approach prevents common oversights that might lead to accidental overheating. Advanced cooling solutions or enclosures designed with adjustable airflow can offer greater control for particularly temperature-sensitive materials. By focusing on proper heat management, you can achieve cleaner lines, sharper details, and sturdy final products.
2 Incorrect slicer settings ruin final output
Fine-tune software configurations for optimal 3D results
Even the most advanced 3D printer struggles with errant slicer settings. Layer height, print speed, infill percentage, and support settings affect your design’s reality. Mismatches can result in weak structures, blobs, or poor finishes. Understanding and refining slicer profiles saves filament and avoids repeated attempts.
Commit to small changes systematically to identify print issues — track changes to know what has improved or worsened. Notes or saved profiles streamline switching between filaments or project types. Once you find consistent quality settings, apply them confidently to similar prints.
Explore new slicing software with advanced controls for specific printer models. These tools often include pre-configured profiles with recommended filament values. Test each profile and tailor parameters to your preferences for steady, predictable prints. Taking charge of slicer configurations leads to stronger, more accurate creations.
1 Low-quality filament creates fragile, uneven layers
Select reliable materials and store them with care
Subpar filaments often contain impurities, inconsistent diameters, or poor bonding characteristics. As a result, you might notice layer shifting, rough surfaces, or brittleness that causes your print to break easily. Opting for well-reviewed and reputable brands ensures each spool meets higher manufacturing standards. Good filament choice pairs well with routine inspections, helping you catch signs of moisture or damage before printing.
Moisture is a common enemy of high-quality prints, as many filaments absorb water from the air and perform poorly as a result. Storing your spools in airtight containers with desiccant packs can maintain their dryness. When a filament becomes saturated, you might hear popping sounds or see steam during extrusion. Drying it out or swapping to a fresh spool can restore your print quality and reduce the likelihood of failure.
Choosing the right material for your intended application also safeguards print success. PLA might suffice for decorative pieces, while functional prototypes may demand tougher materials like PETG or ABS. Matching your filament to the job prevents unnecessary stress on your printed parts and avoids wasted effort. By investing in dependable filaments and storing them properly, you can count on smoother, more reliable prints.
Moving forward with more successful 3D print attempts
Mastering your 3D printer requires understanding five common obstacles. Trial and error help pinpoint the root cause of printing challenges. Adjustments lead to consistently pleasing results. Monitoring bed alignment, maintaining a clean nozzle, perfecting temperature settings, refining slicer parameters, and choosing quality filament all contribute to 3D printing achievements. Patience and learning lead to improved skills and fewer setbacks.