
I have been 3D printing for several years, and getting started wasn’t a walk in the park. I remember my first 3D printer was an Anet A8, and it came in different parts, and I had to assemble everything. I remember spending the whole weekend with my brother, trying to make it work. It was an exciting yet frustrating experience, and after countless hours of trial and error, we finally got it to work.
Over time, I have learned a lot, and there are some key things I wish I had known when starting, which I wish I had known earlier, and I am here to share them with you. If I had known these things, it would have saved me time. Follow along.
You can now build your own 3D printer for less with this amazing open-source project
Never be stuck looking for a specific part again.
5 Consider a fully assembled 3D printer
Assembling the components of a 3D printer is time-consuming
When I got my first 3D printer, there were not many budget-friendly 3D printers that were pre-assembled. The majority required some tinkering to get them to work, and if one wants one fully assembled, they had to spend a few more dollars. Although assembling the machine was a great learning experience in how 3D printers generally work, buying one fully assembled would be much better than spending a lot of time getting the machine right. Currently, affordable brands are available that don’t need assembling, and they also come with an automatic bed leveling feature, so you don’t need to do it manually.
I also didn’t know some 3D printers are noisy, especially the older models. This makes them a nuisance, especially if you are 3D printing at home. I had one that produced a lot of sound when 3D printing, so I had to buy an enclosure to try to insulate it. So, if you have not yet bought one, choose one with silent motors and check other factors that we highlighted in our article on things to check before purchasing a 3D printer.
7 beginner mistakes to avoid when getting into 3D printing
When you start your 3D printing adventure, be sure to avoid these newbie mistakes
4 The first layer is the most important
Have the prints stick correctly to the bed
In 3D printing, the first layer is the most important. It forms the foundation of the entire print, and if you don’t get it right, you won’t have a successful print. One of the issues I faced when starting was getting the print stuck properly to the bed, resulting in the file being thrown off the bed or the print looking like spaghetti.
One of the leading causes of issues with the first layer is an uneven bed. It will result in problems when it is not flat and doesn’t have a consistent distance from the nozzle and on all sides. Whether your 3D printer supports manual or automatic bed leveling, it’s essential to level it properly. Also, the z-offset, the height between the nozzle and the bed, should be correctly set. You can set it in the LCD screen, but if you find it hard to adjust correctly, consider doing so in the firmware.
Glue sticks also significantly help your designs adhere to the bed properly. It is also key to regularly clean the print bed to remove residue or dust. If these fail, consider using Brim and Raft to help the print have a good foundation. You can activate them on the slicer.
7 reasons I’m switching to PETG filament for my 3D printing
While PLA filament is best for 3D printing beginners, there are strong advantages to using PETG instead
3 The quality of the filament matters
Where you buy and how you store the filament is important
Buying just any filament can affect the printing process and the durability of your 3D prints. In addition to buying from reputable brands, proper storage is essential. I remember once leaving the filament exposed, and it absorbed moisture. During 3D printing, I noted stringing in 3D prints, and the filament extrusion was also inconsistent. I later learned that moisture affects the quality of the filament, and one needs to store it in airtight containers with desiccants or use a filament dryer before printing.
2 At one point, you will need to upgrade some components
The upgrade cycle never ends
The nozzle of my 3D printer got clogged once, and I spent a lot of time trying to remove the residue, but I couldn’t, and the only solution was to replace it. This is something every 3D printer owner will face at one point.
In addition to the nozzle, you will upgrade the build plate to a PEI spring sheet for better adhesion, install a fan duct for proper cooling, and even add an enclosure to your machine to help when using materials like ABS, which are prone to warping and producing toxic fumes.
You can also add auto-bed leveling sensors if your 3D printer doesn’t have one to make it easier to level the bed. So, no matter how good the 3D printer is out of the box, there’s always something that you might need to improve, whether by replacing the existing parts or adding a new one.
10 accessories for your 3D printer you can 3D print
Why buy accessories when you can 3D print them?
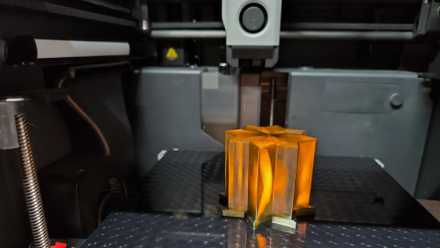
1 Resin 3D printing produces excellent prints, but it’s messy
Despite the mess, you get prints with a good surface finish
Resin 3D printers are great for producing files that are detailed and have a smooth finish, but the process to achieve this is different from FDM 3D printers. In FDM, you use plastic filament, but in this process, you will need toxic liquid resin, which requires careful handling. You will need to wear gloves and work in a well-ventilated area.
After 3D printing, the prints need to be washed in isopropyl alcohol (IPA) and then cured under UV light before touching. You can do this manually. For example, when starting, I used hot water for the initial cleaning, dipped the print in a basin with IPA, and then exposed it to UV light for curing.
This worked, but it required a lot of effort and was a mess, too. I later learned about the wash and cure station machine, which you put your print in, set a time, and it will be cleaned appropriately and cured without much effort. If you are considering getting a resin 3D printer, remember to get a wash and cure station too.
Know the basics before you start 3D printing
When getting into 3D printing, you should not expect it to be all about hitting “print” and then you have your design. It’s more than that. You need to familiarize yourself with the basics, like bed leveling, tweaking the slicer settings, and how to get a good first layer to help save you time along the way. I had to learn these the hard way, which took me much longer than if I had known them before. You will always spend time troubleshooting issues and maintenance when 3D printing, but if you are focused on the journey and not the final results, you will enjoy every single moment.