
These days, it feels like there's a new AI tool dropping every other day. If there's one thing you need to know about me, it's that I absolutely love testing every tool that comes out, especially if it's packed with features meant to cut down the time I spend doing the boring, repetitive stuff. Out of all the tools I've tested so far, Google's AI research assistant is the one that's grown on me the most.
Given that I'm a full-time student in addition to working as a tech journalist, it's packed with all the right features to help me on both fronts. Whether I'm cramming for a midterm past midnight or working on an article and need to fact-check sources, I know I can always turn to NotebookLM. I've been using it since it first launched as an experimental project, which has given me plenty of time to figure out what works, what doesn’t, and which little tweaks actually make a big difference.
Recently, I made a few small changes to how I use NotebookLM. To my surprise, those minor adjustments had a much bigger impact than I expected.
3 Generating reports from multiple sources and adding them as sources
This is a step that takes no more than a few seconds, but is a game-changer in the best ways possible. One of NotebookLM's most underrated features is the ability to generate different reports summarizing the content of your sources with just the click of a button. When you open a notebook in NotebookLM, you'll notice a Reports button in the Studio panel (it used to be called Notes until NotebookLM's most recent update, where it refreshed the Studio panel). Expanding the Reports dropdown menu reveals the following four options: Study Guide, Briefing Doc, FAQ, and Timeline.
All of these are essentially summaries of your sources, just in different formats. For instance, say you're studying for an exam and think a FAQ would be more helpful than a long summary, that format will break down the content into simple Q&A-style explanations that are much easier to skim through. On the other hand, if you're trying to quickly catch up on a topic for a meeting or an article, the Briefing Doc or Study Guide might be the better pick. Once you've generated one of the reports (or even a few), you can add them as a source to your notebook. To do so, click the horizontal three dots next to the source, and hit Convert to source.
The reason why this is so helpful is because instead of NotebookLM using all your original sources to generate audio overviews, mind maps, or even to answer your questions, you can select the report instead. Since these reports are already condensed versions of your material, the tool ends up pulling more focused and relevant responses, saving you time and cutting through the noise.
4 features in NotebookLM that changed how I study
At this point, I might just owe NotebookLM my degree.
2 Converting some of my notebooks to public notebooks
Up until June 2025, sharing NotebookLM notebooks you’ve created with a large audience was a pain. You’d need to add everyone you wanted to share the notebook with individually by email, which meant you needed to know their exact email address ahead of time. Not only was this time-consuming, but it also made it hard to share your work with readers, classmates, or teammates. It only worked best when you needed to share with a handful of people.
For instance, I recently used NotebookLM to learn a new programming language, which involved me creating a dedicated notebook for it. A reader asked me to share the notebook with them, and prior to this update, I’d have needed to ask for their email and add them manually.
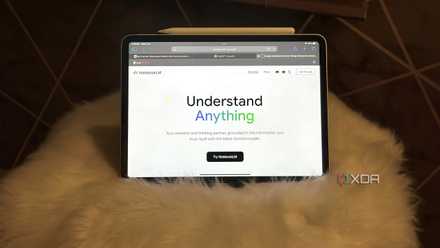
Thankfully, now sharing NotebookLM notebooks just takes a click. All you need to do is hit the Share button in the top-right corner after you’ve created a notebook, then expand the dropdown under Notebook access and select Anyone with the link. From there, just hit Copy link, and you’re good to go.
This is such a minor change I’ve made to my workflow, but it’s had a huge impact. I’ve shared public links to my NotebookLM notebooks with my classmates, family members, colleagues, and even with my readers.
1 Converting certain sources into .txt files before uploading
Though this isn't something backed up by any official recommendation from NotebookLM's official support articles, I noticed that multiple users on the r/NotebookLM subreddit were recommending converting files to .txt format before uploading them to NotebookLM. This is because AI tools find .txt files easier to parse, since the content isn't filled with complex formatting. Ever since I've been using NotebookLM, I've stuck to uploading my PDF files as-is.
But once I saw just how many people were recommending converting text-heavy PDFs to plain text, I figured it was worth a shot, and honestly, it made a noticeable difference. The tool responded faster, and the answers were clearer, especially when I asked follow-up questions. When I uploaded PDFs, I’d noticed that there were sometimes formatting issues, which I assume were because of how the text was arranged in columns or broken up by headers and footers. With .txt files, I noticed that such issues no longer appeared. This was because .txt files were just clean, searchable content the AI could actually understand.
Keep in mind that I didn't do this for every source I uploaded to my NotebookLM notebooks. Before uploading a PDF file or even a Google Doc, I’d manually skim through it to check whether it was formatted in a way that might confuse the tool. If that was the case, I’d end up converting it to .txt using a free online tool like CloudConvert. In cases where I wanted to convert a Google Doc to a .txt file, I'd just download it directly as a .txt file from Google Docs.
Make these changes to your NotebookLM workflow ASAP
None of the changes I’ve made above are ground-breaking when you think about them, but they make a noticeable difference when you start using them. If you aren’t already taking advantage of these small tweaks, now’s the time to give them a shot.