 |
VOOZH | about |
|
VOOZH | about |
Editor’s note: This article was last updated by Chimezie Innocent on 3 May 2024 to include using the Typed.js and react-text-transition libraries for implementing animations in React.
👁 5 Ways To Implement A Typing Animation In ReactThe typing animation effect has become a popular way to add visual interactivity to web applications. In this article, we’ll explore five simple and effective ways to implement typing animations in React.
From creating a typewriter effect from scratch using React to leveraging dedicated typing animation libraries like react-typed, react-type-animation, Typed.js, and react-text-transition, you’ll learn how to implement engaging typewriter effects in your React applications.
You can find the complete project code in this GitHub repository. Let’s get started!
The Replay is a weekly newsletter for dev and engineering leaders.
Delivered once a week, it's your curated guide to the most important conversations around frontend dev, emerging AI tools, and the state of modern software.
useState Hook and setTimeout functionOne way to implement a typing animation in React is by utilizing React’s built-in useState Hook and the setTimeout function. This method allows you to have full control of the animation.
To get started, you’ll first need to create a component called Typewriter.js inside the src folder that will house your typing animation. Within this component, you’ll have a state variable to keep track of the current text to be displayed and an index to determine which character to append next.
You can initialize the state variables using the useState Hook. The current text will initially be an empty string, and the current index will start at 0:
import React, { useState, useEffect } from 'react';

const Typewriter = ({ text, delay }) => {
 const [currentText, setCurrentText] = useState('');
 const [currentIndex, setCurrentIndex] = useState(0);

 // Typing logic goes here

 return <span>{currentText}</span>;
};

export default Typewriter;
In the example above, the text prop is used to pass the desired text content to the Typewriter component. This is the text that will be gradually displayed as the typing animation progresses.
The delay prop is used to specify the delay in milliseconds between each character being appended to the current text. This determines the speed of the typing animation.
Next, we need to implement the animation logic inside the component. This can be achieved by utilizing the useEffect Hook. In this case, we’ll use the useEffect Hook to set up a setTimeout function that appends the next character to the current text after a certain delay:
useEffect(() => {
 if (currentIndex < text.length) {
 const timeout = setTimeout(() => {
 setCurrentText(prevText => prevText + text[currentIndex]);
 setCurrentIndex(prevIndex => prevIndex + 1);
 }, delay);

 return () => clearTimeout(timeout);
 }
}, [currentIndex, delay, text]);
In the useEffect Hook, we check if the currentIndex is less than the length of the text. If true, we set up a setTimeout function that appends the next character from the text prop to the currentText state after the specified delay.
We also increment currentIndex to move to the next character. Additionally, we return a cleanup function that clears the timeout when the component unmounts, or the dependencies change.
Now, let’s see an example of how we can use the Typewriter component that we just created:
import Typewriter from "./Typewriter";

const App = () => {
 return (
 <div>
 <h1>
 Welcome to <Typewriter text="My React App" delay={100} />
 </h1>
 </div>
 );
};

export default App;
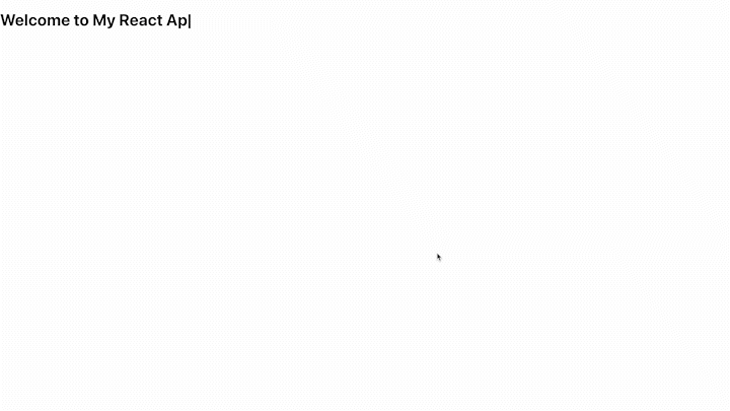
You should see something like this:
In this case, we only applied the typing animation to the string My React App and set the delay to 100 milliseconds. If you want to make the typing animation faster or slower, simply increase or decrease the delay as needed.
While the GIF above shows the typing animation repeating on a loop, in reality, the animation effect will only happen once. The text will then display normally, without the typing animation.
However, in some cases, you might want the typing animation to repeat infinitely. Let’s see how to achieve this next.
In addition to the basic typing animation, we can enhance the Typewriter component by adding an infinite loop functionality. This allows the animation to run infinitely, continuously displaying the text.
To achieve this, we need to add a new prop named infinite to the Typewriter component. This prop allows the animation to run infinitely when set to true.
When the currentIndex reaches the length of the text, the component checks if infinite is true. If so, it resets the currentIndex to 0 and sets currentText equal to an empty string to start the animation from the beginning again.
Your code should look like this:
import { useState, useEffect } from 'react';

const Typewriter = ({ text, delay, infinite }) => {
 const [currentText, setCurrentText] = useState('');
 const [currentIndex, setCurrentIndex] = useState(0);

 useEffect(() => {
 let timeout;

 if (currentIndex <= text.length) {
 timeout = setTimeout(() => {
 setCurrentText(prevText => prevText + text[currentIndex]);
 setCurrentIndex(prevIndex => prevIndex + 1);
 }, delay);

 } else if (infinite) { // ADD THIS CHECK
 setCurrentIndex(0);
 setCurrentText('');
 }

 return () => clearTimeout(timeout);
 }, [currentIndex, delay, infinite, text]);

 return <span>{currentText}</span>;
};

export default Typewriter;
Now, let’s see an example of how we can use the updated Typewriter component with the infinite prop in your App component:
import Typewriter from "./Typewriter";

const App = () => {
 return (
 <div>
 <h1>
 Welcome to <Typewriter text="My React App" delay={100} infinite />
 </h1>
 </div>
 );
};

export default App;
Now that you understand how to implement a typing animation using React Hooks and the setTimeout function, let’s explore other methods that leverage dedicated animation libraries to achieve similar effects with added functionality.
Another approach to implementing a typing animation in React is by using specialized typing animation libraries. One such library is react-typed, which provides an easy and efficient way to create typing effects with additional features and customization options.
To begin, you’ll need to install react-typed in your project:
npm install react-typed
Once installed, you can import the ReactTyped component from react-typed and incorporate it into your React application like this:
// App.js
import { ReactTyped } from "react-typed";

const App = () => {
 return (
 <div>
 <h1>
 Welcome to{" "}
 <ReactTyped strings={["My React App"]} typeSpeed={100} loop />
 </h1>
 </div>
 );
};

export default App;
In the example above, the App component utilizes the <ReactTyped /> component from react-typed. It accepts several props to customize the typing animation:
strings: An array of strings that will be displayed one after the other. In this example, we have provided an array with only one string: My React ApptypeSpeed: Specifies the speed at which the characters are typed. It represents the time delay in milliseconds between each character being displayedloop: Determines whether the animation should loop indefinitely. Setting it to true will repeat the animationYou should see something like this:
There are also other props we can use to customize the ReactTyped component, such as:
backSpeed: Determines the speed at which the characters are deleted when the animation loops. It represents the time delay in milliseconds between each character being removedcursorChar: Allows you to customize the cursor character that appears during the typing animationshowCursor: Controls whether the cursor should be visible during the typing animation. Setting it to true will display the cursorHere’s an updated example that demonstrates the usage of these additional props:
import { ReactTyped } from "react-typed";

const App = () => {
 return (
 <div>
 <h1>
 Welcome to{" "}
 <ReactTyped
 strings={["My React App"]}
 typeSpeed={100}
 loop
 backSpeed={20}
 cursorChar=">"
 showCursor={true}
 />
 </h1>
 </div>
 );
};

export default App;
See the result below:
Now, let’s create one more example that you have likely seen across many websites. This is the typewriter effect that showcases different roles or professions. For example, you might encounter it on personal portfolio websites:
To achieve this typing animation in your React project, your code should look like this:
import ReactTyped from "react-typed";

const App = () => {
 return (
 <div>
 <h1>
 I'm a{" "}
 <ReactTyped
 strings={["Developer", "Writer", "Designer"]}
 typeSpeed={100}
 loop
 backSpeed={20}
 cursorChar=">"
 showCursor={true}
 />
 </h1>
 </div>
 );
};

export default App;
In the above code, the strings prop of the ReactTyped component is an array of strings representing different roles. In this example, we have provided an array with the strings Developer, Writer, and Designer. The typewriter effect will animate these strings one after the other, as shown in the GIF above.
By utilizing the react-typed library, we can easily create dynamic typing animations with customizable speed, looping behavior, and multiple strings to display. This method provides a more straightforward approach when compared to building a typing animation from scratch in React.
Next, let’s explore another method of implementing a typing animation in React using a different animation library called react-type-animation.
Besides the previously mentioned react-typed library, react-type-animation is another great animation library for creating typing animations in React. This library offers a straightforward way to implement dynamic typewriter effects with various customization options.
To begin, you’ll need to install the react-type-animation library in your project:
npm install react-type-animation
Once installed, you can import the TypeAnimation component from react-type-animation and use it in your React project like this:
import { TypeAnimation } from 'react-type-animation';

const App = () => {
 return (
 <div>
 <TypeAnimation
 sequence={[
 "I'm a Developer",
 1000,
 "I'm a Writer",
 1000,
 "I'm a Designer",
 1000,
 ]}
 speed={50}
 repeat={Infinity}
 style={{ fontSize: '2em' }}
 />
 </div>
 );
};

export default App;
In the provided example, the App component includes the TypeAnimation component from react-type-animation. The TypeAnimation component accepts several props to control the typing animation:
sequence: An array that defines the sequence of strings and delays for the typing animation. Each element in the array represents either a string to be displayed or a delay in milliseconds before proceeding to the next elementspeed: Determines the speed at which the characters are typed. It represents the time delay in milliseconds between each character being displayedrepeat: Controls the number of times the animation will repeat. Setting it to Infinity will cause the animation to loop indefinitelyNote that in this example, we have a sequence of strings — I'm a Developer, I'm a Writer, and I'm a Designer — with delays of 1000 milliseconds between each string.
By including the same initial text in every string and varying the dynamic part, we can create an effect where the static part is only typed out once.
The result should look similar to our last example using the react-typed library.
In addition to single-line typing animations, the react-type-animation library supports creating multi-line typing effects. This allows you to display multiple lines of text in a sequential and animated manner.
Let’s take a look at an example of a multi-line typing animation using the react-type-animation library:
import { TypeAnimation } from 'react-type-animation';

const App = () => {
 return (
 <div>
 <TypeAnimation
 sequence={[
 `Welcome to my website!\nI'm a Developer\nand a Designer.`,
 1000,
 "",
 ]}
 speed={50}
 style={{ whiteSpace: 'pre-line', fontSize: '2em' }}
 repeat={Infinity}
 />
 </div>
 );
};

export default App;
In the above example, the sequence prop contains a multi-line string that represents the text to be displayed. Each line is separated by \n — the newline character.
The initial message — Welcome to my website! — is followed by I'm a Developer on a new line, then and a Designer on the subsequent line.
To ensure that proper line breaks are rendered, we set the whiteSpace CSS property to pre-line in the style prop of the TypeAnimation component. This allows the component to interpret newline characters and display the messages on separate lines. See the result below:
Feel free to modify the text content, typing speed, styling, and other parameters according to your specific requirements.
Typed.js is another great library that you can use to implement typing animations in your application. To use this library, install it using any of the commands below:
/* npm */
npm install typed.js

/* yarn */
yarn add typed.js
After installation, you can use it like so:
// App.js

import { useEffect, useRef } from "react";
import Typed from "typed.js";
const App = () => {
 const el = useRef(null);

 useEffect(() => {
 const typed = new Typed(el.current, {
 strings: ["I'm a Software Developer", "I'm a Technical Writer"],
 typeSpeed: 50,
 loop: true,
 loopCount: Infinity,
 cursorChar: "|"
 });
 return () => {
 typed.destroy();
 };
 }, []);
 return (
 <div>
 <h1>
 {" "}
 Hello, <span ref={el} />{" "}
 </h1>
 </div>
 );
};
export default App;
Typed.js uses the useRef Hook to create a reference to a DOM element and then stores it in a variable called el. This reference targets the element where the typing animation will be applied.
Inside the useEffect Hook, a new instance is created from the Typed.js library. The first argument of the instance is el.current, which is the DOM element that we want to animate, and then we pass our configuration options object as the second argument. These options define the behavior of the animation:
strings: An array of strings that will be typed sequentiallytypeSpeed: The speed at which characters are typed (milliseconds between characters)loop: Whether the animation should loop continuouslyloopCount: The number of times the animation should loopcursorChar: Character to display as the cursor during animationFinally, a cleanup function is returned from the useEffect Hook to destroy the instance once the component unmounts:
react-text-transition is another, seamless text transition library that you can use to animate your text changes. To use it, install it using the command below:
npm install react-text-transition
After installation, you can use the library like so:
// App.js

import { useEffect, useState } from "react";
import TextTransition, { presets } from "react-text-transition";

const TEXTS = ["Welcome to my website!", "I'm a Developer", "and a Designer."];

const App = () => {
 const [textIndex, setTextIndex] = useState(0);

 useEffect(() => {
 const interval = setInterval(() => {
 setTextIndex((index) => index + 1);
 }, 3000);
 return () => clearInterval(interval);
 }, []);

 return (
 <div>
 <h1>
 <TextTransition springConfig={presets.wobbly}>
 {TEXTS[textIndex % TEXTS.length]}{" "}
 </TextTransition>
 </h1>
 </div>
 );
};
export default App;
Similar to the other typing amination libraries, textTransition and presets are imported from react-text-transition. Next, a constant array named TEXTS is defined and contains the strings that will be displayed sequentially during the animation. Using a setInterval function in our useEffect, we update the textIndex state every three seconds. Additionally, a cleanup function is required to clear or terminate the interval when the component unmounts.
Finally, the springConfig prop is set to presets.wobbly. This defines the animation style as a wobbly transition effect:
Below are some reasons why using third-party libraries is easier and more performant than implementing the animation directly:
This concludes our tutorial on how to create typing animations in React. In this tutorial, we explored five different methods for implementing typing animations in React. You can check out the full code on GitHub.
By creating a typing animation from scratch using React, or leveraging dedicated animation libraries like react-typed, react-type-animation, Typed.js, and react-text-transition, we can easily add engaging typewriter effects to our React applications.
If you have any questions or feedback, feel free to leave a comment below. Happy coding!
Install LogRocket via npm or script tag. LogRocket.init() must be called client-side, not
server-side
$ npm i --save logrocket

// Code:

import LogRocket from 'logrocket';
LogRocket.init('app/id');
// Add to your HTML:

<script src="https://cdn.lr-ingest.com/LogRocket.min.js"></script>
<script>window.LogRocket && window.LogRocket.init('app/id');</script>
AI tools generate working React code fast, but miss race conditions, empty states, debouncing, and accessibility. Here’s how to catch bugs before production.
Learn how to use Gemini CLI subagents to delegate frontend, backend, testing, and docs tasks to specialized agents with guardrails and clear ownership.
Learn how next-browser gives AI agents runtime context for debugging Next.js apps, including React props, hydration, PPR, forms, and performance.
Build dynamic LLM routing in Next.js with OpenRouter, TanStack AI, task classification, model fallbacks, and cost-aware routing.
Hey there, want to help make our blog better?
Join LogRocket’s Content Advisory Board. You’ll help inform the type of content we create and get access to exclusive meetups, social accreditation, and swag.
Sign up now