 |
VOOZH | about |
|
VOOZH | about |
Flutter is built with Skia, a 2D graphics library written in C++. Flutter’s Skia engine enables it to create portable and performant applications across various platforms, including the web.
👁 Getting Started With WebAssembly In Flutter WebMost web browsers understand the JavaScript language; however, the Skia C++ API can run on the web browser through WebAssembly. WebAssembly allows native code to run in the browser by compiling it into a language that the browser understands.
In this tutorial, we’ll introduce WebAssembly and understand its benefits. We’ll also learn how Flutter code interacts with WebAssembly bindings.
The Replay is a weekly newsletter for dev and engineering leaders.
Delivered once a week, it's your curated guide to the most important conversations around frontend dev, emerging AI tools, and the state of modern software.
WebAssembly (Wasm) is a low-level language that runs with near-native performance. It’s a virtual stack machine with a compact binary format that’s meant to be a compile target for high-level languages.
WebAssembly enables engineers to write code in C, C++, Rust, and other high-level languages that run in the browser. Wasm compiles code written in a high-level language to WebAssembly modules. They’re then loaded into a web app and called with JavaScript.
The browser can quickly turn WebAssembly modules into any machine’s instructions.
JavaScript has been the primary language that browsers understand. However, when running resource-intensive applications like 3D games, JavaScript tends to be sluggish. For such applications, a near-native experience is required. This is where Wasm comes in.
WebAssembly works alongside JavaScript to provide a near-native speed for our applications. Due to the modules’ small size, Wasm loads and executes faster, enabling highly performant apps on the web.
Wasm enables us to build fast, performant, portable, and memory-safe applications. It’s an open standard designed to run on other platforms, not just the web. Many popular languages have at least some support for WebAssembly.
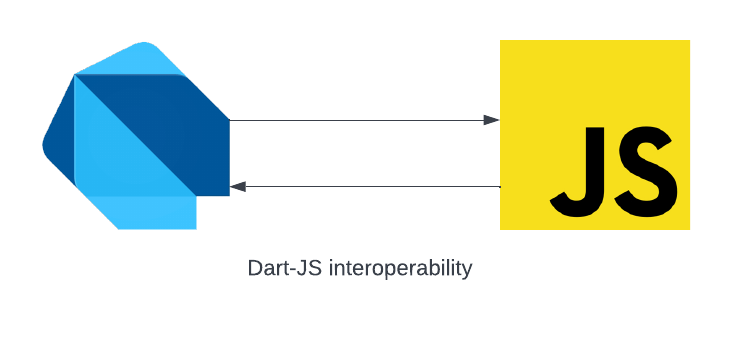
The Dart web platform enables Dart code to be compiled and run in platforms powered by JavaScript. We can also call existing JavaScript code inside our Dart code, made possible by the JavaScript bindings provided by the js package.
The ability to call JavaScript code from Dart code and Dart code from JavaScript code is termed “Dart-JavaScript interoperability.”
The js package provides annotations and functions that let us specify how our Dart code connects with JavaScript code. The JavaScript API has the WebAssembly object, a namespace for all WebAssembly-related functions, that allows loading WebAssembly modules, creating new memory and table instances, and handling WebAssembly Errors.
WebAssembly has two file formats:
.wasm: contains assembly code in binary and is the executable file.wat: contains a human-readable text format of the .wasm file and compiles to .wasm. It is only meant for editing or debuggingWriting WebAssembly code can be painful. Most languages support generating Wasm modules from our source code which we can then load and call using the provided bindings.
We can work with WebAssembly through the JavaScript WebAssembly object in our Dart-web code by using the js bindings.
To make use of the js bindings in our Dart code, annotate the method with @JS and add the external keyword to it:
@JS('WebAssembly.instantiate')
external Object instantiate(Object bytesOrBuffer, Object import);
We can use various languages to create Wasm modules that we can load into our Flutter apps. In this article, we’ll use AssemblyScript, a TypeScript-like language for WebAssembly, to generate the Wasm modules.
To get started, we need to have Node.js installed. You can download Node from Node’s official site.
Next, install npx, an npm package runner, using the command below:
npm i -g npx
Create a new directory and a package.json file. Then install assemblyscript and assemblyscript/loader using the commands below:
mkdir wasm && cd wasm
npm init
npm i --save-dev assemblyscript
npm i --save @assemblyscript/loader
Next, run the command below to scaffold a new project:
npx asinit .
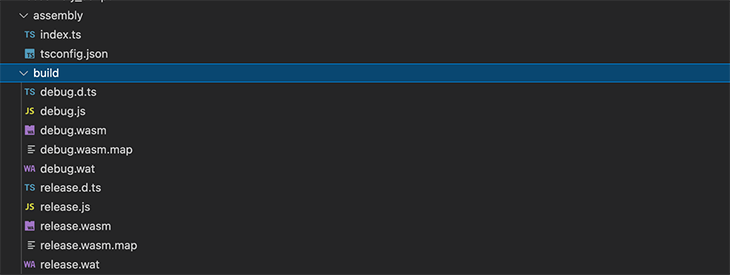
The command will generate assembly and build folders. We’ll write our AssemblyScript modules in the index.ts file and have the generated Wasm code in the build folder.
Next, add the methods below to the index.ts file. The plusOne function adds one to a counter, while the minusOne function subtracts one from the counter.
// The entry file of your WebAssembly module.
export function plusOne(n: i32): i32 {
 return n+1;
}
export function minusOne(n:i32):i32{
 return n - 1;
}
Generate WebAssembly modules by running npm run asbuild in the root directory. This command generates the .wasm and .wat files in the build folder. We’ll make use of the release.wasm file in our Flutter application.
To use the generated Wasm module, we’ll add the release.wasm file as an asset to our Flutter application. We’ll also use the wasm_interop package, which handles the JavaScript WebAssembly bindings for us and enables us to interact with WebAssembly by calling the exposed methods.
First, create a new Flutter application inside the wasm folder using the flutter create . command. Then, create a new assets/wasm folder and add the generated release.wasm file. Update the pubspec.yaml file to include the assets folder and the wasm_interop package:
dependencies:
 wasm_interop: ^2.0.1
flutter:
 assets:
 - assets/wasm/
Run flutter pub get to add the dependencies.
Update the MyHomePage widget in main.dart file as shown below:
class MyHomePage extends StatefulWidget {
 const MyHomePage({Key? key, required this.title}) : super(key: key);
 final String title;
 @override
 State<MyHomePage> createState() => _MyHomePageState();
}
class _MyHomePageState extends State<MyHomePage> {
 int _counter = 0;
 void _incrementCounter() {
 }
 void _decrementCounter() {
 }
 @override
 Widget build(BuildContext context) {
 return Scaffold(
 appBar: AppBar(
 title: Text(widget.title),
 ),
 body: Center(
 child: Column(
 mainAxisAlignment: MainAxisAlignment.center,
 children: <Widget>[
 const Text(
 'You current count is:',
 ),
 Text(
 '$_counter',
 style: Theme.of(context).textTheme.headline4,
 ),
 const SizedBox(
 height: 100,
 ),
 Wrap(
 spacing: 100,
 children: [
 ElevatedButton(
 onPressed: _incrementCounter,
 child: const Text('Increment')),
 ElevatedButton(
 onPressed: _decrementCounter,
 child: const Text('Decrement'))
 ],
 )
 ],
 ),
 ),
 );
 }
}
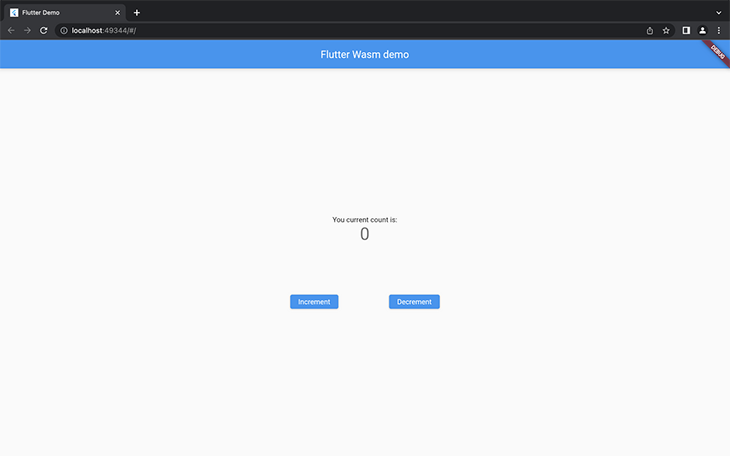
Run flutter run -d chrome in the root directory to serve the app on Chrome. Our app has Increment and Decrement buttons that’ll be hooked to our Wasm functions.
Create a new wasm_loader.dart file and add the WasmLoader class. The WasmLoader class contains our Dart to Wasm interoperability logic.
import 'package:flutter/services.dart' show rootBundle;
import 'package:wasm_interop/wasm_interop.dart';

class WasmLoader {
 WasmLoader({required this.path});
 late Instance? _wasmInstance;
 final String path;
 Future<bool> initialized() async {
 try {
 final bytes = await rootBundle.load(path);
 _wasmInstance = await Instance.fromBufferAsync(bytes.buffer);
 return isLoaded;
 } catch (exc) {
 // ignore: avoid_print
 print('Error on wasm init ${exc.toString()}');
 }
 return false;
 }
 bool get isLoaded => _wasmInstance != null;
 Object callfunction(String name, int input) {
 final func = _wasmInstance?.functions[name];
 return func?.call(input);
 }
}
The code snippet above does the following:
initialized methodInstance.fromBufferAsync method. This method makes use of the WebAssembly.instantiate() JavaScript APIisLoaded state in the initialized method if the Wasm code is successfully initializedcallfunction method that expects a function name and argument, and then makes a call to the functionFinally, update the MyHomePage widget in main.dart file to make use of the WasmLoader:
 late WasmLoader loader;
 int _counter = 0;

 @override
 void initState() {
 super.initState();
 _init();
 }

 Future<void> _init() async {
 loader = WasmLoader(path: 'assets/wasm/release.wasm');
 final isLoaded = await loader.initialized();
 if (isLoaded) {
 setState(() {});
 }
 }

 void _incrementCounter() {
 _counter = loader.callfunction('plusOne', _counter) as int;
 setState(() {});
 }

 void _decrementCounter() {
 _counter = loader.callfunction('minusOne', _counter) as int;
 setState(() {});
 }
The code snippet above does the following:
WasmLoader with the path of our .wasm fileWasmLoader and updates the state of the applications once initialized_counter property with the results of calling the plusOne and minusOne functions in our Wasm moduleRerun the application and click on the Increment and Decrement buttons — the counter updates accordingly. You successfully used WebAssembly code in your Flutter app!
In this tutorial, we discussed WebAssembly and looked into some of its benefits in improving your app’s performance. We also looked into how Flutter interacts with JavaScript bindings. Finally, we used AssemblyScript to generate WebAssembly modules that we hooked into our Flutter web application.
With that, you can now use WebAssembly in your Flutter Web applications and enhance their performance. All the code in this article is available on GitHub.
I hope you enjoyed this tutorial!
Install LogRocket via npm or script tag. LogRocket.init() must be called client-side, not
server-side
$ npm i --save logrocket

// Code:

import LogRocket from 'logrocket';
LogRocket.init('app/id');
// Add to your HTML:

<script src="https://cdn.lr-ingest.com/LogRocket.min.js"></script>
<script>window.LogRocket && window.LogRocket.init('app/id');</script>
Learn how to use Gemini CLI subagents to delegate frontend, backend, testing, and docs tasks to specialized agents with guardrails and clear ownership.
Learn how next-browser gives AI agents runtime context for debugging Next.js apps, including React props, hydration, PPR, forms, and performance.
Build dynamic LLM routing in Next.js with OpenRouter, TanStack AI, task classification, model fallbacks, and cost-aware routing.
TSRX adds first-class control flow, conditional hooks, and scoped styles to React via a TypeScript compiler extension — no new framework required.
Hey there, want to help make our blog better?
Join LogRocket’s Content Advisory Board. You’ll help inform the type of content we create and get access to exclusive meetups, social accreditation, and swag.
Sign up now