 |
VOOZH | about |
|
VOOZH | about |
It’s 2020, and we have certainly had more than our fair share of problems this year. Yet a consistent problem developers have been facing for decades is how to efficiently load media into a web application.
👁 Optimized Media Loading Using Web WorkersThough we have had some experiments and learnings to fix those issues using various techniques like lazy loading, compressing, dynamic media selection based on bandwidths, and so on, there are still a few cases that can cause serious damage to app performance and user experience.
In this article, we will be discussing techniques to build a collage of around 1,000 images (both valid and invalid images), and along the way, we will be discussing the issues, some solutions, and the pros and cons of various approaches.
Let’s consider the following base setup. index.html is a simple webpage that has a button to start loading the images on click, along with a timer (with setInterval) to show the performance when the browser is frozen:
//index.html

<html>
 <head>
 <title>Optimized media loading with web workers | LogRocket</title>
 <link rel="stylesheet" href="styles.css">
 </head>
 <body>
 <div>
 <div class="box">
 <button id="start" onclick="start()">Start</button>
 <div id="count"></div>
 </div>
 <div id="collage"></div>
 </div>
 </body>
 <script>
 setInterval(() => {
 const count = document.getElementById("count")
 const today = new Date();
 const time = today.getHours() + ":" + today.getMinutes() + ":" + today.getSeconds();
 count.innerHTML = time.toString();
 }, 100)
 </script>
</html>
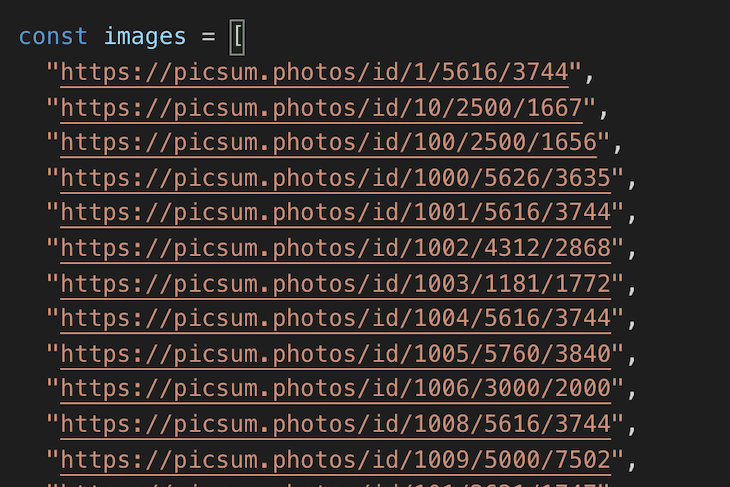
images.js is an array of URLs of images to be loaded:
We’ll explore three different approaches to the problem: adding images into the DOM, using promises, and using web workers.
The Replay is a weekly newsletter for dev and engineering leaders.
Delivered once a week, it's your curated guide to the most important conversations around frontend dev, emerging AI tools, and the state of modern software.
One naive approach to add all these images is to iterate through the array of URLs, create a new DOM element for every URL, and append it into the DOM. This approach blocks the main thread and also creates a bad user experience — to make no mention of the performance issues due to frequent DOM changes.
Here’s the code and an example of how it works:
// Function to append images into the DOM
const start = () => {
 const container = document.getElementById("collage")
 images.forEach(url => {
 const image = document.createElement("img");
 image.src = url;
 container.appendChild(image)
 });
 }
👁 Demo of Adding Images Directly to the DOM
As you can see, in the above approach, both valid and invalid image URLs have been added to the DOM, which impacts the performance (pay attention to the delay in the timer). This can be made a bit better using createDocumentFragment, but it doesn’t change much.
This has proved to be a very bad approach and forces us to find something better, i.e., the promises approach.
A better solution to handle such a situation is to load these images asynchronously and insert them into DOM at once. We can use promises to load images asynchronously alone with the Image() API. More details about Image() constructor can be found here.
In this approach, we iterate through the array of URLs and create a promise with each URL loaded into Image API. It then exposes onload and onerror functions, which resolve to either the image or null, respectively. The code looks something like this:
 const imagesPromiseArray = urlArray.map(url => {
 return new Promise((resolve, reject) => {
 const img = new Image();
 img.onload = () => {
 resolve(img);
 };
 img.onerror = () => {
 resolve(null);
 };
 img.src = url;
 });
 });
Once we have the array of image promises, we can now resolve them in a Promise.all and return it as a promise. Here, we filter and return only valid images and neglect invalid images, as we resolve the image promise with null for invalid images.
return new Promise((resolve, reject) => {
 Promise.all(imagesPromiseArray).then(images => {
 resolve(images.filter(Boolean));
 });
 });
Putting it all together:
//resolve-images.js

const resolveImages = urlArray => {
 const imagesPromiseArray = urlArray.map(url => {
 return new Promise((resolve, reject) => {
 const img = new Image();
 img.onload = () => {
 resolve(img);
 };
 img.onerror = () => {
 resolve(null);
 };
 img.src = url;
 });
 });

 return new Promise((resolve, reject) => {
 Promise.all(imagesPromiseArray).then(images => {
 resolve(images.filter(Boolean));
 });
 });

};
In our start function, we shall use this promise instead of adding images one by one and instead add all the valid images at once into the DOM. The start function looks like:
const start = () => {
 const imageFragment = document.createDocumentFragment();
 const container = document.getElementById("collage")
 resolveImages(images).then((imgs) => {
 imgs.forEach((img) => {
 imageFragment.appendChild(img)
 });
 container.appendChild(imageFragment)
 }, () => {})
}
The changes in action:
👁 Demo of Adding Images Using Promises
If you notice in the gif above, the performance and user experience is a lot better. Now, as the user clicks on the Start button, the loading of images starts in the background, and all the valid images are loaded into the screen after a while.
However, there is one issue visible. As soon as the Start button is clicked, the counter stops at 6:14:4 for a considerable amount of time. This is because the browser is frozen, as it had to handle a huge list of images at once. In a real-world application, it will be even worse since other parts of the application will also engage with the main thread.
Hence, this approach may look better, but it’s still not enough. This leads us to the Web Workers API.
JavaScript is a single-threaded language, and thus, when a data-intensive task is being carried out, it freezes the browser, as it did after the button click in the example above.
But we could leverage the benefits of multi-threading using the Web Workers API so as not to mess with the main thread. That’s exactly what we will do to solve the issue in our case. More details about the Web Workers API can be found here.
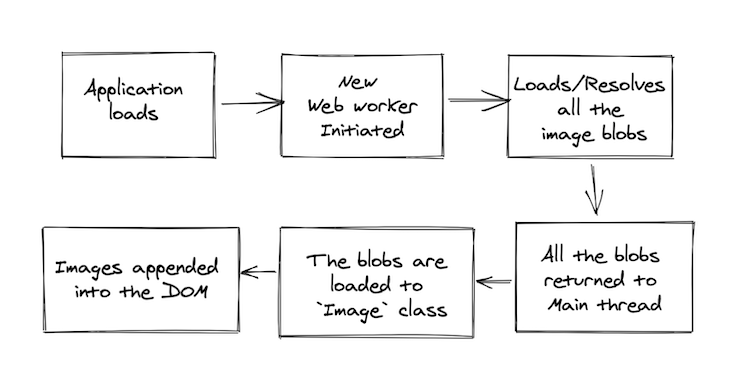
The steps are as simple as below:
👁 Flow Chart Explaining the Process of Adding a Web Worker
Let’s implement it with code. The first step is to create a new file, image-worker.js.
self.addEventListener(
 "message",
 async function(e) {
 const urls = e.data;
 const images = await Promise.all(
 urls.map(async url => {
 try {
 const response = await fetch(url);
 const fileBlob = await response.blob();
 if (fileBlob.type === "image/jpeg")
 return URL.createObjectURL(fileBlob);
 } catch (e) {
 return null;
 }
 })
 );
 self.postMessage(images);
 },
 false
);
Here, we iterate through the array of URLs, fetch them, convert them into blobs, and return an array of valid image blobs. We cant use the Image() API because it translates to the img element, and web workers doesn’t support or allow you to access the DOM.
The next step is to use the web worker in our resolveImages function, as below:
const worker = new Worker("image-worker.js");
The main thread and the web workers communicate using the postMessage function. Hence, we will pass the array of image URLs to the web worker through postMessage:
worker.postMessage(urlArray);
And after the worker processes the URLs and sends the array of image blobs back to the main thread, we need an event listener to handle it, as below:
worker.addEventListener(
 "message",
 async function(event) {
 const imagePromises = event.data.map(async url => {
 if (url) {
 return await createImage(url);
 }
 });
 const imageElements = await Promise.all(imagePromises);
 resolve(imageElements.filter(Boolean));
 },
 false
 );
Here, after we get the image blob, we build image components using the Image() API in the createImage function and repeat the same steps as the previous approach.
const createImage = url => {
 return new Promise((resolve, reject) => {
 const img = new Image();
 img.onload = () => {
 resolve(img);
 };
 img.onerror = () => {
 resolve(null);
 };
 img.src = url;
 });
 };
Putting it all together, resolveImages.js looks like:
const resolveImages = urlArray => {
 const createImage = url => {
 return new Promise((resolve, reject) => {
 const img = new Image();
 img.onload = () => {
 resolve(img);
 };
 img.onerror = () => {
 resolve(null);
 };
 img.src = url;
 });
 };
 return new Promise((resolve, reject) => {
 const worker = new Worker("image-worker.js");
 worker.postMessage(urlArray);
 worker.addEventListener(
 "message",
 async function(event) {
 const imagePromises = event.data.map(async url => {
 if (url) {
 return await createImage(url);
 }
 });
 const imageElements = await Promise.all(imagePromises);
 resolve(imageElements.filter(Boolean));
 },
 false
 );
 });
};
This approach provides all the benefits of the promises-based approach and also prevents the browser from freezing since we moved all the operations from the main thread to web workers. In the gif below, you can see a smooth experience of images loading — and the timer doesn’t stop or lag at all.
👁 Demo of Adding Images Using Web Workers
Thus, we’ve successfully optimized media loading with the help of the Web Workers API. We can leverage the power of workers to solve many standing problems in the world of web development, and this is one use case for it. Do comment if you can find better approaches or ideas on these.
Debugging code is always a tedious task. But the more you understand your errors, the easier it is to fix them.
LogRocket allows you to understand these errors in new and unique ways. Our frontend monitoring solution tracks user engagement with your JavaScript frontends to give you the ability to see exactly what the user did that led to an error.
👁 LogRocket Dashboard Free Trial BannerLogRocket records console logs, page load times, stack traces, slow network requests/responses with headers + bodies, browser metadata, and custom logs. Understanding the impact of your JavaScript code will never be easier!
Learn how to use Gemini CLI subagents to delegate frontend, backend, testing, and docs tasks to specialized agents with guardrails and clear ownership.
Learn how next-browser gives AI agents runtime context for debugging Next.js apps, including React props, hydration, PPR, forms, and performance.
Build dynamic LLM routing in Next.js with OpenRouter, TanStack AI, task classification, model fallbacks, and cost-aware routing.
TSRX adds first-class control flow, conditional hooks, and scoped styles to React via a TypeScript compiler extension — no new framework required.
Hey there, want to help make our blog better?
Join LogRocket’s Content Advisory Board. You’ll help inform the type of content we create and get access to exclusive meetups, social accreditation, and swag.
Sign up now