 |
VOOZH | about |
|
VOOZH | about |
The Replay is a weekly newsletter for dev and engineering leaders.
Delivered once a week, it's your curated guide to the most important conversations around frontend dev, emerging AI tools, and the state of modern software.
React Native is a popular choice for developing complex mobile applications without having in-depth knowledge of Android or iOS. The main selling point for React Native is that you can reuse a significant part of your React web app code to build a mobile app.
👁 ImageAlmost every app requires user authentication. A great option is to use a social login provider like Google or Facebook. This way, we’ll drastically simplify the authentication process because there are built-in plugins that we can easily integrate.
However, many organizations have a custom authentication system that our app needs to handle. Similar to React, React Native is unopinionated, so there are a lot of decisions to make when implementing such a complex functionality.
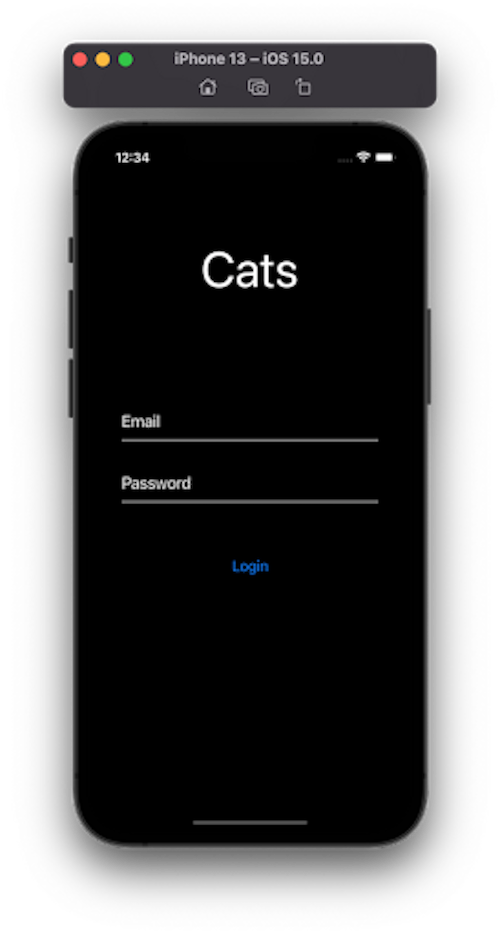
To demonstrate how to authenticate users, we will build a demo application. The app has only one feature: to show a random picture of a cat. But to see that, the user has to be authenticated.
In a nutshell, a JSON Web Token (JWT) is a secure way to exchange information between two or more parties using the JSON format.
After successful authentication using the correct credentials, we will receive two tokens: an access token and a refresh token. We should send back the access token, usually in the Authorization header of every authenticated request. The access token is a sensitive piece of information because if an attacker manages to steal it, he can impersonate us. Since we attach it to every request, the risk is higher. For this reason, the access token has to be short-lived, so an attacker cannot use it for long.
After the access token expires, we can require a new one using the refresh token. For a better user experience, this process needs to be smooth. Speaking about UX, we want the user to be logged in even after closing and opening the application again. To achieve this, we need to persist the tokens.
I have already implemented the backend using Express and MongoDB.
Node.js and Docker are required to run it:
git clone https://github.com/cristian-rita/express-jwt-authentication.git
npm install
docker run --name mongodb -d -p 27017:27017 mongo
npm run dev
The server exposes four API endpoints:
/api/register/api/login/api/refreshToken/api/catFor simplicity, let’s manually create a user:
curl -X POST -H "Content-Type: application/json" -d '{"email":"[email protected]", "password":"test", "firstName":"John", "lastName":"Doe"}' http://localhost:3000/api/register
The final version of the app is available here.
We will initialize an empty React Native app:
npx react-native init ReactNativeJWTExample
Now we need to install some dependencies:
npm install axios axios-auth-refresh react-native-keychain"
npx pod-install
Under src/context, create two files:
//AuthContext.js
import React, {createContext, useState} from 'react';
import * as Keychain from 'react-native-keychain';

const AuthContext = createContext(null);
const {Provider} = AuthContext;

const AuthProvider = ({children}) => {
 const [authState, setAuthState] = useState({
 accessToken: null,
 refreshToken: null,
 authenticated: null,
 });

 const logout = async () => {
 await Keychain.resetGenericPassword();
 setAuthState({
 accessToken: null,
 refreshToken: null,
 authenticated: false,
 });
 };

 const getAccessToken = () => {
 return authState.accessToken;
 };

 return (
 <Provider
 value={{
 authState,
 getAccessToken,
 setAuthState,
 logout,
 }}>
 {children}
 </Provider>
 );
};

export {AuthContext, AuthProvider};
Nothing fancy here. We are using the Context API to manage the authentication state.
There is also a reference to Keychain. As I told you before, we need to persist the access and refresh tokens.
One possibility is to use the AsyncStorage, the equivalent of the browser’s LocalStorage. AsyncStorage is not secure because it is not encrypted. Keeping sensitive data here is an awful idea. The react-native-keychain package uses the Keychain services to store data securely:
import React, {createContext, useContext} from 'react';
import axios from 'axios';
import {AuthContext} from './AuthContext';
import createAuthRefreshInterceptor from 'axios-auth-refresh';
import * as Keychain from 'react-native-keychain';

const AxiosContext = createContext();
const {Provider} = AxiosContext;

const AxiosProvider = ({children}) => {
 const authContext = useContext(AuthContext);

 const authAxios = axios.create({
 baseURL: 'http://localhost:3000/api',
 });

 const publicAxios = axios.create({
 baseURL: 'http://localhost:3000/api',
 });

 authAxios.interceptors.request.use(
 config => {
 if (!config.headers.Authorization) {
 config.headers.Authorization = `Bearer ${authContext.getAccessToken()}`;
 }

 return config;
 },
 error => {
 return Promise.reject(error);
 },
 );

 const refreshAuthLogic = failedRequest => {
 const data = {
 refreshToken: authContext.authState.refreshToken,
 };

 const options = {
 method: 'POST',
 data,
 url: 'http://localhost:3001/api/refreshToken',
 };

 return axios(options)
 .then(async tokenRefreshResponse => {
 failedRequest.response.config.headers.Authorization =
 'Bearer ' + tokenRefreshResponse.data.accessToken;

 authContext.setAuthState({
 ...authContext.authState,
 accessToken: tokenRefreshResponse.data.accessToken,
 });

 await Keychain.setGenericPassword(
 'token',
 JSON.stringify({
 accessToken: tokenRefreshResponse.data.accessToken,
 refreshToken: authContext.authState.refreshToken,
 }),
 );

 return Promise.resolve();
 })
 .catch(e => {
 authContext.setAuthState({
 accessToken: null,
 refreshToken: null,
 });
 });
 };

 createAuthRefreshInterceptor(authAxios, refreshAuthLogic, {});

 return (
 <Provider
 value={{
 authAxios,
 publicAxios,
 }}>
 {children}
 </Provider>
 );
};

export {AxiosContext, AxiosProvider};
We expose two instances of axios. One we need for authenticated API calls and the other for public calls.
Axios is a simple HTTP client that has some unique features. Axios lets us intercept the request or the response. We use an interceptor to send the access token in the Authorization header.
Another interceptor we use is coming from the axios-auth-refresh package. From the client’s point of view, unless we verify the expiration date, it is impossible to determine if the access token has expired or not. This check can prove tricky, so it’s better to rely on the server to tell us if the access token is still valid.
The downside of this approach is that we realize the access token is expired only after a failed HTTP call. In that case, we first need to refresh the access token and then retry the failed request. The axios-auth-refresh package takes care of all that complexity for us.
Now we modify the index.js file to use the newly created context providers:
//index.js
import {AppRegistry} from 'react-native';
import App from './App';
import {name as appName} from './app.json';
import {AuthProvider} from './src/context/AuthContext';
import {AxiosProvider} from './src/context/AxiosContext';
import React from 'react';

const Root = () => {
 return (
 <AuthProvider>
 <AxiosProvider>
 <App />
 </AxiosProvider>
 </AuthProvider>
 );
};
AppRegistry.registerComponent(appName, () => Root);
In the App.js file, we try to load the tokens from the keystore. If there are no tokens, we render the Login screen. Otherwise, we show the Dashboard:
// App.js

import React, {useCallback, useContext, useEffect, useState} from 'react';
import Login from './src/components/Login';
import {AuthContext} from './src/context/AuthContext';
import * as Keychain from 'react-native-keychain';
import Dashboard from './src/components/Dashboard';
import Spinner from './src/components/Spinner';

const App = () => {
 const authContext = useContext(AuthContext);
 const [status, setStatus] = useState('loading');

 const loadJWT = useCallback(async () => {
 try {
 const value = await Keychain.getGenericPassword();
 const jwt = JSON.parse(value.password);

 authContext.setAuthState({
 accessToken: jwt.accessToken || null,
 refreshToken: jwt.refreshToken || null,
 authenticated: jwt.accessToken !== null,
 });
 setStatus('success');
 } catch (error) {
 setStatus('error');
 console.log(`Keychain Error: ${error.message}`);
 authContext.setAuthState({
 accessToken: null,
 refreshToken: null,
 authenticated: false,
 });
 }
 }, []);

 useEffect(() => {
 loadJWT();
 }, [loadJWT]);

 if (status === 'loading') {
 return <Spinner />;
 }

 if (authContext?.authState?.authenticated === false) {
 return <Login />;
 } else {
 return <Dashboard />;
 }
};

export default App;
While checking the Keychain, we display a spinner that we create in src/components/Spinner.js:
// src/components/Spinner.js

import React from 'react';
import {ActivityIndicator, StyleSheet, View} from 'react-native';

const Spinner = () => (
 <View style={styles.container}>
 <ActivityIndicator size="large" color="#007aff" />
 </View>
);

const styles = StyleSheet.create({
 container: {
 flex: 1,
 justifyContent: 'center',
 alignItems: 'center',
 },
});

export default Spinner;
Now that we have implemented the authentication flow, we still need to implement two more components, Login and Dashboard:
// src/components/Login.js

import {
 View,
 Text,
 StyleSheet,
 SafeAreaView,
 TextInput,
 Button,
 Alert,
} from 'react-native';
import React, {useContext, useState} from 'react';
import {AuthContext} from '../context/AuthContext';
import * as Keychain from 'react-native-keychain';
import {AxiosContext} from '../context/AxiosContext';

const Login = () => {
 const [email, setEmail] = useState('');

 const [password, setPassword] = useState('');
 const authContext = useContext(AuthContext);
 const {publicAxios} = useContext(AxiosContext);

 const onLogin = async () => {
 try {
 const response = await publicAxios.post('/login', {
 email,
 password,
 });

 const {accessToken, refreshToken} = response.data;
 authContext.setAuthState({
 accessToken,
 refreshToken,
 authenticated: true,
 });

 await Keychain.setGenericPassword(
 'token',
 JSON.stringify({
 accessToken,
 refreshToken,
 }),
 );
 } catch (error) {
 Alert.alert('Login Failed', error.response.data.message);
 }
 };

 return (
 <SafeAreaView style={styles.container}>
 <Text style={styles.logo}>Cats</Text>
 <View style={styles.form}>
 <TextInput
 style={styles.input}
 placeholder="Email"
 placeholderTextColor="#fefefe"
 keyboardType="email-address"
 autoCapitalize="none"
 onChangeText={text => setEmail(text)}
 value={email}
 />

 <TextInput
 style={styles.input}
 placeholder="Password"
 placeholderTextColor="#fefefe"
 secureTextEntry
 onChangeText={text => setPassword(text)}
 value={password}
 />
 </View>
 <Button title="Login" style={styles.button} onPress={() => onLogin()} />
 </SafeAreaView>
 );
};

const styles = StyleSheet.create({
 container: {
 flex: 1,
 backgroundColor: '#000',
 alignItems: 'center',
 justifyContent: 'flex-start',
 width: '100%',
 },
 logo: {
 fontSize: 60,
 color: '#fff',
 margin: '20%',
 },
 form: {
 width: '80%',
 margin: '10%',
 },
 input: {
 fontSize: 20,
 color: '#fff',
 paddingBottom: 10,
 borderBottomColor: '#fff',
 borderBottomWidth: 1,
 marginVertical: 20,
 },
 button: {},
});

export default Login;
The login is pretty straightforward. We show a form and call the API with the public instance of Axios. In case of a successful login, we save the access and refresh tokens into the Keychain:
// src/components/Dashboard.js

import React, {useContext, useState} from 'react';
import {Button, Image, StyleSheet, View} from 'react-native';
import {AuthContext} from '../context/AuthContext';
import {AxiosContext} from '../context/AxiosContext';
import Spinner from './Spinner';

const Dashboard = () => {
 const axiosContext = useContext(AxiosContext);
 const authContext = useContext(AuthContext);
 const [image, setImage] = useState(null);
 const [status, setStatus] = useState('idle');

 const loadImage = async () => {
 setStatus('loading');
 try {
 const response = await axiosContext.authAxios.get('/cat');
 setImage(response.data);
 setStatus('success');
 } catch (error) {
 setStatus('error');
 }
 };

 if (status === 'loading') {
 return <Spinner />;
 }

 return (
 <View style={styles.container}>
 <Image
 source={{uri: image}}
 width={300}
 height={500}
 style={styles.image}
 />

 <View style={styles.buttonGroup}>
 <Button title="Get Image" onPress={loadImage} />
 <Button title="Logout" onPress={() => authContext.logout()} />
 </View>
 </View>
 );
};

const styles = StyleSheet.create({
 container: {
 justifyContent: 'center',
 alignItems: 'center',
 flex: 1,
 },
 image: {
 width: '90%',
 height: '50%',
 resizeMode: 'contain',
 },
 buttonGroup: {
 marginTop: 20,
 flexDirection: 'row',
 justifyContent: 'space-between',
 width: '90%',
 },
});
export default Dashboard;
The Dashboard component has two buttons: one for getting a new image by calling /api/cat and another for logging out.
You should now be able to log in and test the application using the user we created earlier.
Email: [email protected]
Passwod: test
Keep in mind that there are better ways to handle these API requests. Also, we should have better error handling, but we tried to keep the app as simple as possible.
Implementing authentication is not a trivial task. Even though we created a simple application, you can use these ideas as a starting point and build around them. For instance, adding navigation is as easy as replacing the Login component with a navigation stack dedicated to public navigation and the Dashboard with a navigation stack for authenticated navigation.
LogRocket's Galileo AI watches sessions for you and and surfaces the technical and usability issues holding back your React Native apps.
LogRocket also helps you increase conversion rates and product usage by showing you exactly how users are interacting with your app. LogRocket's product analytics features surface the reasons why users don't complete a particular flow or don't adopt a new feature.
Start proactively monitoring your React Native apps — try LogRocket for free.
AI tools generate working React code fast, but miss race conditions, empty states, debouncing, and accessibility. Here’s how to catch bugs before production.
Learn how to use Gemini CLI subagents to delegate frontend, backend, testing, and docs tasks to specialized agents with guardrails and clear ownership.
Learn how next-browser gives AI agents runtime context for debugging Next.js apps, including React props, hydration, PPR, forms, and performance.
Build dynamic LLM routing in Next.js with OpenRouter, TanStack AI, task classification, model fallbacks, and cost-aware routing.
Hey there, want to help make our blog better?
Join LogRocket’s Content Advisory Board. You’ll help inform the type of content we create and get access to exclusive meetups, social accreditation, and swag.
Sign up now