 |
VOOZH | about |
|
VOOZH | about |
JavaServer Pages (JSP) is a technology used to create dynamic web pages using Java and HTML. Eclipse IDE provides an easy environment for developing JSP applications, while Apache Tomcat acts as the web server to run and test them efficiently.
The process includes three main steps:
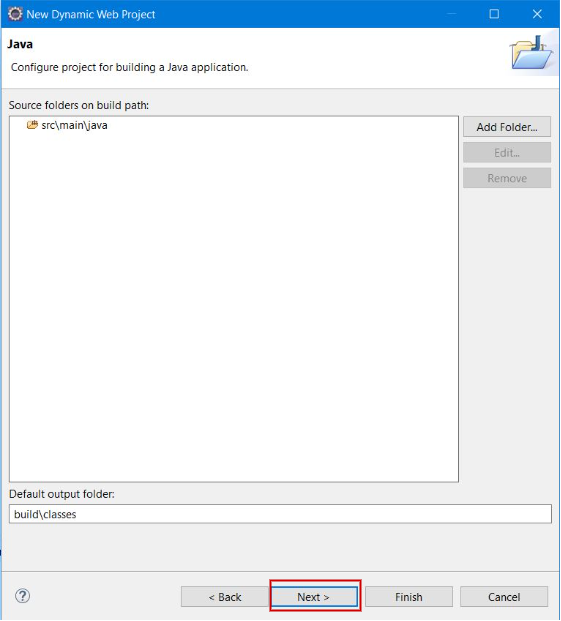
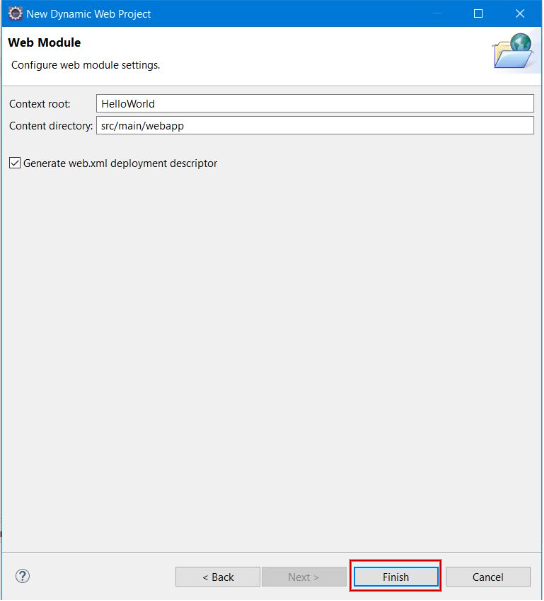
click Next -> Finish as pictorially depicted below.
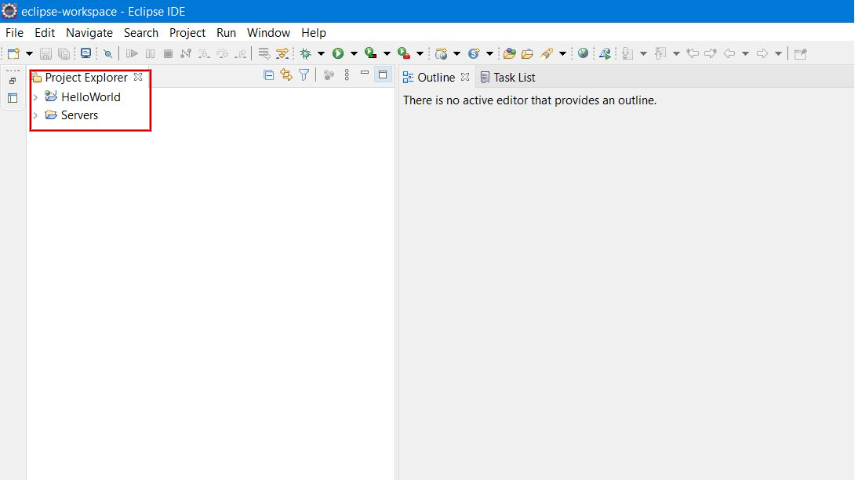
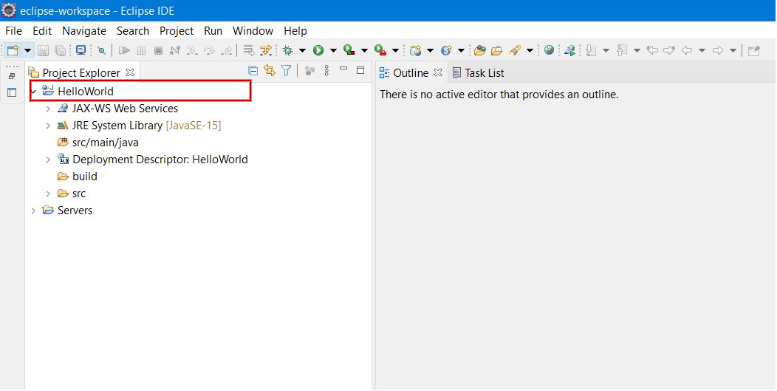
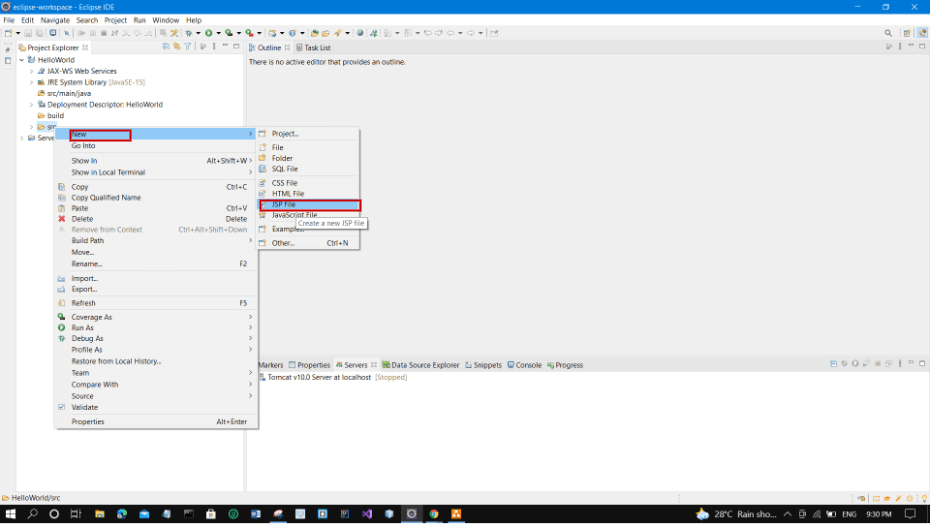
👁 ImageNow you can see your project in the Project Explorer Workspace.
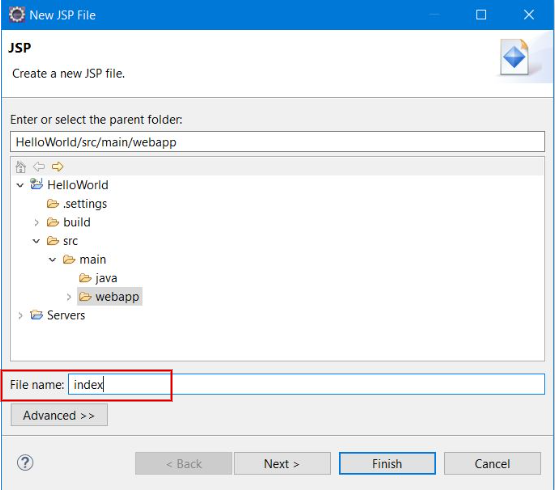
👁 ImageNow, Write File Name, e.g. index. Then Click Next.
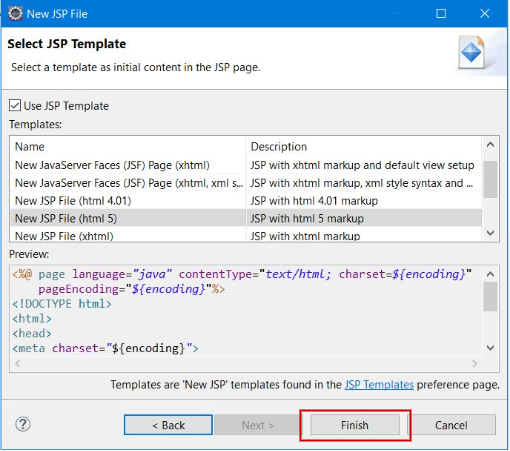
👁 ImageThen, click Finish button.
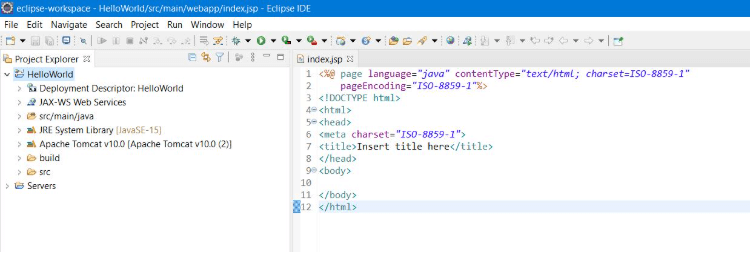
👁 ImageNow, the JSP File is created. Now we can write code here.
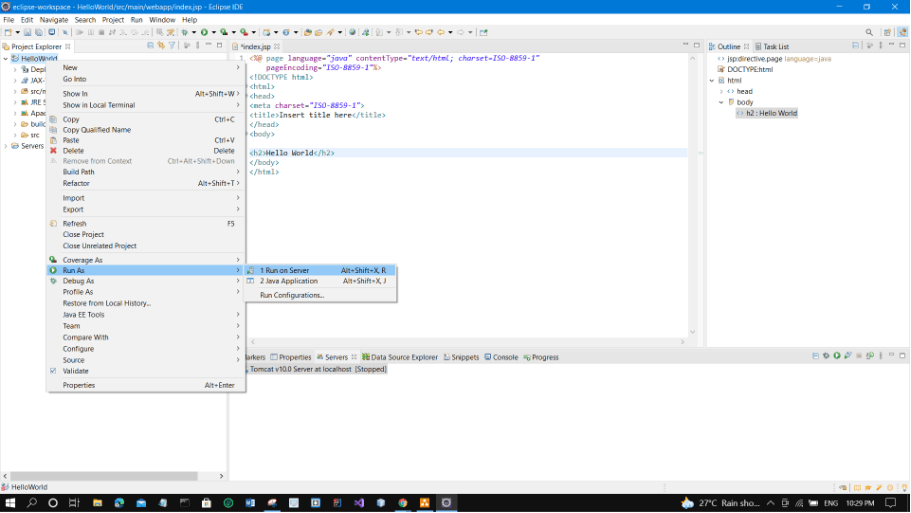
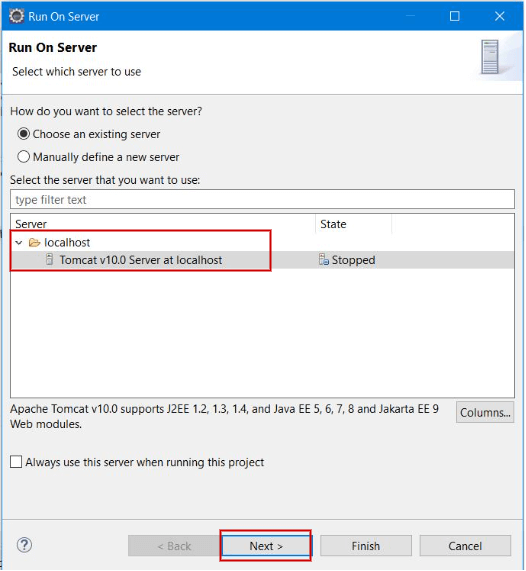
👁 ImageChoose tomcat server. Then Click Next.
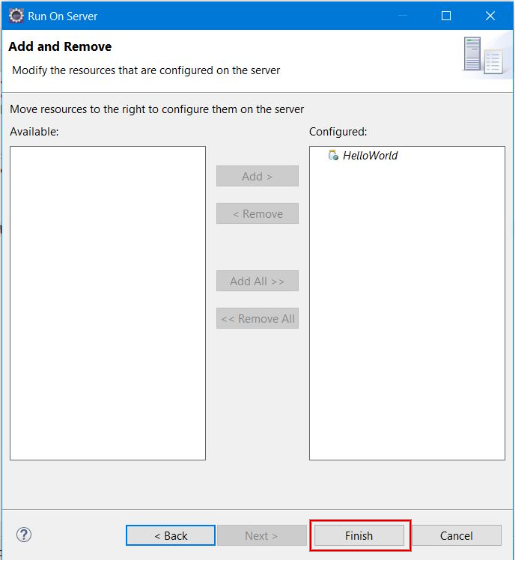
👁 ImageClick Add All -> Finish.
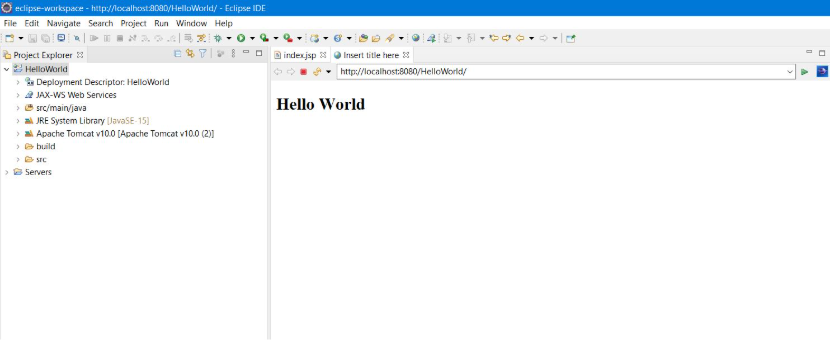
👁 ImageNow, you can see that Java Server Pages (JSP) is running successfully as shown below. Hence we are able to achieve our goal in creating JSP in Eclipse IDE with Tomcat server.
👁 ImageThe application runs at:
http://localhost:8080/HelloWorld/index.jsp