 |
VOOZH | about |
|
VOOZH | about |
Creating a REST API using Spring Boot allows developers to build scalable and production-ready web services with minimal configuration. It simplifies RESTful service development by providing built-in support for HTTP methods, dependency injection, and auto-configuration.
Spring Boot makes it easy to create production-ready apps:
Follow the below steps to create and run a REST API in Spring Boot.
Using Spring Initializr (Recommended)
1. Open Spring Initializr in your browser.
2. Fill in the project details:
3. Click Add Dependencies-> Select Spring Web.
4. Click Generate-> It will download a .zip file.
5. Extract the zip-> Open it in your IDE (IntelliJ / Eclipse / VS Code).
Create a simple Employee class inside com.example.demo:
Create a class to hold a list of employees.
The DAO class will handle adding and retrieving employees.
The controller contains the REST API endpoints.
Open DemoApplication.java (already generated by Spring Boot) and run it:
Now we can test the API using tools like Postman or a web browser.
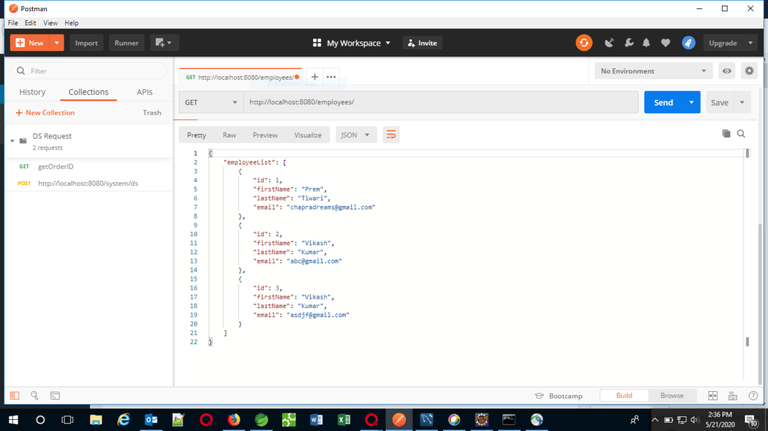
GET Request: Fetch all employees
URL: http://localhost:8080/employees/
Response:
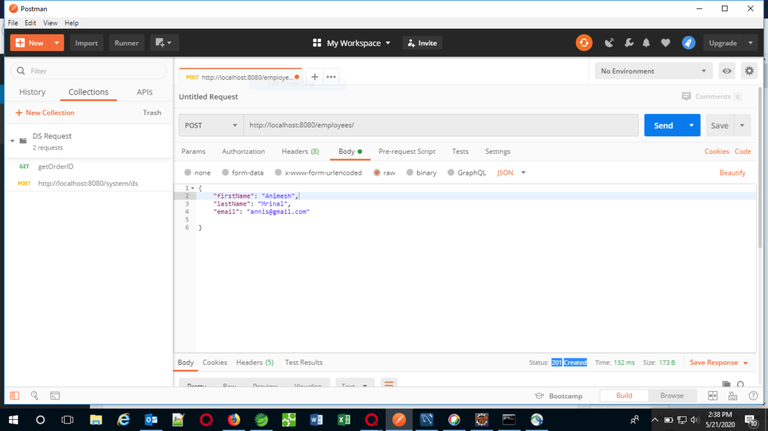
👁 Get-RequestPOST Request: Add a new employee
Response:
Again hitting the GET request after performing the POST request:
This concludes creating a REST API using Spring Boot. Now we have a fully functioning API to manage employees.