 |
VOOZH | about |
|
VOOZH | about |
The java.lang.NoClassDefFoundError: javax/xml/bind/JAXBException occurs in Java applications when there is a runtime condition that cannot find a class definition at runtime. The above exception refers to the class method javax.xml.bind.JAXBException does not exist in Java Architecture in the XML Building (JAXB) class method. This exception can happen for various reasons such as the Java version has changed, or our Java implementation does not have dependencies.
In this article, we will discuss how to handle the java.lang.NoClassDefFoundError: javax/xml/bind/JAXBException in a Java application.
The jaxb-api artifact is the Java Architecture for XML Binding (JAXB) API, which provides a way to convert Java objects to XML representations and vice versa. XML processing operations, such as marshaling and unmarshalling, are necessary to prevent errors related to missing JAXB classes or methods.
Step 1: Create a Maven Project in any preferred IDE. We will be using here Eclipse.
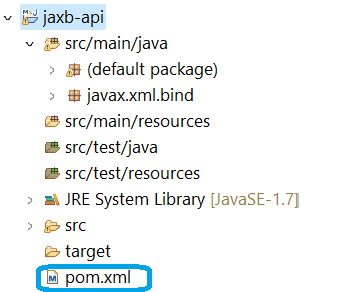
Step 2: Add JAXB dependency, Open the pom.xml file.
The below figure shows the file structure and path for the pom.xml file.
👁 File StructureOpen pom.xml file in Maven project and write the below code in the XML file and save it.
<project xmlns="https://maven.apache.org/POM/4.0.0" xmlns:xsi="https://www.w3.org/2001/XMLSchema-instance" xsi:schemaLocation="https://maven.apache.org/POM/4.0.0 https://maven.apache.org/xsd/maven-4.0.0.xsd">
 <modelVersion>4.0.0</modelVersion>
 <groupId>javax.xml.bind</groupId>
 <artifactId>jaxb-api</artifactId>
 <version>2.3.1</version>
</project>
After saving the file, Maven will be automatically downloading the JAXB library and manage the dependencies.
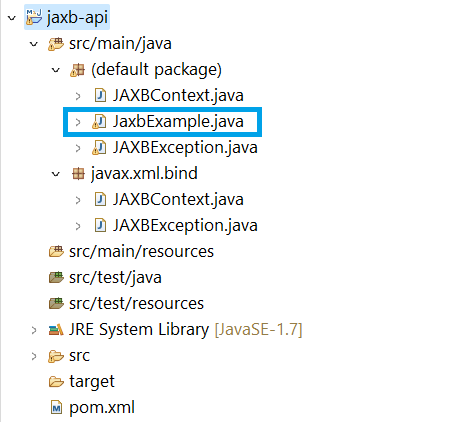
Step 3: Now, let's write a simple Java program. First create a class and name the class as JaxbExample.
The below figure shows the path for JaxbExample file.
👁 File Path for path for java programStep 4: Run the code.
Step 5: After the execution, check the console of Eclipse for the output of the above program. If there is no errors or exceptions in the program, the JAXBContext is successfully created.
We can see the output, in the console of our Eclipse as shown below.
👁 Console Output