 |
VOOZH | about |
|
VOOZH | about |
Spring Boot's CrudRepository is a part of the Spring Data JPA framework, which provides convenient methods for performing CRUD (Create, Read, Update, Delete) operations on entities in a relational database. CrudRepository is an interface that extends the basic Repository interface and adds generic CRUD methods to it. It is defined in the package org.springframework.data.repository and it extends the Spring Data Repository interface. If someone wants to use CrudRepository in the Spring Boot application, she has to create an interface and extend the CrudRepository interface.
Syntax:
public interface CrudRepository<T, ID> extends Repository<T, ID>
Where:
Example:
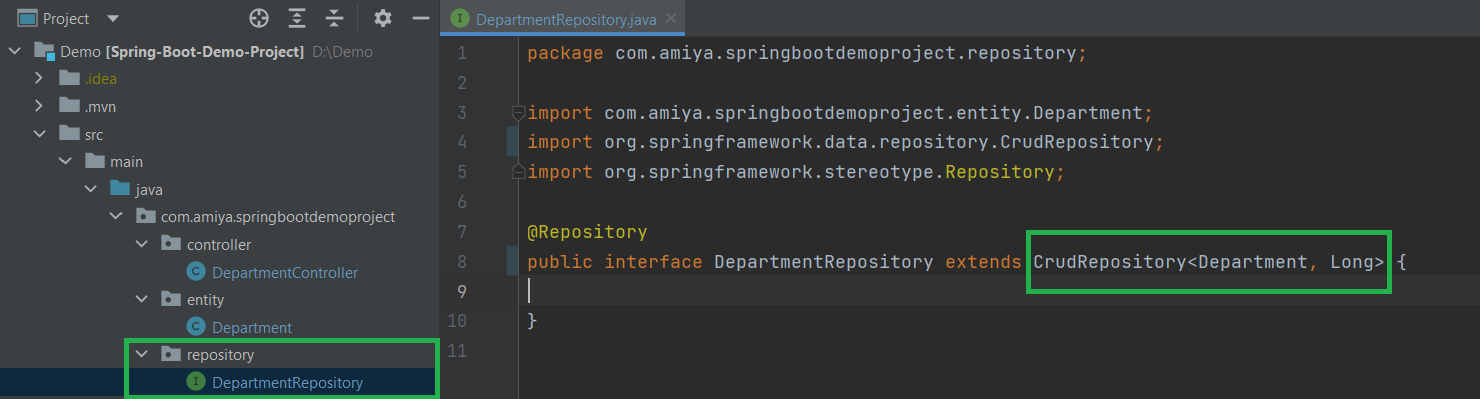
public interface DepartmentRepository extends CrudRepository<Department, Long> {}
Now, let us discuss some of the most important methods that are available inside the CrudRepository are given below as follows:
1. save(): Saves a given entity. Use the returned instance for further operations as the save operation might have changed the entity instance completely.
Syntax:
<S extends T> S save(S entity)
2. findById(): Retrieves an entity by its id.
Syntax:
Optional<T> findById(ID id)
3. findAll(): Returns all instances of the type.
Syntax:
Iterable<T> findAll()
Return Type: All entities
4. count(): Returns the number of entities available.
Syntax:
long count()
Return Type: the number of entities.
Method 5: deleteById(): Deletes the entity with the given id.
Syntax:
void deleteById(ID id)
Parameters: Id (must not be null)
Exception Thrown: IllegalArgumentException in case the given id is null.
The following Spring Boot application manages a Department entity with CrudRepository. The data is saved in the H2 database. We use a RESTful controller.
Go to and select:
Download and open it in your IDE.
Below is the complete code for the pom.xml file. Please check if you have missed something.
# H2 Database
spring.h2.console.enabled=true
spring.h2.console.path=/h2-console
spring.datasource.url=jdbc:h2:mem:dcbapp
spring.datasource.driverClassName=org.h2.Driver
spring.datasource.username=sa
spring.datasource.password=password
spring.jpa.database-platform=org.hibernate.dialect.H2Dialect
spring.jpa.hibernate.ddl-auto=update
Inside the entity package create a simple POJO class inside the Department.java file. Below is the code for the Department.java file
Inside the repository package create a simple interface and name the interface as DepartmentRepository. This interface is going to extend the CrudRepository as we have discussed above.
Inside the package create one interface named as DepartmentService and one class named as DepartmentServiceImpl. Below is the code for the DepartmentService.java file.
Example A
Example B : Below is the code for the DepartmentServiceImpl.java file.
Inside the controller package create one class named as DepartmentController.
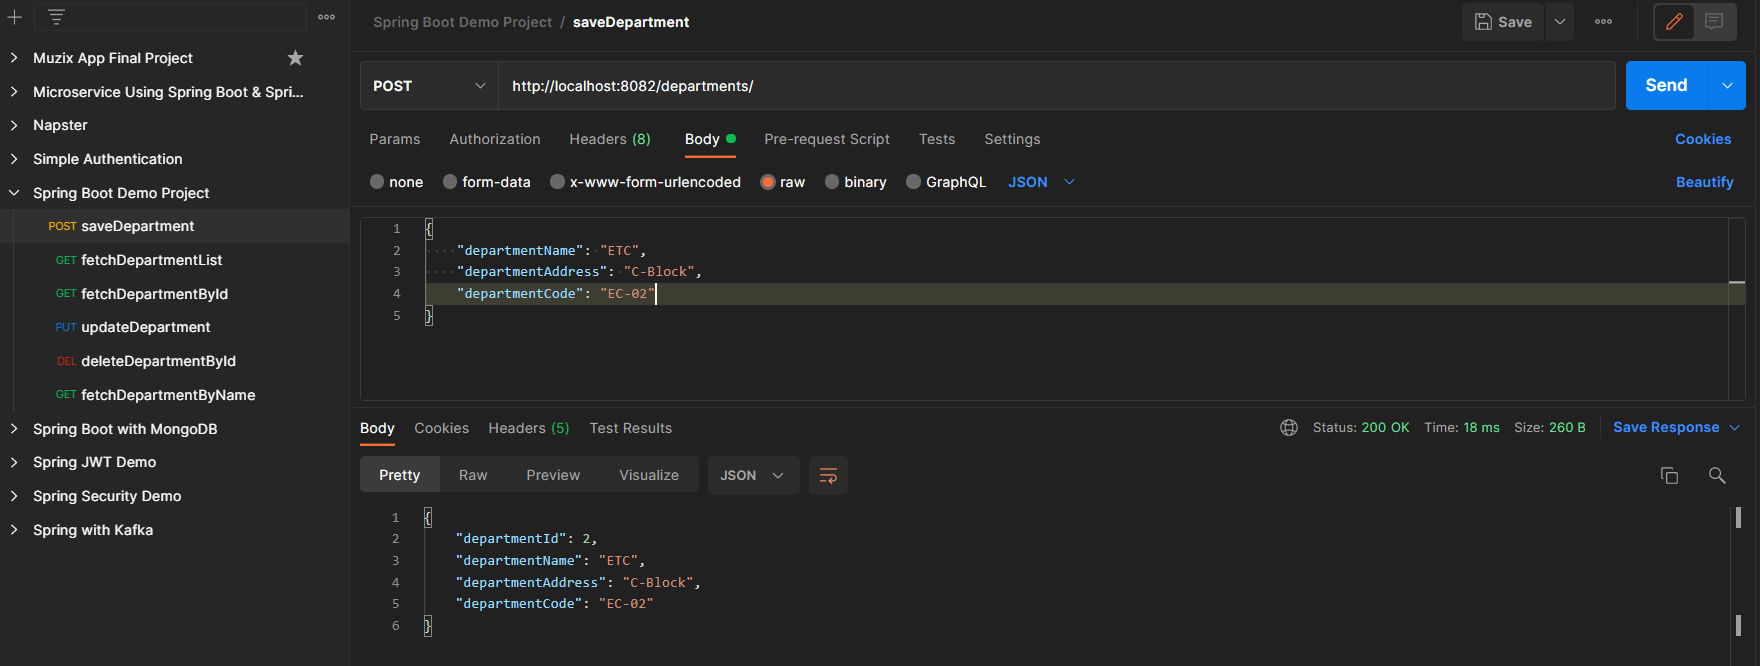
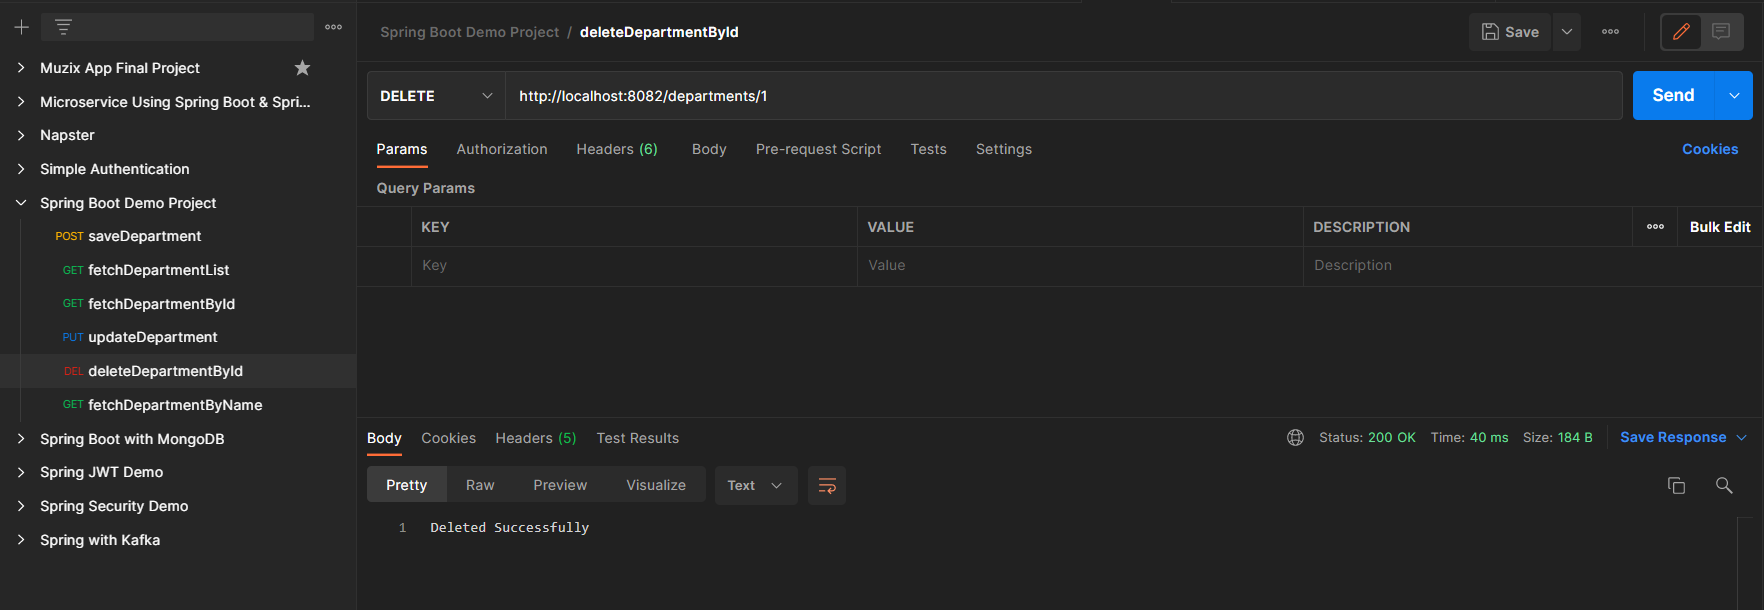
Now run your application and let's test the endpoints in Postman and also refer to our H2 Database.
Endpoint 1: POST - http://localhost:8082/departments/
Endpoint 2: GET - http://localhost:8082/departments/
Endpoint 3: PUT - http://localhost:8082/departments/1
Endpoint 4: DELETE - http://localhost:8082/departments/1
H2 Database is as depicted in below media