 |
VOOZH | about |
|
VOOZH | about |
Spring Boot is a powerful microservice-based framework that allows developers to create production-ready application in very little time. Spring Boot is built on the top of the spring and contains all the features of spring. And is becoming a favorite of developers these days because it’s a rapid production-ready environment that enables the developers to directly focus on the logic instead of struggling with the configuration and setup.
And Tomcat is a very popular Java Servlet Container. Tomcat is the default spring boot server which can manage multiple applications within the same application which avoids multiple setups for each application in a single application.
Spring Boot application deployment on the Tomcat Server involves three steps:
To use the appropriate Tomcat version and Java version, it will be helpful to visit the HTML file.
This is a spring boot web application project, i.e. the project needs to be deployed on Tomcat. The project can be created as a maven-based project and hence required dependencies we can specify in the pom.xml file.
pom.xml->Configurations can be specified in a Maven project via pom.xml
As the project needs to be deployed using Tomcat, it has to be packaged as "WAR"(Web Application Resource or Web Application Archive).
Basically, pom.xml should have spring boot related dependencies like
- spring-boot-starter-parent
- spring-boot-starter-web
- spring-boot-starter-tomcat and its scope is set to be provided "geeks-web-services" should be the name of "WAR" file as per pom.xml
Example 1:
A controller class is required through which we can able to invoke the services either as a GET method or POST method. As a sample, let us see "SampleRestControllerExample.java" which contains two methods as "GET" methods
Two methods are written which provide a static text as output.
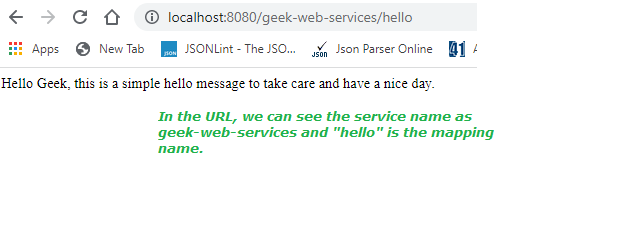
As this is a simple example, just let us show as on calling "geeks-web-services/hello", displays Hello Geek, this is a simple hello message to take care and have a nice day.
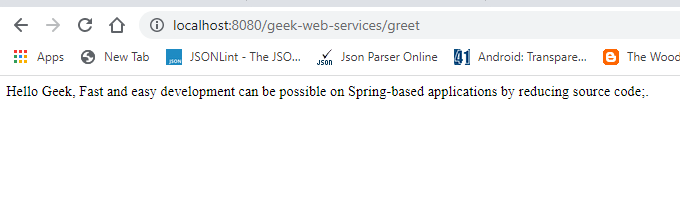
on calling "geeks-web-services/greet", displays Hello Geek, Fast and easy development can be possible on Spring-based applications by reducing source code.
@RestController is a specialized version of the controller. It includes the @Controller and @ResponseBody annotations, and as a result, simplifies the controller implementation.
Example 2: SampleRestControllerExample.java
There are 3 ways of creating a Spring Boot WAR:
SpringBootWarDeploymentOnTomcatServer.java is our Main class
Example:
We can run the maven steps using the command line,
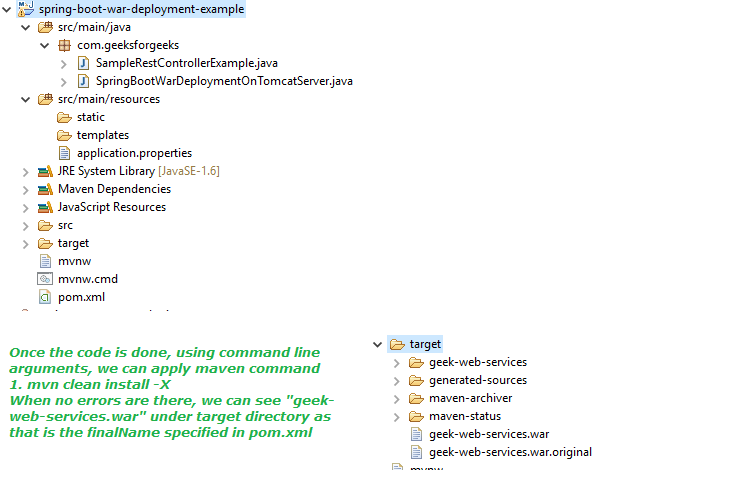
mvn clean install -XAs an image let us see the project structure and the target folder:
👁 project structure and the target folderWhen the WAR file created successfully, it will show the WAR File path with a message i.e. "BUILD SUCCESS" in the console, as shown in the below image:
Apache Tomcat Server has to be installed if not installed earlier. Preferably higher versions of tomcat will be helpful. As an example, We are using tomcat version 9.0.x.
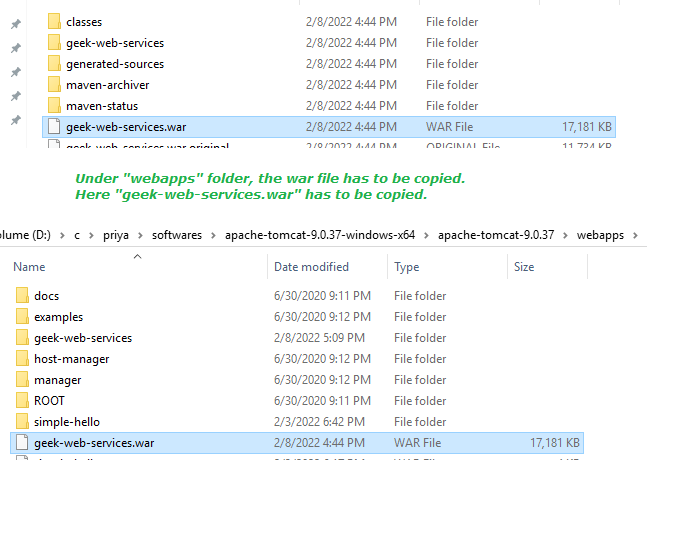
To use the appropriate tomcat version and java version, it will be helpful to check the HTML file. In our previous step, we have got "geek-web-services.war" and it has to be copied under the "webapps" folder of tomcat.
👁 Copied geek-web-services.warNow, open the command prompt and point to the tomcat location's bin folder,
And also our war file is deployed in tomcat too. The below screenshot confirms that:
We can test the same by executing the below URL in a browser:
2nd Output:
Project Explanation: It is as justified via video provided below as follows:
.webp)
.webp)