 |
VOOZH | about |
|
VOOZH | about |
Spring Security provides the PasswordEncoder interface to securely store and verify user passwords in Java applications. Instead of saving passwords in plain text, passwords are encoded using secure hashing algorithms like BCrypt, PBKDF2, SCrypt, and Argon2.
Using PasswordEncoder improves application security because:
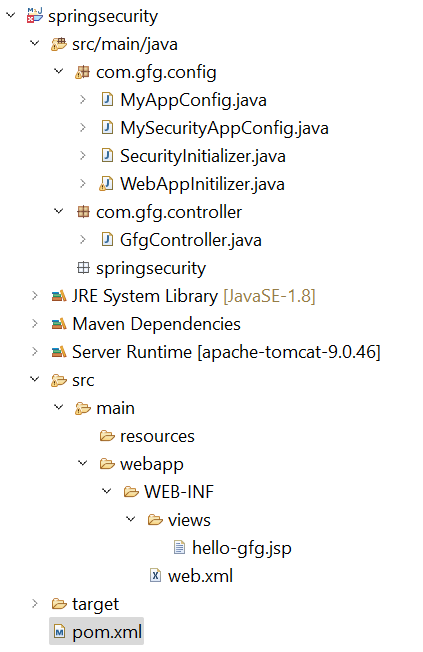
Project Structure
Add the following dependencies to your pom.xml file
Below is the complete pom.xml file. Please cross-verify if you have missed some dependencies.
Go to the src > main > java and create a class WebAppInitilizer.
File: WebAppInitilizer.java
Create another class in the same location (src > main > java) and name it MyAppConfig.
File: MyAppConfig.java
Reference article:Spring – Configure Dispatcher Servlet in Three Different Ways
Go to the src > main > java and create a class GfgController.
File: GfgController.java
Go to the src > main > webapp > WEB-INF > right-click > New > Folder and name the folder as views. Then views > right-click > New > JSP File and name your first view.
File: hello-gfg.jsp
Go to the src > main > java > MyAppConfig and set your ViewResolver.
File: MyAppConfig.java
Go to the src > main > java and create a class MySecurityAppConfig and annotate the class with @EnableWebSecurity annotation.
File: MySecurityAppConfig.java
Go to the src > main > java and create a class SecurityInitializer.
File: SecurityInitializer.java
Now we are done with setting up our Spring Security Filter Chain.
Modify the MyAppConfig file. Here we are going to create the PasswordEncoder Bean.
File: MyAppConfig.java
Modify the MySecurityAppConfig file. Here we are going to create the User, and we are going to provide the password in Bcrypt format. And we are also going to provide the roles to the user.
File: MySecurityAppConfig.java
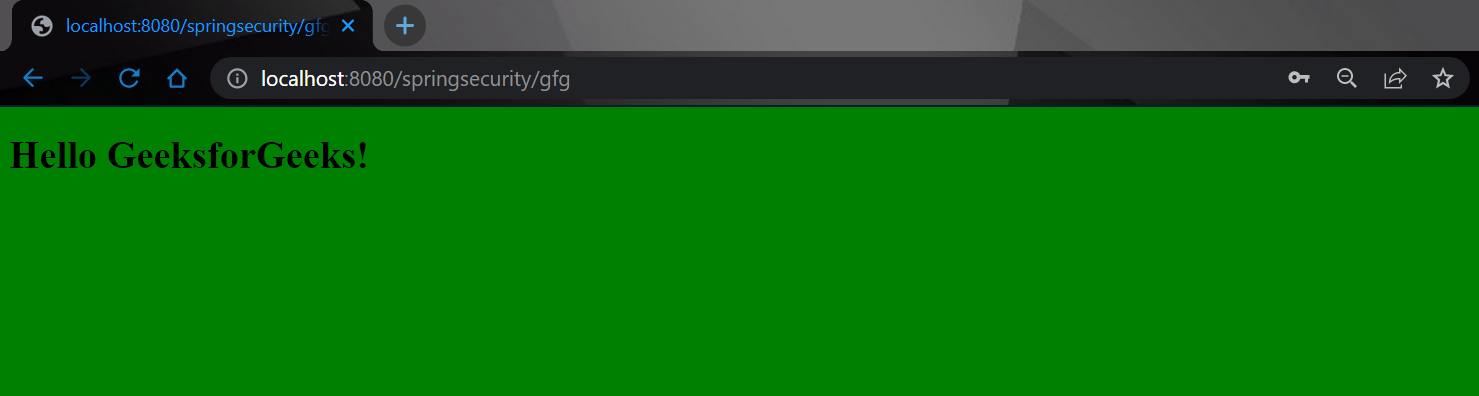
To run our Spring MVC Application right-click on your project > Run As > Run on Server. After that use the following URL to run your controller.
http://localhost:8080/springsecurity/gfg
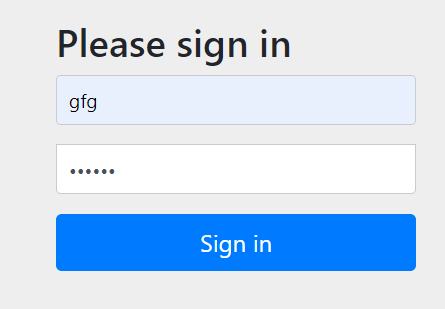
The time when you hot the URL you can see it will redirect automatically to this URL
http://localhost:8080/springsecurity/login
And the output is something like this.
Now sign in with the following credentials
👁 Spring-Security---Password-Encoder-1.png
And now you can access your endpoint.