 |
VOOZH | about |
|
VOOZH | about |
Selenium WebDriver has revolutionized web automation, but it faces limitations when dealing with native Windows dialogs. This is where AutoIT comes to the rescue, bridging the gap between web and desktop automation. For testers and developers working on web applications, understanding how to integrate AutoIT with Selenium can significantly enhance their automation capabilities.
AutoIT, a freeware BASIC-like scripting language, excels at automating Windows GUI and general scripting. Combined with Selenium, it becomes a powerful tool for handling scenarios that Selenium alone cannot, such as file uploads through Windows dialogs.
Table of Content
While used in the context of Selenium, AutoIT is a third-party automation tool that is meant strictly for Windows GUI and general scripting. When it comes to the execution of tasks in the browser under the conditions of web application testing, Selenium WebDriver is most effective in occupying browser actions, whereas aspects beyond the browser scope, such as file chooser dialog or system alert, are out of the focus of this framework.
AutoIT works hand in hand with Selenium which deals with these system levels, which puts the testers in a position of coming up with more complete and credible automated test scripts. When combining AutoIT with Selenium, it becomes easy to automate tasks that would not be easily possible by using Selenium alone.
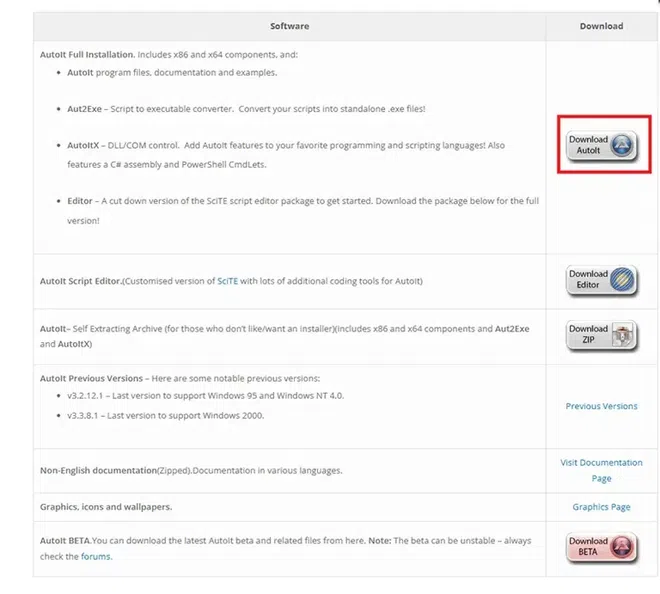
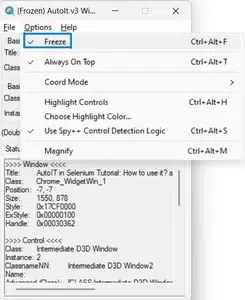
Open Au3Info.exe or element detection, which will be useful for creating scripts.
pip install selenium
AutoIT is a type of language that supports automation of the GUI of the windows and other general scripting. SciTE is the script editor that comes with AutoIT and it includes the syntax help and also constructive environment for AutoIT script writing and running tests on the scripts.
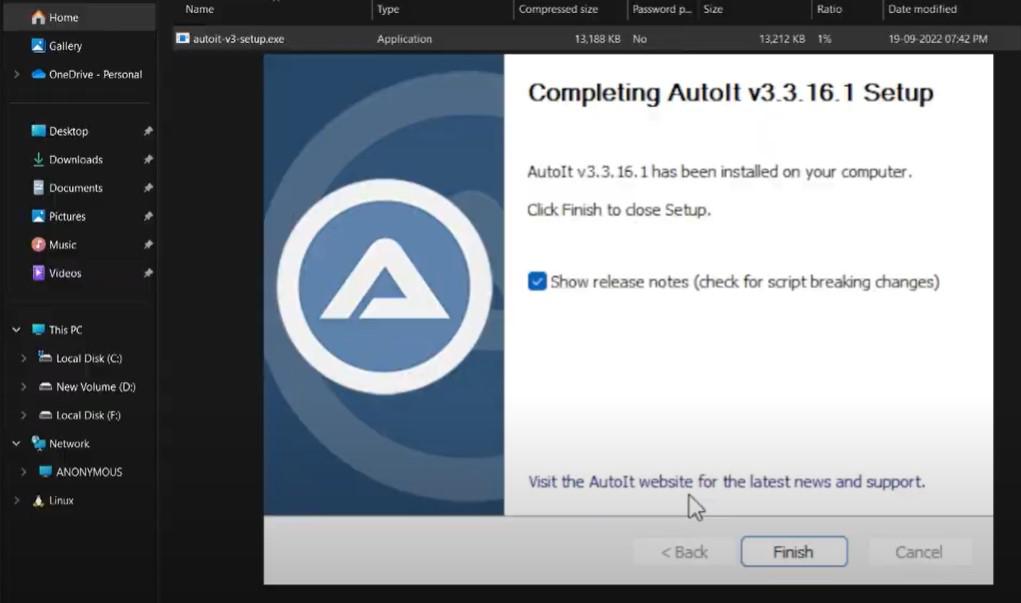
1. Open SciTE Editor: Go to the directory of AutoIT installation and start SciTE.exe
2. Get Syntax Help:
○ To clearer apprehend the syntax in SciTE, press F1 to open a syntax help dialog.
○ For more information and examples about the syntax used in AutoIT you can go to AutoIT3Help.exe within the installation folder of AutoIT.
3. Creating and Compiling Scripts:
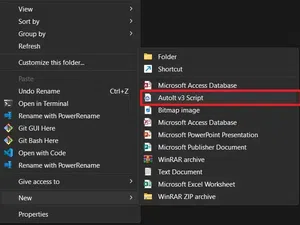
○ Go to the folder where you would like to save your AutoIT script and right click and select New --> AutoIT v3 Script
○ When you have completed your script, you can build it by running the script CTRL+F7 or click ‘tools > compile’ in SciTE. This will generate an executable . exe file in the same directory and clicking it runs the program.
○ Save the following script as file-upload.au3:
#cs ----------------------------------------------------------------------------

 AutoIT Version: 3.3.16.1
 Author: Sanjeev

 Script Function:
	File upload AutoIT script.

#ce ----------------------------------------------------------------------------


; Wait for the "Open" dialog to become active
WinWaitActive("Open", "", 10)

; Set the file path to upload
Local $filePath = "C:\path\to\your\file.txt"

; Sleep for 2 seconds
Sleep(2000)

; Type the file path into the "File name:" field
Send($filePath)

; Press Enter to confirm the file selection
Send("{ENTER}")
○ Explanation:
• WinWaitActive("Open", "", 10): Waits up to 10 seconds for the "Open" dialog to become active.
• Local $filePath = "C:\path\to\your\file. txt”: This assigns the variable $filePath to the path of the file which you want to upload.
• Send($filePath): Sends the file path to “File name:” field in the dialog.
• Send("{ENTER}"): Hits the main ENTER key to affirm the selection of the file and the shutting down of the dialog.
○ Compiling the Script:
1. Open the SciTE editor.
2. Write your script and save it with the name file-upload. au3.
3. Stop the program and then compile the script by pressing CTRL+F7 or from the menu tools then compile.
4. This will create an executable file-upload.exe file in the same directory.
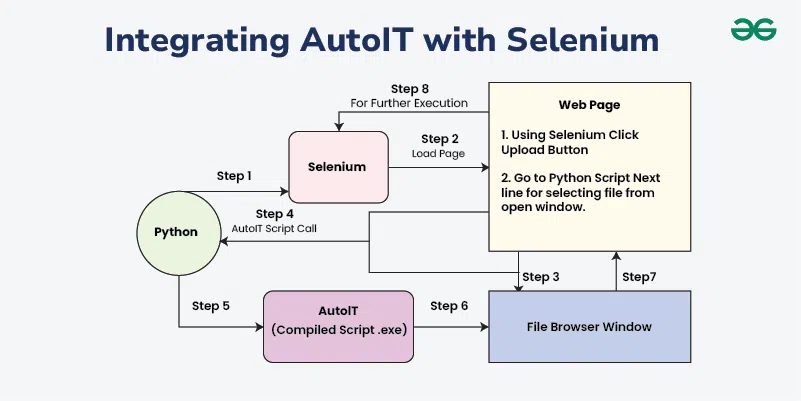
Step 1: Python initiates the process by starting a Selenium script.
Step 2: Selenium loads the target web page.
Step 3: Using Selenium, the script clicks the upload button on the web page to open the file browser window.
Step 4: Control returns to the Python script, which then calls an AutoIT script.
Step 5: The compiled AutoIT script (.exe) is executed.
Step 6: AutoIT handles the file browser window, automating the selection of the desired file.
Step 7: The file browser window is closed after the file is selected.
Step 8: Selenium resumes further execution, completing the upload process.
1. Setup the WebDriver:
2. Trigger File Upload Dialog:
3. Use AutoIT for File Selection:
4. Initiate File Upload:
Verify Upload Completion:
6. Extract the Uploaded File Link:
7. Clean Up:
AutoIT is the potent scripting language established particularly for the objective of automating the graphical user interface of Windows and generally more for scripting. This automation tool is commonly integrated with other automation tools such as Selenium to enrich the test automation framework. Hence, the following are some of the reasons why you should use AutoIT.
AutoIT is genuinely a powerful instrument for enriching the Selenium and the goal of having full and end-to-end coverage of the application. Therefore, incorporating AutoIT into your automation process enables one to overcome most of the limitations of tools that solely operate on the web interfaces, enhance complex operations, and enhance the efficiency of the test automation overall.