
In this how to guide, I will walk you through the various steps you can follow to install Fedora 24 on your machine, the installation process includes screen shots from every step, so there is no need to worry about missing any vital information from.
The installation of Fedora 24 is not in any specific way different from Fedora 23 installation, so I suppose you will find it so.
What’s New in Fedora 24 Workstation?
With every new release of a Linux distribution, users expect a lot of new features and major improvements, that is the same case with Fedora 24, it comes with certain new features and these include:
- GNOME 3.20
- Easier input device and printer settings
- Better search interface
- Convenient music controls
- Shortcuts windows for keyboard commands
- Flatpak software packaging format
- Wayland graphics stack, a continued work on X replacement
- Software app includes system upgrade functionality and many other minor improvements
Lets get started, but before we go further, you may wish to upgrade from Fedora 23 to Fedora 24, here is a link below for those who do not want a fresh installation:
If you want to continue with this guide for a fresh installation, then first you will need to download Fedora 24 live image from the links below:
Installation of Fedora 24 Workstation
After downloading the live installation image, you need to make a bootable media such as CD/DVD or USB flashdrive using following article.
If your bootable media is ready, then proceed installation steps.
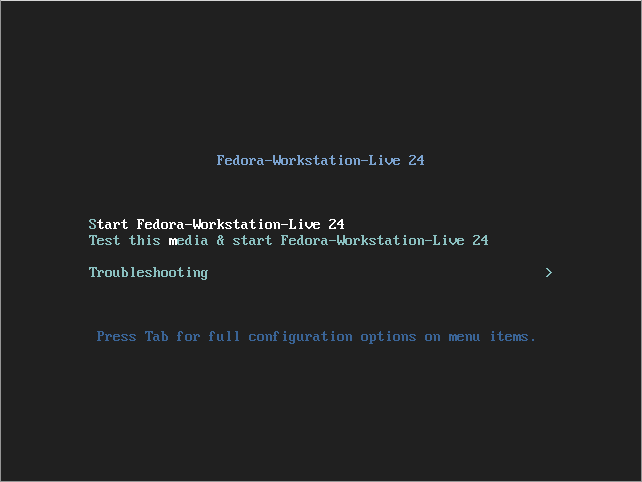
1. Insert your bootable media into a drive/port and boot from it, you should be able to see this screen below. There are two options, one you can start live Fedora 24 or test the installation media for any errors before starting Fedora 24 live.
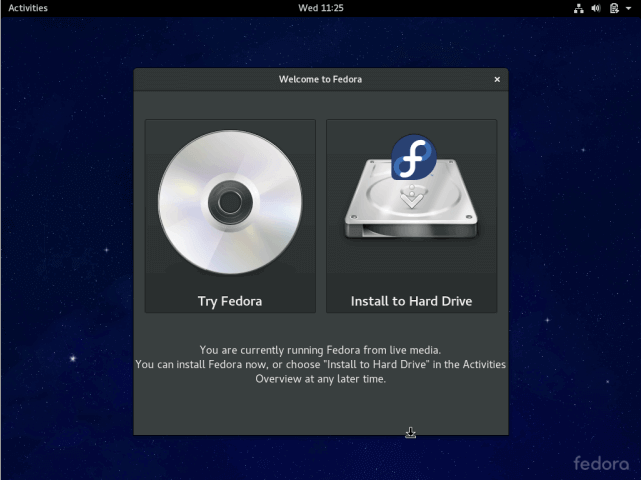
2. There are two options, one is for trying out Fedora 24 without installing it and the second is to install it to the Hard Drive, select “Install to Hard Drive”.
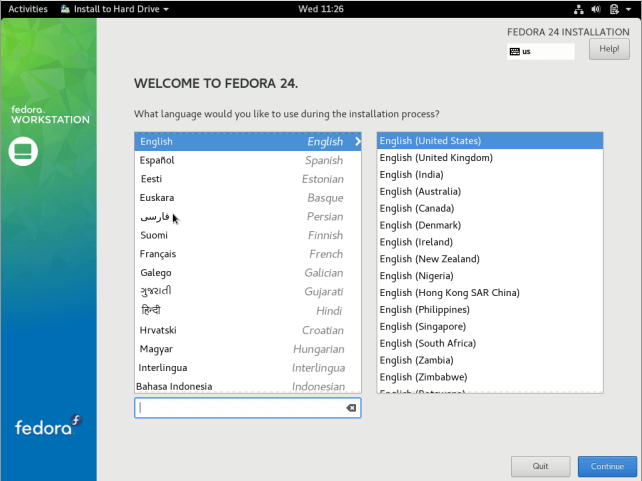
3. Next, choose the installation language and click Continue.
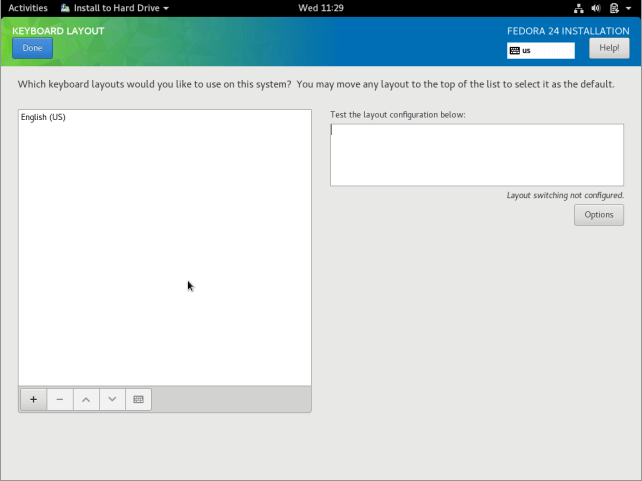
4. You will see this customization interface to configure your Keyboard layout, Time and Date, Installation disk, Network and Hostname.
Configure Keyboard Layout
5. Select the default Keyboard language your system will use, you can find more options by clicking on the “+” button, after selecting, click on Done.
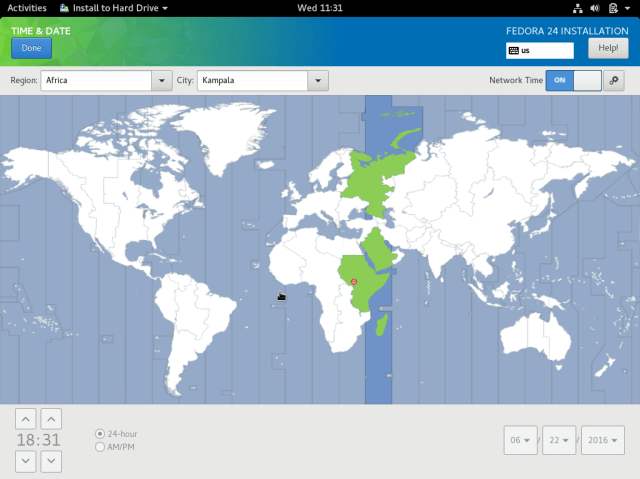
Set Time and Date
6. Here, you will configure system timezone, time and date, in case your system is connected to the Internet, then time and date will be detected automatically. Setting time manually is more helpful according to your location. After that click Done.
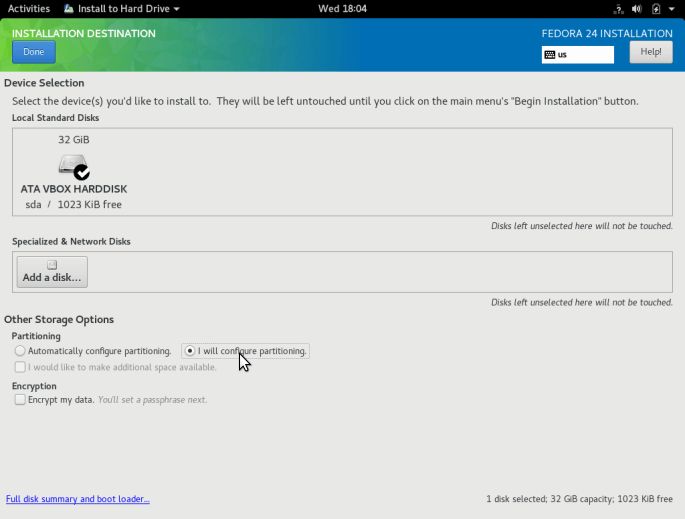
Configure Installation Disk
7. In this step, you will configure your system partitions and filesystem types for every system partition. There are two ways to setup partitions, one is automatically and another manually.
In this guide, I have chosen to do it manually. So, click on the disk image to select it and select “I will configure partitions manually”. Then click Done to go to the next screen in the next step.
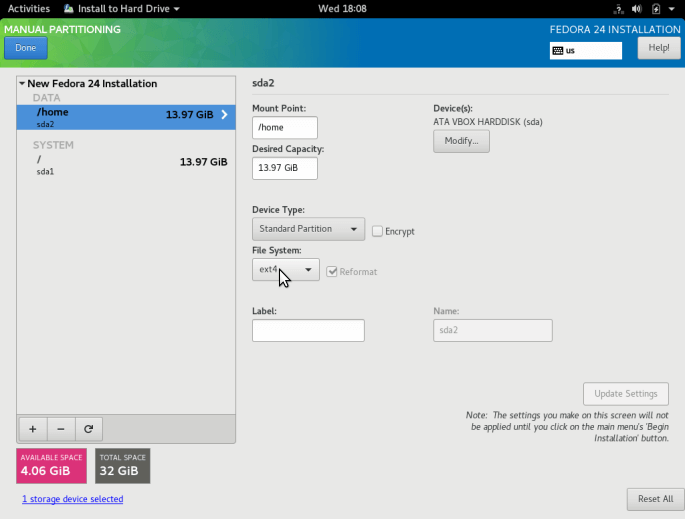
8. In the screen below, select “Standard Partition” partitioning scheme from the drop down menu, for creating mounting points for the various partitions you will create.
9. Use the “+” button to create a new partition, let us start by creating the root (/) partition, so specify the following in the screen below:
- Mount point:
/ - Desired Capacity:
15GB
The partition size I have selected is the purpose of this guide, you can set a capacity of your choice according to the size of your system disk.
After that click on “Add mount point”.
Set the filesystem type for the root file system created in the previous step, I have used ext4.
10. Add the home partition mount point which will store system users files and home directories. Then click on “Add mount point” to proceed to the next step.
Set the filesystem type for the home partition as in the interface below.
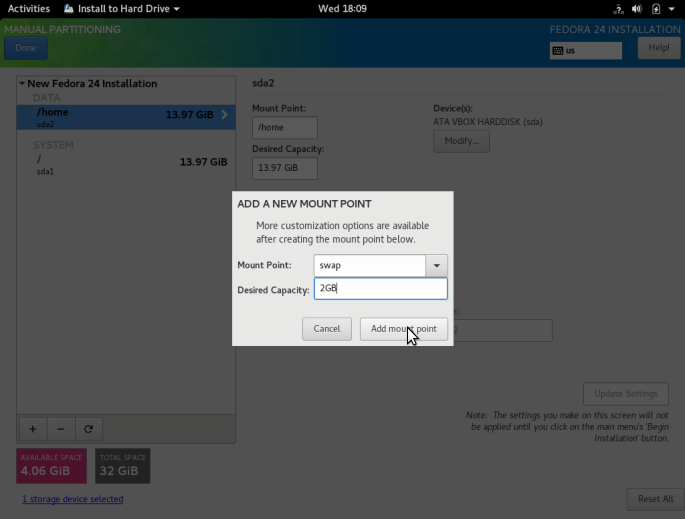
11. Create a swap partition, this is space on the hard disk that is allocated to hold extra data in system RAM that is not actively being used by the system in case RAM is used up. Then click on “Add mount point” to create the swap space.
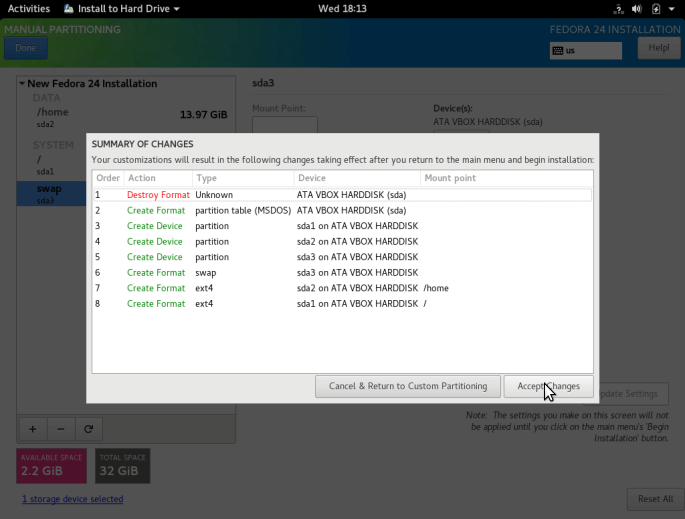
12. Next, after creating all the necessary mount points, then click on Done button. You will see the interface below for you to effect all the changes to your disk. Click on “Accept Changes” to continue.
Setup Network and Hostname
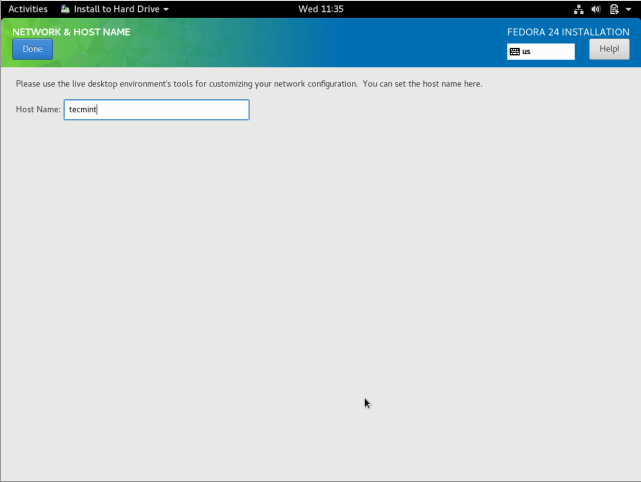
13. From the previous step, you will see configuration screen, next, click on “Network and Hostname”. Provide the hostname you want to use for your Fedora 24, click on Done to move back to the configuration screen.
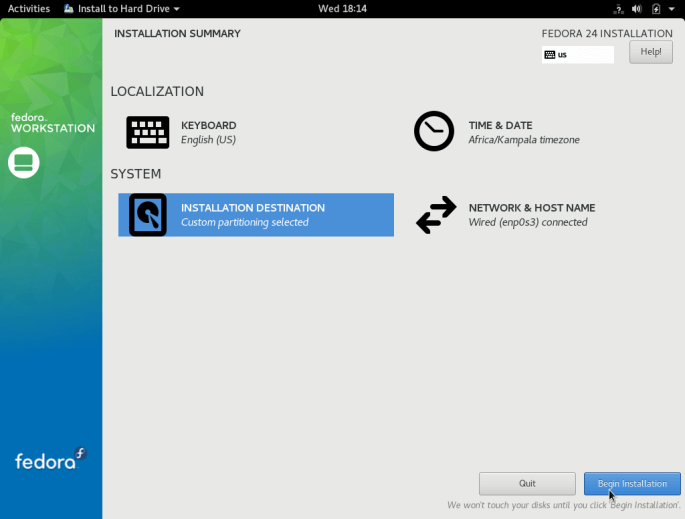
14. Begin the actual Fedora 24 installation of system files by clicking on “Begin Installation” from the screen below.
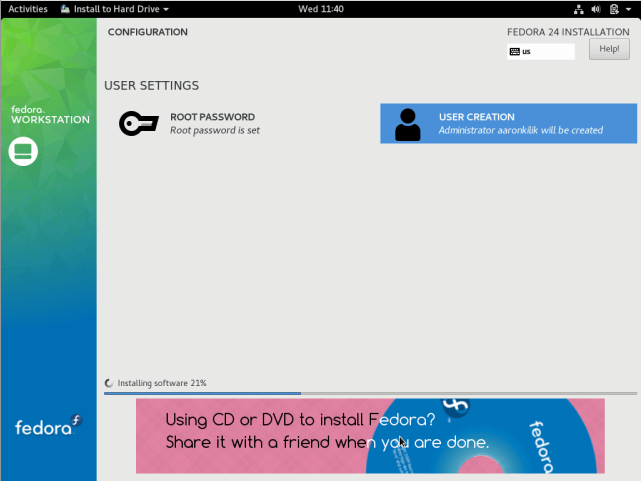
15. As the system files are being installed, you can setup system users.
To setup root user, click on “ROOT PASSWORD” and add a root password, then click Done.
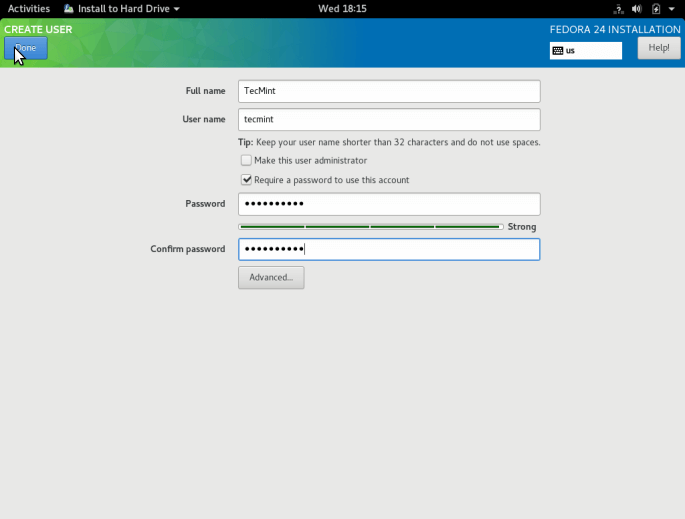
Move over to normal system “USER CREATION” and fill in the necessary information including giving administrator privileges to the user plus set a password for the user as in the interface below, then click Done.
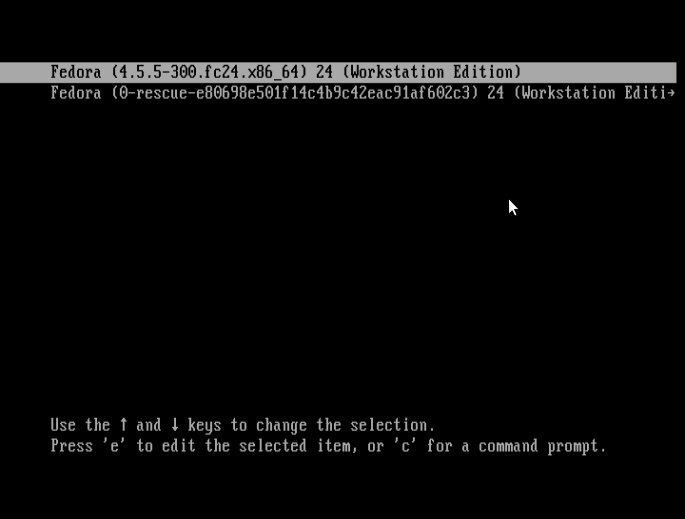
Wait for the installation to finish after setting system users, when installation is complete, click Quit at the bottom right corner and reboot your system.
Remove the installation media and boot into Fedora 24.
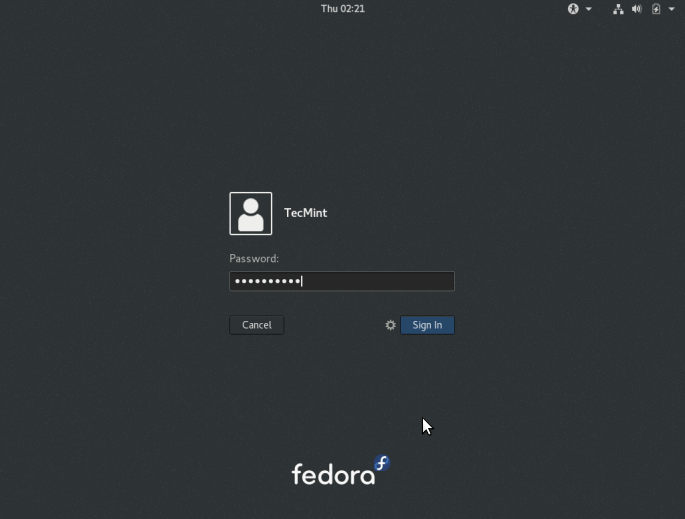
Wait for the login interface below to appear, then provide your password and click on “Sign In”.
That is it, you now have the latest edition of Fedora 24 Linux running on your machine, hope everything went on smoothly, for any questions or additional information, drop a comment in the comment section below.
Don’t Miss: Things to Do After Fresh Fedora 24 Workstation Installation
If this article helped you solve a problem, consider buying a coffee. It helps keep TecMint free, supports the authors, and keeps the project going.
Got Something to Say? Join the Discussion... Cancel reply