
Sometimes PHP developers want to build and run different websites/applications using different versions of PHP on the same web server. As a Linux system administrator, you are required to setup a environment where you can run multiple websites using different PHP version on a single web server i.e. Nginx.
In this tutorial, we will explain you how to install multiple versions of PHP and configure the web server Nginx to work with them via the server blocks (virtual hosts in Apache) in CentOS/RHEL 7 distributions using LEMP stack.
Read Also: Pyenv – Install Multiple Python Versions for Specific Project
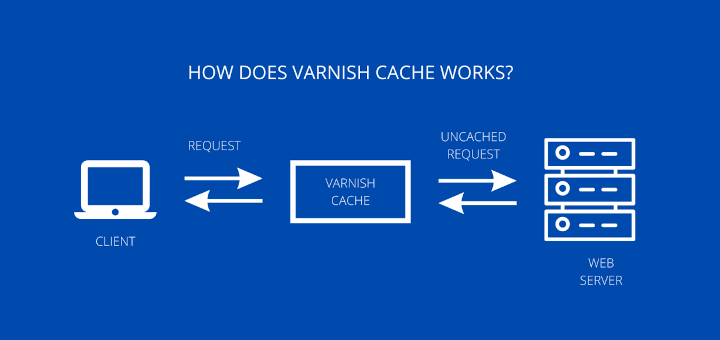
Nginx uses PHP-FPM (stands for FastCGI Process Manager), which is an alternative PHP FastCGI implementation with some extra, useful features for heavily loaded websites.
Testing Environment Setup
- A CentOS 7 or RHEL 7 server with minimal installation.
- Nginx HTTP Server.
- PHP 7.1 (to be used as default version) and 5.6.
- MariaDB Database Server.
- Server IP address: 192.168.56.10.
- Websites: example1.com and example2.com.
Step 1: Installing and Enabling EPEL and Remi Repository
1. First start by installing and enabling the EPEL and Remi repository, which offers the latest versions of the PHP stack on CentOS/RHEL 7 distributions.
# yum install https://dl.fedoraproject.org/pub/epel/epel-release-latest-7.noarch.rpm
# yum install http://rpms.remirepo.net/enterprise/remi-release-7.rpm
2. Next install the yum-utils package, which extends yum’s native functionalities and provides yum-config-manager command, which is used to enable or disable Yum repositories on the system.
# yum install yum-utils
Note: On RHEL 7 you can enable the optional channel for some dependencies using the following command.
# subscription-manager repos --enable=rhel-7-server-optional-rpms
Step 2: Installing Nginx Web Server
3. To install latest version of Nginx, we need to add the official Nginx repository, create a file named /etc/yum.repos.d/nginx.repo.
# vi /etc/yum.repos.d/nginx.repo
Add the following lines to file as per your distribution.
--------------- On CentOS 7 ---------------
[nginx]
name=nginx repo
baseurl=http://nginx.org/packages/centos/7/$basearch/
gpgcheck=0
enabled=1


--------------- On RHEL 7 ---------------
[nginx]
name=nginx repo
baseurl=http://nginx.org/packages/rhel/7.x/$basearch/
gpgcheck=0
enabled=1
4. Once nginx repo has been added, you can install Nginx using yum package manager tool as shown.
# yum install nginx
Step 3: Installing MariaDB Database Server
5. To install latest version of MariaDB, we need to add the official MariaDB repository, create a file named /etc/yum.repos.d/mariadb.repo.
# vi /etc/yum.repos.d/mariadb.repo
Add the following lines to file as per your distribution.
--------------- On CentOS 7 ---------------
[mariadb]
name = MariaDB
baseurl = http://yum.mariadb.org/10.2/centos7-amd64
gpgkey=https://yum.mariadb.org/RPM-GPG-KEY-MariaDB
gpgcheck=1


--------------- On RHEL 7 ---------------
[mariadb]
name = MariaDB
baseurl = http://yum.mariadb.org/10.2/rhel7-amd64
gpgkey=https://yum.mariadb.org/RPM-GPG-KEY-MariaDB
gpgcheck=1
6. Once MariaDB repo has been added, you can install MariaDB using yum package manager tool as shown.
# yum install MariaDB-client MariaDB-server
7. Afterwards, secure the database server installation using the script below. Set a root password and answer y and press [Enter] for the rest of the subsequent questions to disable remote root user login, remove anonymous-user accounts and test database which by default can be accessed by all users, even anonymous users.
# mysql_secure_installation
Read Also: 12 MySQL/MariaDB Security Best Practices for Linux
Step 4: Installing Multiple Versions of PHP
8. To install different versions of PHP for your projects, use yum-config-manager command to install multiple versions of PHP along with most required modules as shown.
Install PHP 7.1 Version
# yum-config-manager --enable remi-php71 [Default]
# yum install php php-common php-fpm
# yum install php-mysql php-pecl-memcache php-pecl-memcached php-gd php-mbstring php-mcrypt php-xml php-pecl-apc php-cli php-pear php-pdo
Install PHP 5.6 Version
# yum install php56 php56-php-common php56-php-fpm
# yum install php56-php-mysql php56-php-pecl-memcache php56-php-pecl-memcached php56-php-gd php56-php-mbstring php56-php-mcrypt php56-php-xml php56-php-pecl-apc php56-php-cli php56-php-pear php56-php-pdo
9. Once installed PHP, you can use following command to check the default version of PHP used on your server.
# php -v
Step 5: Configuring PHP-FPM and PHP56-PHP-FPM
10. This is the most interesting part of this tutorial, it explains how you can actually run multiple PHP versions on your server. Here, you will configure the different versions of php-fpm that Nginx will work with. You should define the user/group of the FastCGI processes as well as the ports they will listen on.
These are the following two configuration files that you will going to edit.
- php-fpm (default 7.1) – /etc/php-fpm.d/www.conf
- php56-php-fpm – /opt/remi/php56/root/etc/php-fpm.d/www.conf
Open the files above, set the user/group of FastCGI processes.
# vi /etc/php-fpm.d/www.conf [PHP 7.1]
# vi /opt/remi/php56/root/etc/php-fpm.d/www.conf [PHP 5.6]
The default values should be apache, change them to nginx as shown.
user = nginx
group = nginx
11. Next, find the listen parameters, and define the address:port on which FastCGI requests will be received.
listen = 127.0.0.1:9000	[php-fpm]
listen = 127.0.0.1:9001	[php56-php-fpm]
12. Once all the above configuration done, you need to start and enable Nginx, MariaDB and PHP-FPM to auto-start at system boot.
# systemctl enable nginx
# systemctl start nginx

# systemctl enable mariadb
# systemctl start mariadb

---------------- PHP 7.1 ----------------
# systemctl enable php-fpm
# systemctl start php-fpm

---------------- PHP 5.6 ----------------
# systemctl enable php56-php-fpm
# systemctl start php56-php-fpm
Attention: In case you get any errors while starting the second instance of PHP, php56-php-fpm, a SELinux policy could be blocking it from starting. If SELinux is in enforcing mode, set it to permissive mode, then try starting the service once again.
# getenforce
# setenforce 0
Step 6: Setup Websites with Permissions
13. At this point, you can now create the necessary directories for your websites under /var/www/html/. You also need to create directories to store logs as follows:
---------------- Website 1 ----------------
# mkdir -p /var/www/html/example1.com/
# mkdir -p /var/log/nginx/example1.com/


---------------- Website 2 ----------------
# mkdir -p /var/www/html/example2.com/
# mkdir -p /var/log/nginx/example2.com/
14. Set the appropriate ownership permissions on all the directories.
---------------- Website 1 ----------------
# chown -R root:nginx /var/www/html/example1.com/
# chmod -R 755 /var/www/html/example1.com/
# chown -R root:nginx /var/log/nginx/example1.com/
# chmod -R 660 /var/log/nginx/example1.com/

---------------- Website 2 ----------------
# chown -R root:nginx /var/www/html/example2.com/
# chmod -R 755 /var/www/html/example2.com/
# chown -R root:nginx /var/log/nginx/example2.com/
# chmod -R 660 /var/log/nginx/example2.com/
Step 7: Setup Nginx Server Blocks for Websites
15. Now configure how Nginx will process requests to your websites using the server block configuration files which should be located in /etc/nginx/conf.d/.
Create the configuration files for your websites ending with .conf extension.
# vi /etc/nginx/conf.d/example1.com.conf
# vi /etc/nginx/conf.d/example2.com.conf
Then paste the following server block configurations in the respective files.
Website 1
server {
 listen 80;
 server_name example1.com www.example1.com;

 root /var/www/html/example1.com/;
 index index.php index.html index.htm;

 #charset koi8-r;
 access_log /var/log/nginx/example1.com/example1_access_log;
 error_log /var/log/nginx/example1.com/example1_error_log error;

 location / {
 try_files $uri $uri/ /index.php?$query_string;
 }

 # pass the PHP scripts to FastCGI server listening on 127.0.0.1:9000
 location ~ \.php$ {

 root /var/www/html/example1.com/;
 fastcgi_pass 127.0.0.1:9000;	#set port for php-fpm to listen on
 fastcgi_index index.php;
 fastcgi_param SCRIPT_FILENAME $document_root$fastcgi_script_name;
 include fastcgi_params;
 include /etc/nginx/fastcgi_params;

 }
}
Website 2
server {
 listen 80;
 server_name example2.com www.example2.com;

 root /var/www/html/example2.com/;
 index index.php index.html index.htm;

 #charset koi8-r;
 access_log /var/log/nginx/example2.com/example2_access_log;
 error_log /var/log/nginx/example2.com/example2_error_log error;

 location / {
 try_files $uri $uri/ /index.php?$query_string;
 }

 # pass the PHP scripts to FastCGI server listening on 127.0.0.1:9000
 location ~ \.php$ {

 root /var/www/html/example2.com/;
 fastcgi_pass 127.0.0.1:9001;	#set port for php56-php-fpm to listen on
	 fastcgi_index index.php;
 fastcgi_param SCRIPT_FILENAME $document_root$fastcgi_script_name;
 include fastcgi_params;
 include /etc/nginx/fastcgi_params;

 }
}
16. Make sure that you have the following line in the closing part of the http block in /etc/nginx/nginx.conf. It helps to include all configuration files inside the /etc/nginx/conf.d/ directory when Nginx is running.
include /etc/nginx/conf.d/*.conf;
Step 8: Testing Different PHP Versions
17. Finally, you need to test that your server is using the two versions of PHP. You can create a very basic info.php script in the document root directories of your websites as shown.
# echo "<?php phpinfo(); ?>" > /var/www/html/example1.com/info.php
# echo "<?php phpinfo(); ?>" > /var/www/html/example2.com/info.php
18. To apply all the changes you have made above, you need to restart Nginx, php-fpm and php56-php-fpm. But you can first of all check that the Nginx configuration files for any syntax errors before doing so.
# nginx -t
# systemctl restart nginx php-fpm php56-php-fpm
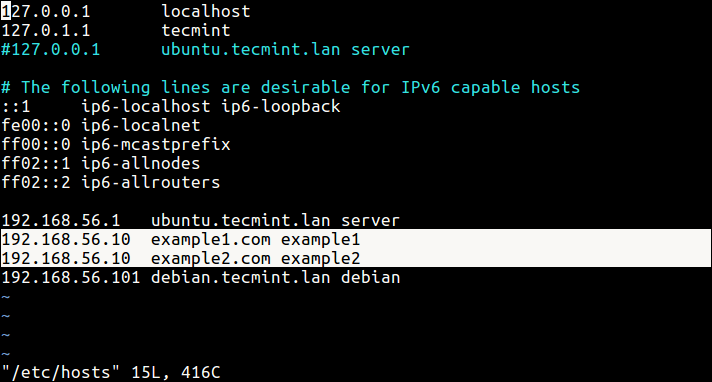
19. There is one other last thing to do, especially if you are running your server locally, you need to setup local DNS using /etc/hosts file as shown in the screen shot below.
192.168.56.10 example1.com example1
192.168.56.10 example2.com example2
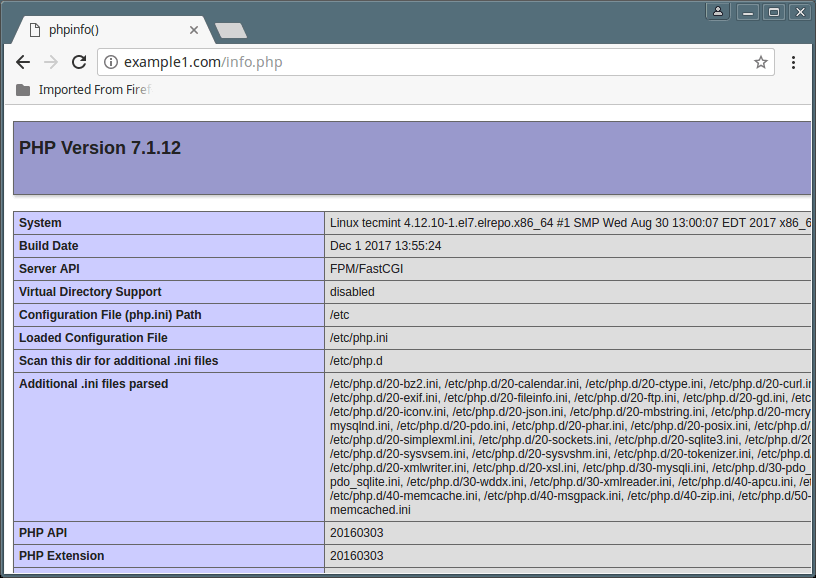
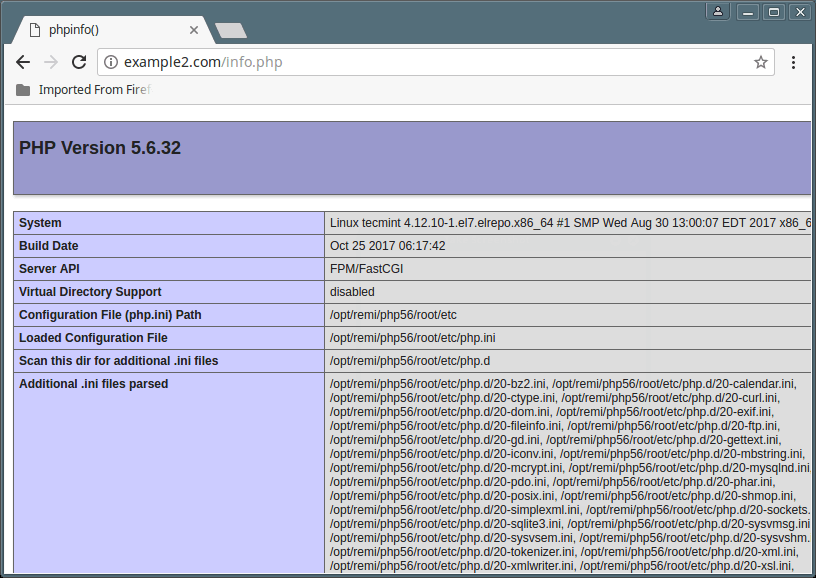
20. Finally, open a web browser and type the following addresses to verify the versions of PHP installed on the system.
http://example1.com/index.php
http://example2.com/index.php
That’s It! Now you can deploy files and test websites with different PHP versions. If you have any additions to make or questions to put forward, make use of the comment form below.
If this article helped you solve a problem, consider buying a coffee. It helps keep TecMint free, supports the authors, and keeps the project going.
Got Something to Say? Join the Discussion... Cancel reply