
Somewhere out there, Raspberry Pi boards have been running nonstop for years without crashes or replacements. They sit quietly in a server closet or tucked behind TVs, doing exactly what they were meant to do. Then there are Pis, which barely make it past a few months or a year, usually because someone decided to use one as a desktop replacement.
You can use a Pi as a daily driver — it’s not that fragile. The community projects and numerous tutorials make it tempting to keep adding them to the same board. That’s the slippery slope. The Pi misbehaves and crashes when you keep stacking workloads and treat it like a full PC.
13 common Raspberry Pi mistakes and how to avoid them
If you're just getting started with Raspberry Pi, here are some common mistakes to avoid
The SD card is the ticking clock that most ignore
Browsers started the timer
While running various projects, people rarely think about peeking at the microSD slot at the bottom of the board. That’s because most consumer microSD cards aren’t built for those kinds of sustained workload adventures. Random freezes or boot failures are the classic indicators of data corruption happening under the hood.
Most tutorials never mention the constant read-write cycles since the focus is on getting the project up and running. You only find out that the microSD’s reliability is deteriorating months later. After all, a card's flash has a finite number of write cycles, and it’s not tested under constant workloads. You can get the A2 speed class cards, but eventually, the wear and tear catch up.
Running a Pi-hole on a Pi won’t have much impact, since there’s not much stress on storage. But if you’ve installed a full desktop OS with a browser, that’s a different storage. Running the desktop environment on Pi jabs the card constantly with cache writes, swap activity, temp files, and system logs.
Instead, the headless Pi OS Lite or DietPi removes the desktop environment's workload. While microSD A2 cards may seem fine, boot the Pi from an NVMe drive rather than a USB SSD. Apart from faster boot times, it solves your storage problems. In the case of Pi 5, the NVMe delivers better read and write throughput than the limited USB 3.0 speeds.
The Pi board needs a proper case and a fan
Heat triggers CPU throttling
While you are streaming videos and compiling code on your Pi 4 or Pi 5 boards, the processor’s usage quickly bumps up to double digits for a long time. Using your Pi like that regularly pushes the CPU's thermal envelope, and under heavy workloads, it starts throttling performance without proper cooling.
When that happens, dashboards and utilities feel sluggish and unresponsive. That regularly takes you down the troubleshooting rabbit hole, and you might end up with a few workarounds, like increasing swap space or enabling ZRAM.
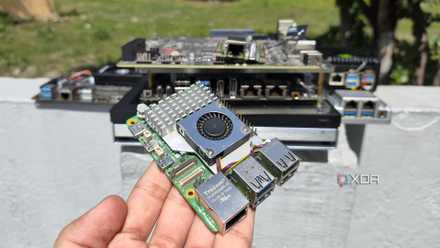
That’s why the official active cooler exists. That $5 upgrade provides active cooling that helps in the long term, even if you aren’t running heavy workloads.
Apart from that, you can pick a third-party case with an additional fan, or 3D print one yourself, to improve the Pi's cooling. That protects the board’s components from direct exposure to external elements.
Get a proper power supply before it bumps off the Pi
Matching the power requirements is vital
Here’s the thing: Pi boards don't come with a charger. You need to buy a power supply separately. So people either use their existing USB charger or pick up kits with cheaper third-party adapters. Either option boots the Pi, and people assume everything works. But such adapters rarely maintain a stable voltage under load, and your Pi keeps rebooting in those situations.
You can use your phone’s charger with a Pi, provided the charger's output meets the Pi's power requirements. For example, Pi 4 requires a phone charger that outputs at least 3A with a stable 5V supply. Additionally, the USB cable needs to be high-quality, or its connector will melt.
Hence, most enthusiasts grab the official power supply along with a Pi board because they know better than risking their setup.
This is what a happy Pi looks like
A setup that just works
You can run a headless version of Pi OS Lite or DietPi to turn your Pi into a smart home hub with Home Assistant, without breaking a sweat. You can pair it with Jellyfin to serve media and run a Pi-hole instance in a Docker container — that’s a genuinely good setup.
Lightweight network monitoring utilities sit comfortably within the Pi’s memory limits without hammering the storage. That’ll be the sweet spot, and it just works. Troubles arise when you start deploying more containers or resource-intensive utilities and dashboards.
4 Raspberry Pi projects I abandoned after realizing sub-$150 mini PCs run them all better
After all, cheap mini-PCs crush Raspberry Pi SBCs on the performance and OS compatibility fronts
The Pi can outlast everything if you let it
When you stop treating Pi like a PC, it can outlast everything in your home. Of course, it won’t replace your laptop — it was never meant to. Build a retro game console, a smart home hub, or a network monitor with Pi to leverage the hardware’s strengths. That’s when Pi just keeps going.
If you push the Pi beyond that, you’ll spend more time troubleshooting the microSD card and dealing with throttled performance than using it.
Raspberry Pi 5
- CPU
- Arm Cortex-A76 (quad-core, 2.4GHz)
- Memory
- Up to 8GB LPDDR4X SDRAM
- Operating System
- Raspberry Pi OS (official)
- Ports
- 2× USB 3.0, 2× USB 2.0, Ethernet, 2x micro HDMI, 2× 4-lane MIPI transceivers, PCIe Gen 2.0 interface, USB-C, 40-pin GPIO header
The Raspberry Pi is back, and the fifth iteration of the SBC is a lot more capable than the older models. From a new quad-core Arm Cortex-A76 CPU, support for dual monitor setups at 4K 60Hz, and a dedicated power button, there's a lot to love about this palm-sized computer.