
My router handles browsing, media streaming, and basic home networking without breaking a sweat. Once I started expanding my smart home, self-hosting services, tightening firewall rules, and segmenting network traffic, it became the weakest link in my growing home lab.
I dusted off my old ASUS AC66U router and pushed its limits to manage the trifecta of security features: VLANs, VPNs, and firewall rules. Those features did work, but without any stability, had inconsistent performance, and lacked reliability. It became clear that it wasn’t my configuration problem but an architectural one. Replacing an old router with a mini PC that runs OPNsense made those issues disappear. Also, my network is now easier to manage alongside my growing home lab.
Pushing my router beyond its limits
Feature support didn’t help in practice
On paper, using an old router with a checklist of supported features seemed reasonable. I flashed a custom firmware image, enabled the VPN service, set up VLANs, and configured a few firewall rules. Every router maker labels and implements those features differently, and often inconsistently. So finding and changing those settings was tedious.
Even after I configured most things, the router struggled to sustain heavy workloads. It often became unresponsive and sluggish, forcing me to restart. Over time, the router’s performance dropped frequently. Over time, it became clear that the hardware and software in consumer routers aren’t designed to handle complex tasks or sustain heavy workloads for long periods.
Hardware and software gave a reality check
Promises matching expectations
Consumer routers pack SoCs paired with minimal memory. While the ARM and MIPS SoCs are energy-efficient, the modest x86 leaves them behind. Also, the NICs struggle when several bandwidth-demanding machines are connected simultaneously. Flashing custom firmware helps, but it was highly specific to select models. Troubleshooting and tweaking those options took hours. Even after enabling and running those settings, the instability made me second-guess if the risk was worth it.
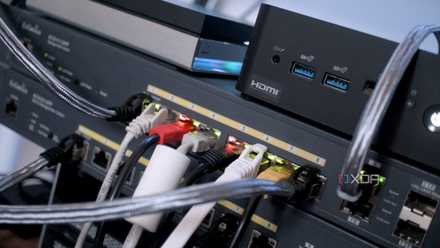
I moved to a mini PC with 10th Gen Intel Core i5, 16GB of RAM, and 256GB SSD to run OPNsense and additional NICs. The guided installation made OPNsense usable within half an hour. I deliberately chose to add a second NIC to better support network segmentation with a managed switch on my wishlist.
Configuring confidently without any guesswork
Better documentation helps
Custom firmware may be lightweight and quick to install, but I spent hours digging through forum posts because of the scanty documentation. During my research, I found tweaks, fixes, helpful scripts, and add-ons for use with custom firmware. But my success with some of them felt very hardware-specific, limited mostly to the top-tier models.
In contrast, OPNsense’s installation and configuration felt deliberate. A clean web UI and in-depth official documentation made the setup quick, and things were running in no time. That said, I did bring down my home’s internet connectivity several times while configuring OPNsense. That was enough to teach me not to tinker with OPNsense on a live network.
Once it was stable, I scoured the official and community-supported plugins to enable Tailscale and WireGuard integration with a few clicks. With the advice and answers from the active OPNsense community, my home network finally worked the way I expected it to. After that, I stopped trying to fix the network and started managing it with more control.
Well, the upgrade did pay off
Consistent experience
One of the biggest gains I noticed was the network stability. With OPNsense, the network behaved predictably, especially with the demanding features like VPN. After making several mistakes, I managed to segment the network, mostly for wired and smart home devices. For example, I made mDNS work across VLANs to ensure AirPlay and Chromecast devices were always discoverable. Setting up firewall rules that consistently work made VLANs work the way I defined them.
Segmenting smart home devices helped me discover that many weren’t responsive most of the time. After updating and reconfiguring them, the automations rarely missed a beat.
The VPN setup using the WireGuard plugin ran it as a full server, not a service passthrough, unlike my old router’s admin interface. I got better speeds since there were no bottlenecks with OPNsense-favoring hardware. Detailed graphs and logs helped me make sense of everything going on in my network — of course, that took quite a bit of hand-holding from the documentation.
Usage statistics, live views, graphs, and traffic logs helped me diagnose the issues and pointed me in the correct direction. I was no longer shooting in the dark and randomly rebooting OPNsense after every little change. That made troubleshooting more methodical.
9 things to avoid when building your dream OPNsense firewall
Building your own firewall can be incredibly rewarding, but here are some things to watch out for.
When OPNsense made more sense than an old router
A consumer router is enough for most folks with basic home networking needs. You can repurpose an old router, but it quickly hits the wall when you rely on it for home labbing. Instead, building your own firewall using a mini PC with a fairly modern x86 CPU, at least 8GB of RAM, and an SSD gives OPNsense enough headroom to run reliably. A used mini PC often costs as much as a mid-tier router, while delivering more control and professional-grade routing and firewalling capabilities.
OPNsense
OPNsensei is an open-source, feature-rich platform for firewalling and routing.